21 Valentine Arts and Crafts for Handmade Gifts, Cards, and Decorations


For a handmade Valentine you can finish without special equipment, start with a folded-heart bouquet card, a jar of handwritten compliments, or a strand of paper hearts. If you enjoy slower work, try a felt bookmark or a little clay ring dish. The projects below cover cards, small gifts, gift wrapping, and decorations, with directions you can adapt to the paper, yarn, and colors you already have.

The visuals are AI-generated craft concepts. Use the written steps for construction; the images illustrate the intended designs rather than documenting tested projects.
Choose a project before you gather supplies
For a paper-only afternoon, choose projects 1, 2, 4, 6, or 17. For a gift someone can use afterward, consider the bookmark, photo book, or tassel keyring. Leave several days before gifting the clay dish so drying does not become a last-minute problem.
Keep cardstock, colored paper, scissors, a ruler, pencil, glue stick, and paper-safe liquid glue nearby. Pick up felt, clay, clear adhesive film, or a frame only for the project you choose. A glue stick suits flat paper layers; raised paper coils and heavier embellishments need an adhesive labeled for those materials. Follow its drying directions before moving or packaging the finished piece.
If children are joining in, choose supplies labeled for their ages and have an adult handle sharp tools. Save loose buttons, needles, glass jars, and small keyring parts for supervised work with children who can use them appropriately.
Handmade Valentine cards
1. Folded-heart bouquet card
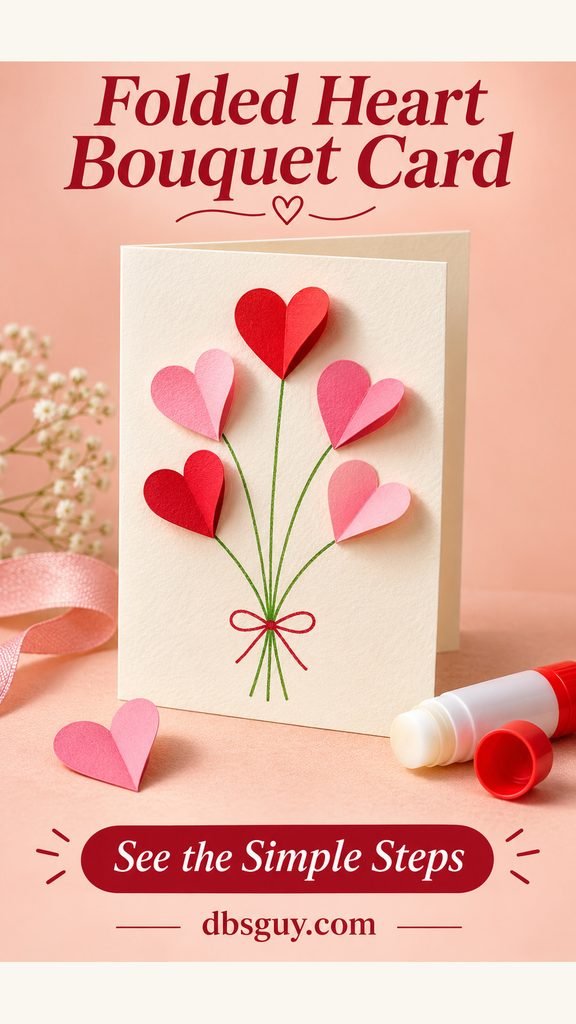
Five lifted paper hearts turn a flat card into a tiny bouquet. This is a useful choice when you want dimension without building a pop-up mechanism.
Fold a 10-by-7-inch piece of cardstock into a 5-by-7-inch card. Cut five hearts about 1½ inches tall from lightweight pink and red paper, then crease each vertically. Arrange them on the front before gluing: one high in the middle, two below it, and two lower down. Draw stems that meet near the bottom and add a small drawn bow.
Glue just one half of each heart to the card and leave the other half lifted. Keep the folds out of the card’s main hinge. For mailing, gently flatten the hearts and check the finished card against your envelope before writing inside.
2. Woven-paper heart window card
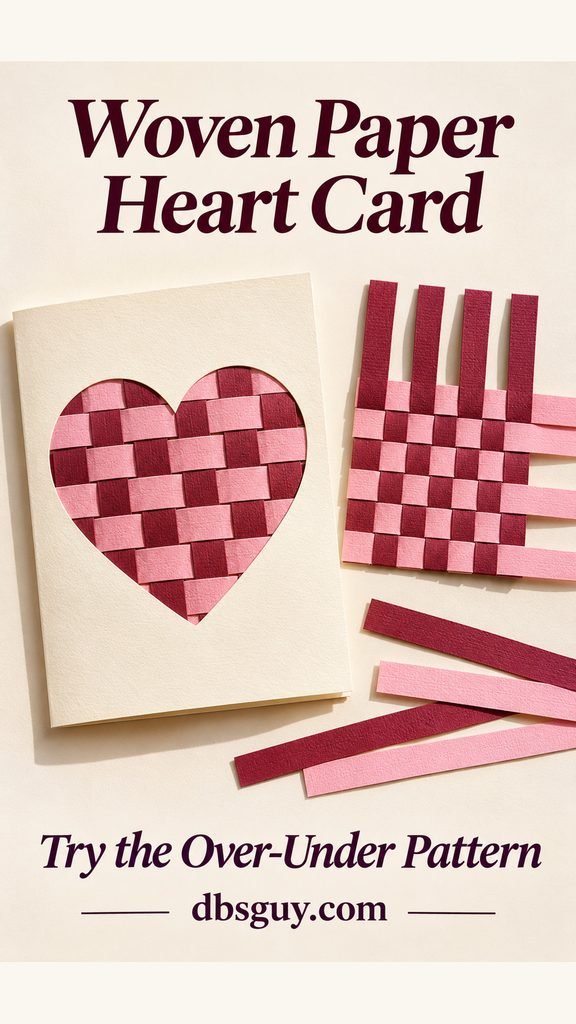
The little checkerboard is made as a separate mat, which makes this easier to manage than weaving directly into a folded card.
- Cut two colors of paper into strips about ½ inch wide. Lay several strips vertically and tape their top ends temporarily to scrap paper.
- Weave a contrasting strip across them, going over one and under the next. Reverse the pattern on the following row. Make the mat slightly larger than your planned heart window, then glue the strip ends together at its edges.
- Cut a heart window from a cardstock front panel. Glue the woven mat behind it, keeping adhesive around the window’s border. Attach this whole panel to a folded card so the strip ends are hidden.
Use two colors with a clear difference in lightness. Thin paper bends more easily than heavy cardstock, and a broad heart shows the woven pattern better than a narrow one.
3. White-crayon watercolor-resist card
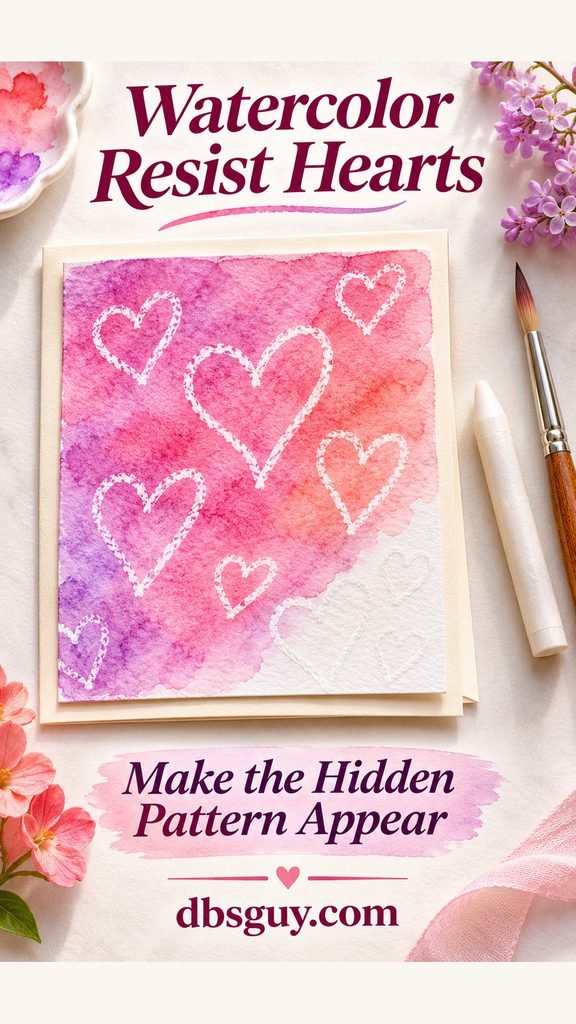
Draw hearts firmly with white wax crayon on a piece of watercolor paper, then brush a light wash of pink, coral, or lilac watercolor over them. The wax marks remain pale as the color settles around them. Try a few crayon strokes on a scrap first so you can judge how much pressure leaves a visible pattern.
Work on a separate panel slightly smaller than the card front. Let it dry flat, then mount it with a narrow border showing. This keeps a wet painting from soaking through the folded card or marking the message inside.
For a reveal version, send the unpainted panel with a note explaining how to brush watercolor over it. Keep the message short and press firmly enough that the white marks cover the paper’s texture.
4. Torn-paper mosaic heart card
This card gives leftover paper a job, including the scraps that are too small for another full heart. It also works for a group because everyone can fill the same outline differently.
Lightly pencil a broad heart on a white card panel. Tear red, pink, and coral paper into pieces roughly the size of a fingernail. Arrange the edge pieces first, then fill the middle with a glue stick, leaving small white gaps between the scraps. Add a thin red outline if you want a more defined border.
Use a separate panel for younger makers so an enthusiastic layer of glue does not gum up the card’s hinge. Flatten any raised corners before the glue sets; the torn edges can stay irregular.

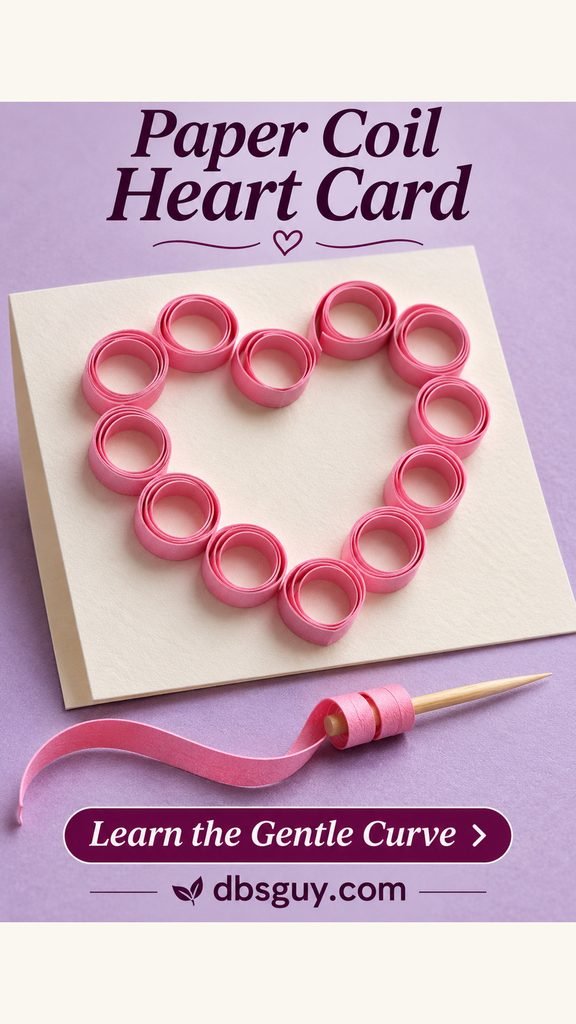
5. Paper-coil heart card
Open paper coils make a raised heart outline with a blank center for an initial. This one is better hand-delivered in a shallow box than pressed into a tight envelope.
Cut lightweight paper into strips about ¼ inch wide and 6–8 inches long. Wrap a strip around a toothpick or quilling tool, slide it off, and let it relax into an open coil. Glue the outer tail to hold the circle. Make enough coils to lay out a heart about 4 inches tall; the exact count depends on how loosely you roll them.
Arrange all the coils on the card before attaching any. Add a small amount of paper glue to their bottom edges and return them to the outline. Use slightly smaller coils near the point if the curve looks too blunt. Let the card dry flat without a book on top.
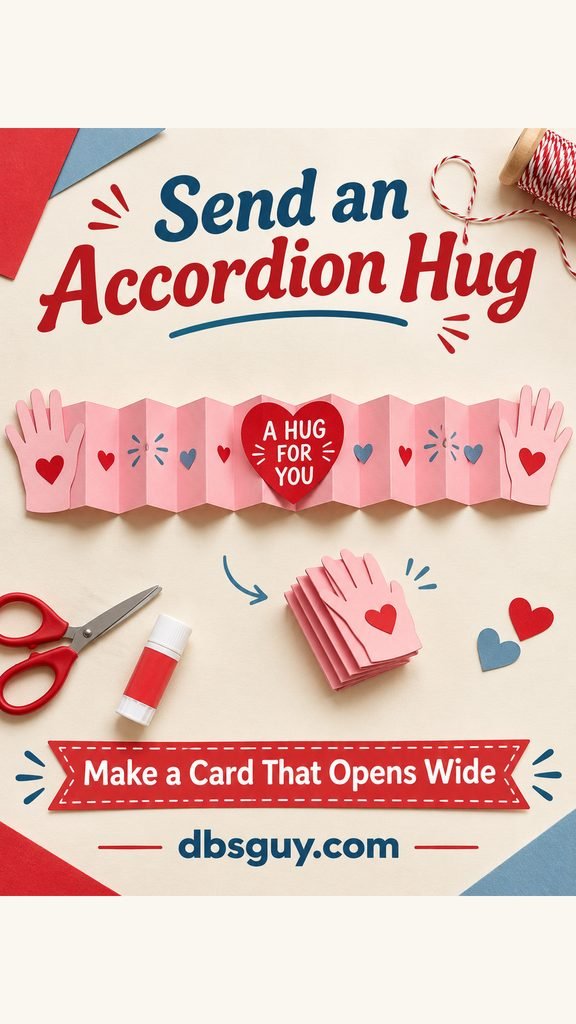
6. Accordion hug card
A strip of paper unfolds into two outstretched hands, giving a child’s Valentine a playful shape. Trace their hand once and use that outline to make both ends.
Cut a strip of lightweight paper about 3 inches high and 18 inches long; join two shorter strips with a small overlap if needed. Fold it back and forth into panels about 1½ inches wide. Cut two paper hands and glue one wrist to each end panel.
Write a short message across the panels or add a paper heart at the center. If the heart spans a fold, crease it in the same direction first and glue each half to the panel beneath it. Open and close the accordion before adding more decorations so nothing bridges a hinge and stops it folding.
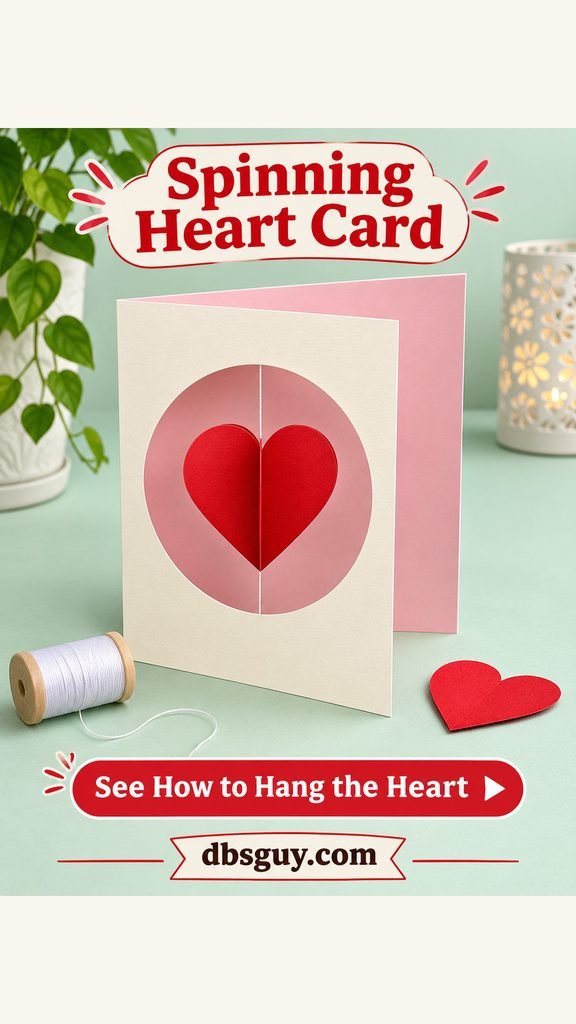
7. Spinning-heart window card
A heart suspended on thread adds movement when the card opens. The thread needs room above and below the heart, so start with a generous window.
- Cut a circular window about 3½ inches across in the front of a 5-by-7-inch card. Make a matching window in a separate cardstock liner. An adult should handle a craft knife if one is needed.
- Cut two identical hearts about 2 inches tall. Sandwich a length of sewing thread between them with a thin layer of glue, leaving thread extending above and below.
- Position the heart in the window. Tape the thread ends to the inside of the card front, then cover them with the windowed liner. Keep glue away from the heart and the exposed thread.
Once dry, turn the heart gently a few times, close the card, and open it to check the spin. If it catches, trim the heart slightly or reposition it farther from the window’s edge.
For help with the message inside, browse Valentine card ideas that make a simple message feel personal.
Small handmade gifts and thoughtful wrapping
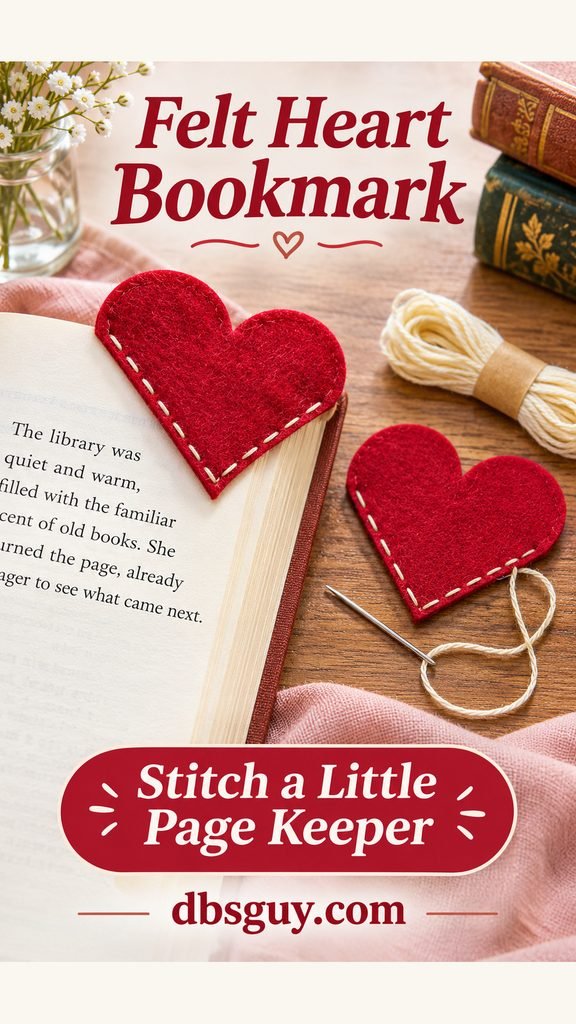
8. Felt-heart corner bookmark
Two felt hearts make a little pocket that slips over a page corner. Choose thin craft felt so the bookmark does not add much bulk to a closed book.
Cut two matching hearts about 2½ inches tall, with straight lower sides that meet at a right angle. Stack them and use embroidery floss to sew a running stitch along those two lower sides, about ⅛ inch from the edge. Leave the rounded upper edges completely open. Knot the thread between the layers where it will not rub against the page.
Slide the pocket over a scrap-paper corner before finishing the seam. If it feels tight, shorten the stitched section near the top. Pair the bookmark with a note recommending a book, or tuck it into a book you already planned to give.
9. Air-dry-clay heart trinket dish
A shallow heart dish gives rings or earrings a place to land. Keep this version for dry jewelry; it is a decorative clay craft, not a food dish or a waterproof ceramic piece.
On a protected work surface, roll air-dry clay to an even thickness of about ¼ inch. Lay a paper heart template about 4 inches wide on top and cut around it with a suitable clay tool. Smooth the edge, then gently raise the rim with your fingers while keeping the center flat. Set it on a nonstick craft surface to dry according to the clay’s instructions.
Do not paint it while it is still damp. Crayola lists about 24 hours to become touch-dry and 72 hours to dry fully for its Air-Dry Clay, with conditions and piece size affecting the result; check the manufacturer’s drying guidance for that product. Other clays may differ. Once fully dry, add small painted hearts with a compatible craft paint. A sealer does not make Crayola Air-Dry Clay waterproof, so include a short care note with the gift.

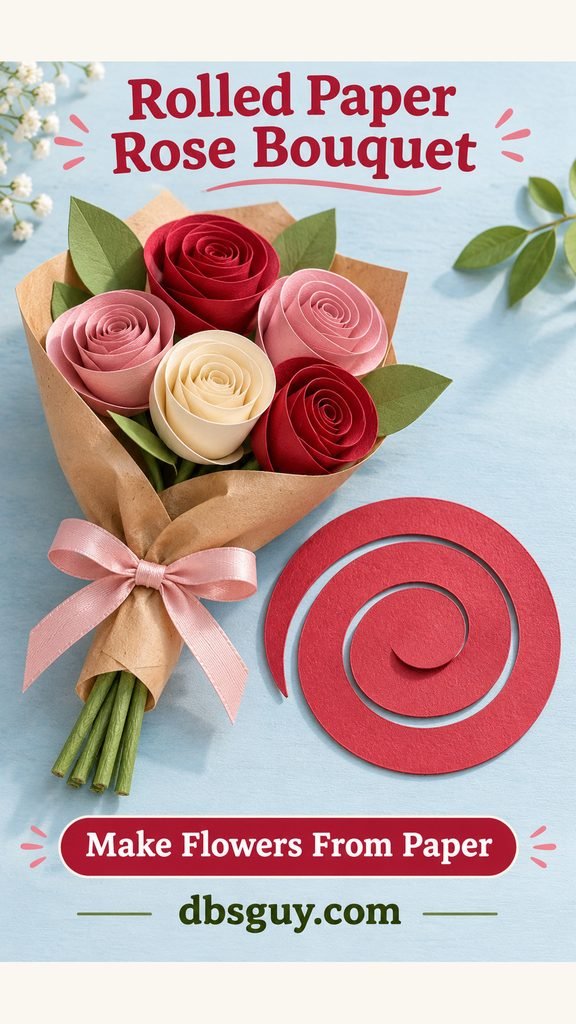
10. Spiral-paper rose bouquet
Rolled paper roses suit someone who likes flowers on a desk but does not have room for a vase of water. Five blooms make a manageable first bouquet.
Cut a paper circle about 5 inches across, then cut a spiral inward, keeping the strip roughly ½–¾ inch wide and leaving a small round tab at the center. Start at the outside tip and roll toward the center. Let the coil loosen into a rose, then glue the bottom to the round center tab. Hold it until the adhesive grips.
Attach each rose to a paper straw with an adhesive suitable for both materials. Use green straws or cover them with green paper, add paper leaves, and wrap the stems in a small sheet of kraft paper. Keep the blooms close to the tops of the stems so they do not wobble on long, exposed supports.
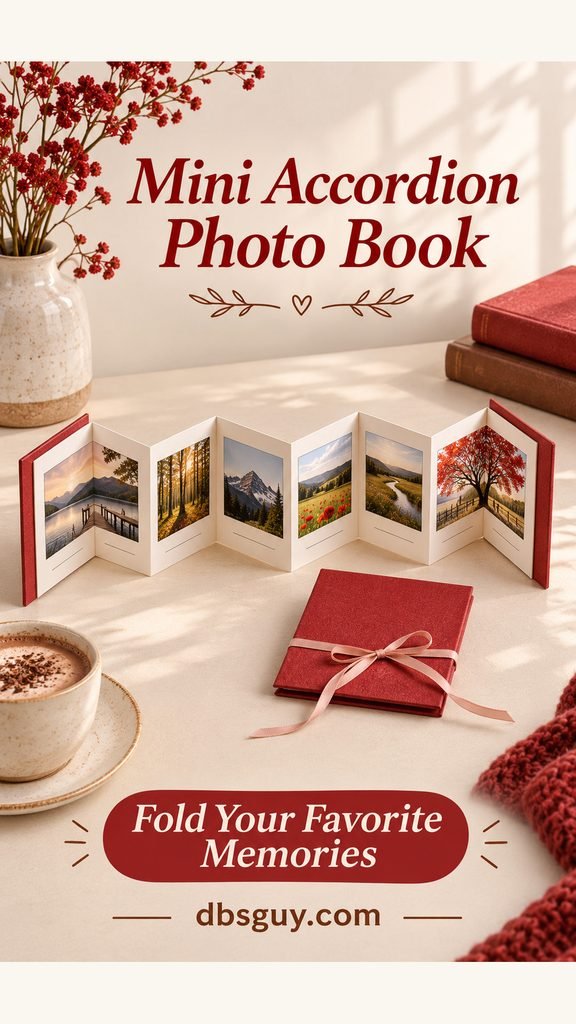
11. Mini accordion photo book
Choose a handful of printed memories: a favorite trip, a pet’s funniest poses, or ordinary places you both recognize. Reprints let you keep the originals intact.
Make a paper strip 3 inches high with six 3-inch-square panels. Join shorter lengths using a ½-inch tab hidden behind an end panel, rather than across a folding hinge. Fold the strip back and forth. Attach slightly larger cardstock covers to its first and last panels, trapping a ribbon beneath the back cover if you want a tie.
Mount photos smaller than each square and leave a little space for a date or caption. Keep prints away from the creases. Before tying the ribbon, close the book and check that the stacked photos do not force the covers apart.
12. Jar of handwritten compliments
The making is simple here; the useful work is choosing words that could only be meant for that person. Write about what you notice rather than filling every slip with a general compliment.
Wash and thoroughly dry a small jar and lid. Cut paper into slips about 1 by 4 inches, write one thought on each, and fold them loosely. Start with ten notes: a few qualities you admire, a few small memories, and a few everyday things you appreciate. Try “You make people feel welcome” or “I still smile about our rainy bookstore afternoon.”
Tie a ribbon around the neck and add a small heart tag. Use a lightweight lidded box instead of glass if the gift is traveling in a backpack or going to a child. Leave enough empty space that one note can be pulled out easily.

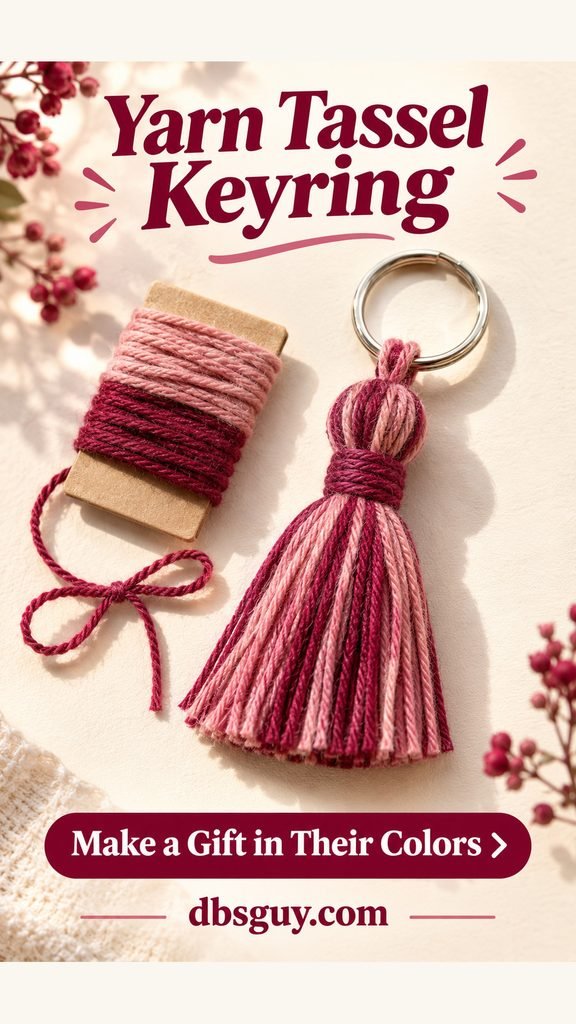
13. Yarn tassel keyring
A tassel is a useful way to use a small amount of yarn in the recipient’s favorite colors. Keep the attachment short so it works as a keyring or bag charm.
- Wrap yarn around a 3-inch-tall piece of cardboard until you have a full bundle. Slide a separate strong yarn tie under the loops at the top and knot it firmly.
- Slide the bundle off the card. Cut the bottom loops, then wrap another strand around the bundle about ½ inch below the top to form the neck. Tie it securely and tuck its ends into the fringe.
- Use the top tie to fasten the tassel to a split ring with a short doubled loop. Trim the fringe evenly.
Tug the attachment gently before gifting. If the yarn sheds or breaks easily, choose a stronger yarn and remake the tie; this is a decorative charm, not a handle for carrying a heavy bag.
14. Heart-stamped gift wrap
A cardboard-tube stamp turns plain kraft paper into wrapping that matches any of the gifts above. Stamp a flat sheet before wrapping so you can press evenly.
Gently flatten a short cardboard tube. Push one fold inward to make the heart’s top notch, keeping the opposite fold as the point. Test the rim on scrap paper and adjust the shape until it prints a recognizable outline.
Spread a thin layer of craft paint on a washable palette, dip only the rim, and stamp spaced hearts across the paper. Reload when the outline becomes faint. Let the sheet dry fully before folding it around a gift, then finish with plain twine. A thick puddle of paint can blur the heart and leave wet patches that transfer onto the gift.

If you are choosing what to put inside the wrapping, these thoughtful Valentine’s Day gifts for partners, friends, and family offer more starting points.
Valentine decorations to make at home
15. Yarn-wrapped heart hanging
Cardboard gives this soft-looking decoration its shape. A broad heart with a shallow notch is easier to cover than one with narrow lobes or a very long point.
Cut a heart about 5 inches tall from sturdy cardboard. Tape a short hanging loop securely to the back, then tape down the end of your yarn. Wrap around the heart in changing directions, crossing the center and then filling the exposed areas near each lobe. Keep the yarn snug without bending the cardboard.
Secure the final tail on the back with a small amount of suitable craft glue. If the heart shape disappears under the wrapping, unwind the last few passes and follow the outer edges more closely. Hang it from an existing peg or use it as a large gift topper.

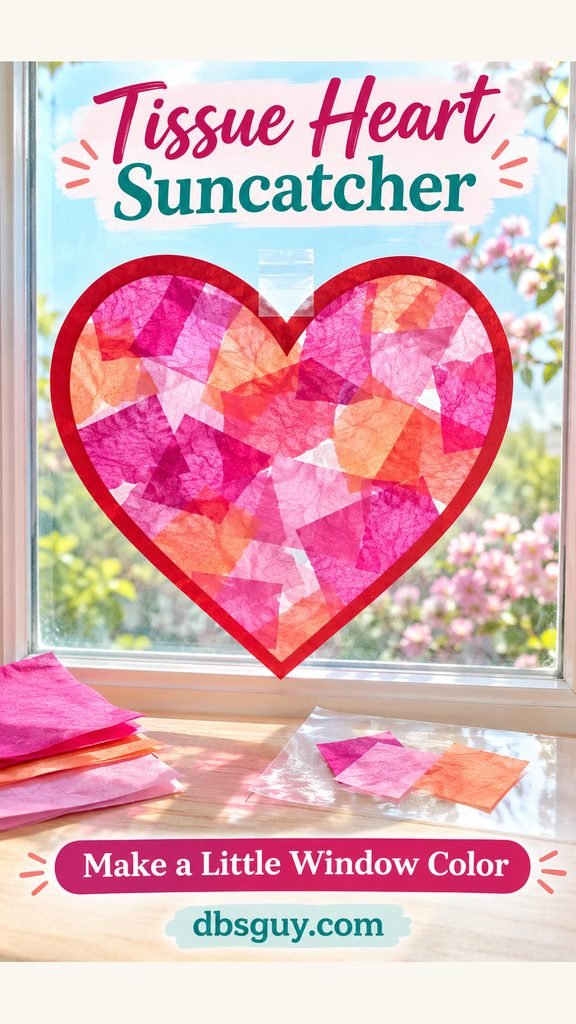
16. Tissue-paper heart suncatcher
Overlapping tissue pieces add color without paint or drying time. The clear adhesive film does the joining, so this version does not need an iron.
- Cut two matching cardstock heart frames, about 6 inches tall with a border roughly ½ inch wide.
- Lay one frame on clear self-adhesive book-cover film, sticky side up. Fill its opening with small tissue-paper pieces, allowing a few overlaps and gaps for light.
- Add a second sheet of film, adhesive side down, and smooth it from the center outward. Attach the second frame to the back, then trim the film around the outside border.
Test removable tape on an unobtrusive area of the window frame before hanging. Keep the heart clear of the latch. Pale tissue stays more translucent than a thick stack of dark pieces.
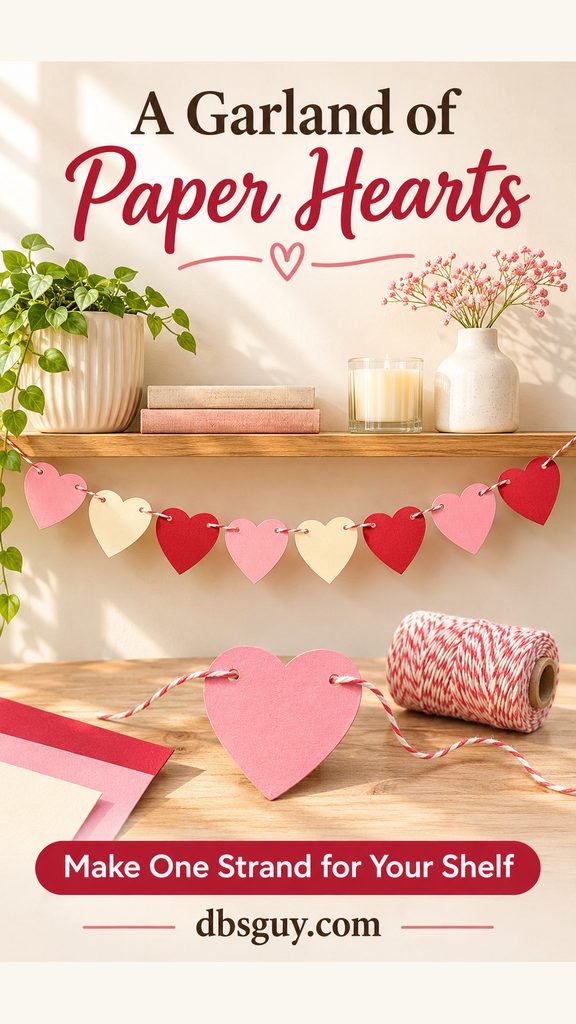
17. Two-hole paper-heart garland
Two holes keep each heart facing forward more reliably than a single hole at the top. Use this strand across a shelf or on a wall where you can see all the shapes.
Cut eight hearts about 3 inches tall from cardstock. Punch one hole near each upper shoulder, keeping enough paper outside each hole that it will not tear easily. Pass cotton twine from the back through the first hole, across the front, and back through the second. Repeat with the remaining hearts.
Lay the strand flat and space the hearts before hanging it in a shallow dip. If a shape slides, add a tiny piece of tape behind it where it meets the twine. Measure the chosen spot first and leave extra cord at both ends for tying. Keep hanging cords out of young children’s reach.
18. Layered-paper heart wreath
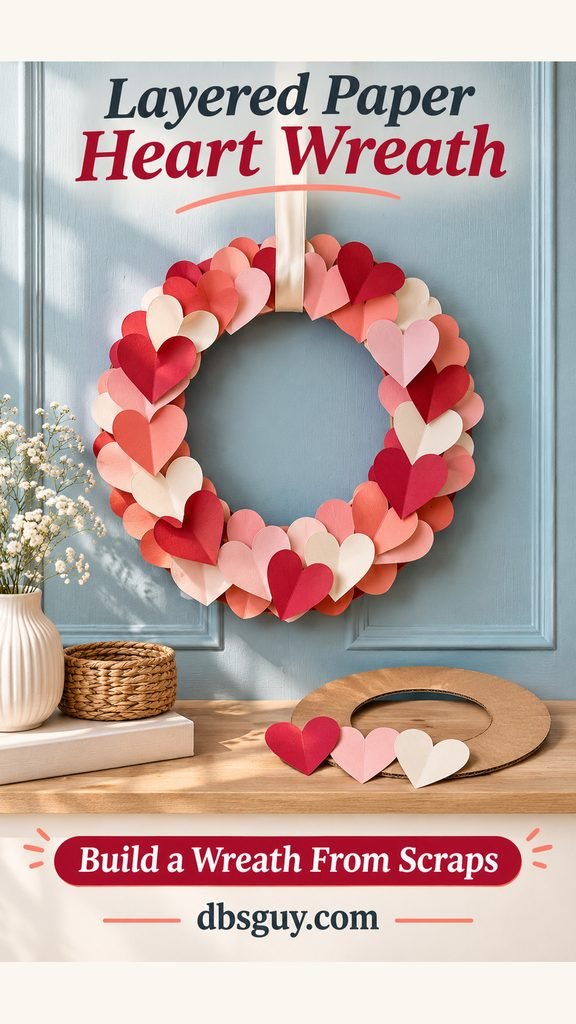
A cardboard ring supports a wreath of overlapping paper hearts, so you can make the base from packaging rather than buying a wreath form.
Trace a dinner plate onto cardboard, then trace a smaller plate inside it to leave a ring about 2 inches wide. Have an adult cut out the center if the cardboard needs a knife. Add a short ribbon loop through a hole in the top of the ring before covering it.
Cut paper hearts in two or three sizes and lay them around the ring, overlapping their edges until the cardboard disappears. Glue the lower half of each heart to the base. Give a few hearts a light center crease so their upper edges lift. Let the wreath dry flat and display it indoors, where rain and door movement will not crush the paper.
19. Heart-window LED jar lantern
A vellum sleeve softens the light while the cutout hearts leave clear little windows. Use a flameless LED tealight for this paper-covered jar.
Wrap a strip of vellum around a clean, dry, undamaged jar to measure the length, allowing about ½ inch of overlap. Trim it shorter than the straight-sided part of the jar. Remove the strip and cut three or four small heart windows, keeping them away from the overlap seam.
Wrap the sleeve around the outside and tape the ends to each other at the back. Place the LED tealight inside and check the effect with the room lights lowered. Leave the jar’s opening clear so you can reach the switch and remove the light. Keep this craft away from real candles and use an LED light with a secured battery compartment if children will be nearby.

20. Clothespin photo-and-heart display
This decoration can change throughout February because the pieces clip on instead of being glued permanently. Use photo copies or small art prints you do not mind clipping.
Hang a short length of cotton twine between existing hooks or fasteners suitable for your wall. Start with three small photos and four cardstock hearts, alternating them with miniature clothespins. Keep the heaviest print near an end if the middle sags too much.
Leave the photos’ important details below the clips, and use smaller hearts if the display starts to feel crowded. Position it above a desk or shelf with the cord out of children’s reach. To make it a family activity, leave one empty clip for a drawing someone adds later.

21. Framed button-heart art
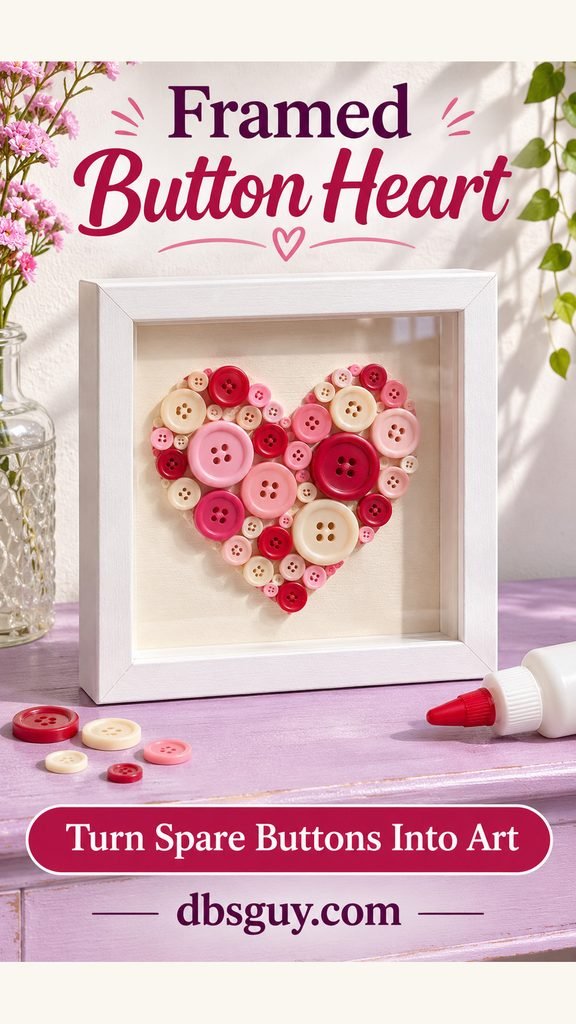
Different sizes of spare buttons give this heart its texture. A shadow-box frame leaves room for the raised surface without pressing the buttons against the glass.
Cut sturdy cardstock to fit the frame backing and pencil a heart in the center. Lay out the largest buttons first, then fill the gaps with smaller ones. Choose flat-backed buttons so they sit neatly. Once you like the arrangement, lift and glue one button at a time using an adhesive labeled for the button material and paper.
Let everything set flat for the full time specified on the glue before standing the frame upright. Check the frame’s depth before replacing the glass. If young children are helping, swap the loose buttons for large paper circles and give them their own flat collage to make.
For ideas on where to display your finished pieces, see Valentine decor ideas from heart garlands to flower-filled tables.
Make the last step count
Before giving a project away, open every fold, test each pocket, and check that glued pieces stay attached. Let paint and adhesive finish drying before wrapping. Add the recipient’s name or one sentence about why you made it for them; that small detail belongs on even the simplest paper heart.
Valentine arts and crafts FAQs
Which projects are good for beginners?
The folded-heart bouquet card, torn-paper mosaic, compliment jar, and two-hole garland have straightforward construction and room for imperfect cutting. Try one finished sample before preparing supplies for a group. The spinning card and paper coils need more careful placement.
What can I make using supplies already at home?
Use paper scraps for the mosaic, shipping cardboard for the yarn heart or wreath, and a clean cardboard tube for stamped wrapping paper. The compliment jar can be a small lidded box. Check the finished gift’s size before cutting new wrapping or buying a container.
How far ahead should I start?
Work backward from drying and delivery. Leave several days for the clay dish, plus time for paint or any compatible finish to dry. For paper projects, make a sample early and leave finished pieces flat until their glue sets. Keep raised coils and paper roses in a box that gives them space during transport.
Can I use colors other than pink and red?
Yes. Try blue and cream for a woven card, deep green yarn for a tassel, or a clay dish with a single cobalt heart. Keep enough contrast that the design is clear. Using the recipient’s favorite colors is an easy way to make a familiar heart shape feel personal.