
To make dried orange Christmas garland without scorching the slices, cut the oranges evenly, blot away surface juice, and dry them slowly in a single layer. For the oven method below, start at 200°F (about 93°C), turn and inspect the slices every 30 minutes, and remove individual pieces as they finish. Expect roughly 3–5 hours, but let the cooled fruit—not the clock—tell you when it is ready.
The tricky part is the finish. A slice can have a dry-looking edge and a damp center, while its thinner neighbor is already getting too dark. This tutorial walks you through those decisions, then shows you how to string a garland that hangs with the orange faces visible.

The images in this tutorial are AI-generated concepts illustrating the process and finished look; they are not photographs of a tested batch.
What you need for a 6-foot orange garland
Plan on a decorated strand about 6 feet long, plus extra twine at both ends for hanging. For a lightly spaced design, start with 20–24 usable dried rounds. That is a layout estimate: larger slices need fewer pieces, and a fuller strand needs more.
- 3–4 medium, firm oranges: navel oranges are a convenient starting choice. You may have extra slices; select the best rounds after drying.
- A sharp knife and stable cutting board.
- Clean, lint-free towels or paper towels for blotting.
- One or two baking sheets and parchment paper. An oven-safe wire rack is optional; a cooling rack is useful afterward.
- An oven thermometer, if available, to check the actual temperature near the tray.
- About 8 feet of fine twine or strong cotton thread, scissors, and a large-eye needle that fits your string.
- Suitable hanging hooks and, optionally, two small ribbon bows for the ends.
Allow a half-day window so you are not rushing the final drying checks. Slicing, arranging, and stringing are the hands-on portions; most of the time belongs to drying and cooling. Stay home while the oven is running and set a repeating check timer.
1. Slice evenly and blot both sides
Wash and dry the oranges, then cut across their middle to reveal the round, wheel-like segments. Aim for slices about ⅛ inch thick, or roughly 3 mm. Keep the thickness consistent across each slice as well as across the batch.
A wedge-shaped round causes trouble: its thin edge can darken while the thick side still feels juicy. Set noticeably thicker pieces aside for a separate tray rather than making every thin slice wait for them.
Lay the rounds on a clean towel, cover with another towel, and gently press to absorb surface juice. Turn them and repeat on a dry section of towel if needed. Blot without crushing the segments—you want intact circles that will support two small threading holes later.
Woodlark’s original dried-orange tutorial uses evenly cut ⅛-inch rounds, blotting, and a 200°F oven. Those preparation details are a useful foundation; your oven and fruit will still determine the finish.
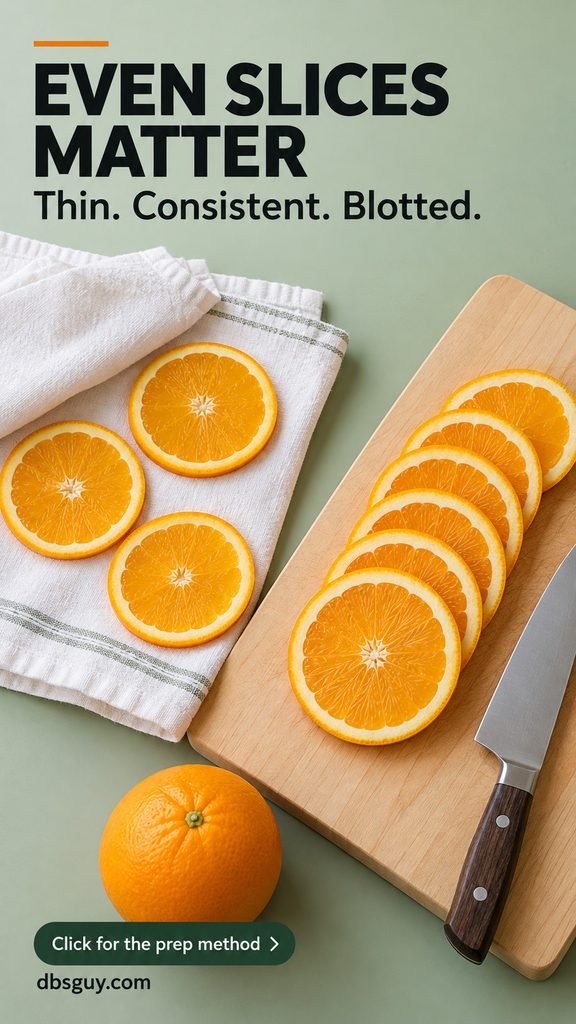
Before moving on: look across the stack from the side. If one round is obviously thicker, put it in the slower group. Consistency is more useful here than trying to make every orange exactly the same diameter.
2. Dry slowly, turn regularly, and watch the final stretch
Set up a small first batch
Preheat a conventional oven to 200°F (about 93°C). Line a baking sheet with parchment and arrange the rounds in a single layer with gaps between them. Start on the middle rack, away from direct contact with heating elements. A single tray makes it easier to learn how your oven behaves.
If you use a wire rack above a sheet instead, check that it is approved for oven use. A rack can expose both sides to moving air, but it does not remove the need to watch the slices.

Use a check schedule, not a finish deadline
- After the first 30 minutes: inspect the tray and gently turn each round. Use a thin spatula if a slice clings to the parchment.
- Every 30 minutes afterward: turn the rounds and look for uneven coloring. Rotate the tray front to back if one area consistently dries faster.
- As the slices look nearly dry: shorten the interval to about 10–15 minutes when needed. Remove finished pieces instead of waiting for the entire tray.
- At roughly 3–5 hours: many thin slices may be ready for a cooling test. Some finish earlier; thicker or wetter rounds may need longer.
That closer attention near the end matters. Colorado State University Extension’s drying guidance explains that drying time varies with piece size, humidity, and air circulation, and that fruit scorches easily toward the end. Applying that principle here means watching the final stretch more closely, rather than increasing the heat to hurry it.
What to do if the edges brown too quickly
Take the tray out briefly and check your setup. Are the rounds too close to an element? Is one part of the oven much hotter? Does an oven thermometer show a higher temperature than the control setting?
If the oven can reliably hold a lower temperature, reduce the setting toward 170–180°F (about 77–82°C) and continue in short, watched intervals. This is a practical adjustment for a batch that is coloring too fast, not a guaranteed drying time. If the oven cannot run gently enough, a temperature-controlled dehydrator is the better route.
A little amber deepening is normal. Rapidly expanding dark patches, blackened edges, or a scorched smell are reasons to stop that batch and reassess. Once a slice is scorched, additional drying will not restore its color.
Keep the oven door closed unless the appliance instructions specifically direct otherwise for a drying mode. Do not leave the oven running overnight, and do not assume that convection, air-fry, or broil settings behave like the conventional method above.
3. Cool the slices and check the centers
Transfer promising slices to a cooling rack and let them reach room temperature before making the final decision. Warm fruit can feel softer than it will after cooling; testing it hot can tempt you to leave it in the oven unnecessarily.

Check several rounds, including the thickest and the ones from the slowest-drying part of the tray:
- Touch both faces. They should not have damp or tacky patches.
- Check the center gently. A juicy, squishy pocket needs more drying, even if the rind looks finished.
- Cut one sample in half if you are unsure. Look for visible moisture inside and check whether gentle pressure releases any liquid.
- Allow some flexibility. A dry slice can be leathery; forcing every piece to become brittle can lead to unnecessary browning.
These checks follow the principles in Clemson Extension’s fruit-drying guidance, which recommends examining cooled samples for moisture and tackiness. Appearance alone cannot confirm that a slice is dry enough.
Return damp pieces to low heat and check them again after cooling. Keep the already-finished rounds out of the oven. If you are making several trays, sort them into “ready” and “needs more drying” groups instead of mixing everything together.
4. Thread two holes so the orange faces stay visible
Lay out the cooled, dry rounds before cutting your final spacing. Alternate slightly larger and smaller circles if that is what your oranges produced. A natural mix looks intentional when the gaps are reasonably consistent.
For the 6-foot decorated span, cut about 8 feet of string and leave roughly 12 inches free at each end. Start with about ½–1 inch of clear space between neighboring slices, then adjust the arrangement to fit your chosen length.

- Support the slice flat. Use the needle to make two small holes near the upper arc, around the 10 o’clock and 2 o’clock positions. Place them just inside the rind without tearing through the outer edge.
- Bring the threaded needle from back to front through the first hole.
- Pass it from front to back through the second hole. A short bridge of twine will now cross the upper part of the orange face.
- Slide the slice into position gently. Repeat with the remaining rounds, keeping the same face toward you.
- Tie hanging loops at the ends. Lift the strand carefully and adjust the gaps before putting it on display.
The two-hole approach is also shown in Homestead and Chill’s original garland tutorial. It gives each round two attachment points rather than letting it swivel freely from one central hole.
If a slice cracks while piercing, use a finer needle or thread and choose a sturdier round. Do not force thick jute through a delicate opening. If rounds slide together when you lift the strand, add a small loose stopper knot in the gap beside the moving slice; avoid cinching a knot tightly against the fruit.
5. Hang the garland where it can stay dry
Choose a dry indoor spot and support the string rather than the fruit. Two end hooks work for a short strand; add a middle support when a longer garland sags too much. Leave a relaxed curve instead of pulling the twine taut.
The finished concept below uses a pale wood console, a simple vase of evergreen branches, and two burgundy bows. To recreate the arrangement, attach the garland to suitable hooks along the console edge and tie the bows around the end loops. Keep the branches separate so you can replace or remove them without taking apart the oranges.
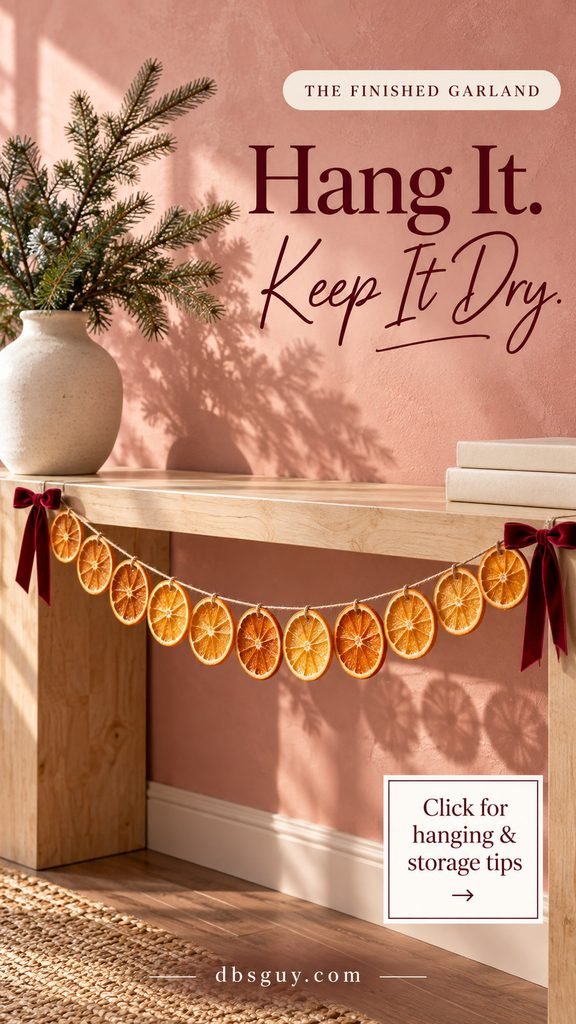
Avoid steamy areas, damp window glass, and outdoor exposure. Keep the strand away from heaters, working fireplaces, and open flames. The U.S. Fire Administration recommends at least 12 inches between candles and anything that can burn; flameless candles are an easier choice around dried decorations.
Hang loose strings and fragile rounds where children and pets cannot pull or chew them. Check the fruit occasionally during the season, especially if your home becomes humid.
Store it only after it is fully dry and cool
At the end of the season, inspect the rounds before packing them away. Remove ribbon and greenery if they would press against or damage the fruit. Place the dry garland loosely in a clean, dry container with a tight-fitting lid, without crushing the slices, and keep it somewhere cool, dark, and dry.
The National Center for Home Food Preservation explains that warm dried fruit can create condensation in packaging and that dried foods can reabsorb moisture. Its storage principles are useful for this fruit-based decoration, although they do not establish a guaranteed lifespan for an assembled craft garland.
Check the container after packing and periodically during storage. If moisture appears and the fruit is otherwise unspoiled, remove the string and dry the affected rounds again before repacking. Discard moldy slices; do not try to save them by reheating. Color may darken over time, and reuse next Christmas depends on the condition of the fruit, not just the date you made it.
Fix the most common dried-orange problems
The slices are dark at the edges but wet in the middle
That pattern points to a mismatch between heat and drying progress, often made worse by uneven thickness. Separate the thicker pieces, check the actual oven temperature, and continue more gently if your appliance allows. For the next batch, prioritize even cuts rather than a higher setting.
Some slices are finished and others are not
Remove the dry rounds individually. Fruit size, thickness, and tray position all affect timing. If the same corner always finishes first, rotate the tray and place the slower pieces where you can watch them easily.
The rounds curl or tear
Turn them carefully while drying, avoid crushing them during blotting, and loosen stuck slices with a thin spatula. A little curling is fine for a natural garland. Severely torn rounds are harder to thread securely, so choose intact ones for the main strand.
The garland feels tacky after hanging
Check for a damp display spot as well as incomplete drying. Move the strand out of steam or condensation. Remove affected rounds for another drying check; do not pack tacky fruit into a sealed container and hope it improves.
Questions before you start
Is 200°F the best temperature for every oven?
No. It is a commonly used starting point for decorative orange slices, not a universal setting. An oven that runs hot may require a lower stable temperature. For food preservation, University of Minnesota Extension discusses drying at about 140°F. This decorative tutorial is not a validated method for preparing edible, shelf-stable orange snacks.
What if my oven’s lowest setting is 250°F?
Do not assume the same schedule will work at that temperature. Use an appropriate manufacturer-approved drying function or a temperature-controlled dehydrator. If neither is available, buying already-dried craft slices is a practical way to make the garland without risking another overheated batch.
Can I use a dehydrator instead?
Yes. Follow your machine’s instructions for citrus or its fruit setting, keep the rounds in a single layer, and inspect them as they dry. A dehydrator generally uses gentler controlled heat, but the same cooled-center test still matters. Do not transfer the oven’s 3–5-hour estimate to a different appliance.
Do I need to add sugar, cinnamon, or a sealant?
None is needed for this plain orange-and-twine design. Keep the slices uncoated while you learn the drying process. The burgundy end bows supply the extra festive detail without covering the orange faces.
Will the finished garland make the room smell like oranges?
Do not count on it as a room fragrance. The look is the main reason to make this decoration; scent after drying is variable and may be faint. You do not need to add oils or sprays to complete the project.
Can I eat the slices after using them as decorations?
Treat this garland as decor. Once fruit has been handled for crafting, threaded, and displayed, keep it separate from food. If you want dried citrus for eating or drinks, prepare a separate batch using appropriate food-preservation guidance and food-safe handling.
How far ahead of Christmas should I make it?
Choose a day when you can stay home for the drying checks, then leave enough time for cooling before you plan to hang it. For a U.S. holiday decorating schedule, a November weekend or the days around Thanksgiving can be convenient. There is no need to make it months early unless you also have a suitable dry storage spot.