
The best Dollar Tree Christmas DIYs start with a simple shape and one thoughtful finish: a dark wash on shiny bells, a generous paper star, or a strip of velvet on an ordinary chair. You do not need to turn every inexpensive find into a complicated project.
These 17 ideas include the supplies, the basic assembly, and the small decisions that make the finished piece feel more considered. For a quick afternoon refresh, start with the gift-bag artwork, chair bows, or snowy jar. If you enjoy painting, try the aged bells, gingerbread houses, or ivory nutcrackers.
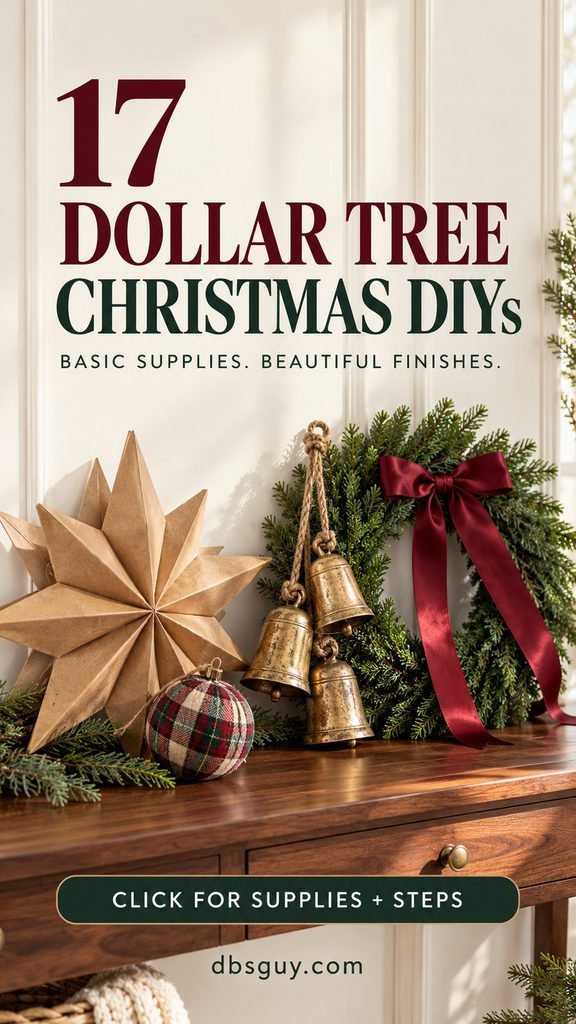
The images are AI-generated styling concepts, not photographs of projects tested for this article. Use them as visual guides; the size, finish, and materials you find will affect your result.
Before You Fill Your Dollar Tree Basket
Shop for the underlying material first: plain glass, lightweight ornaments, ribbon, paper bags, frames, and small craft blanks. Dollar Tree’s Christmas craft collection is a useful starting point, but seasonal selections differ by store. Bring a flexible list rather than depending on one exact item.
Check shelf prices and package quantities. Dollar Tree’s current company information describes additional price points above $1.25, so “Dollar Tree” does not mean every supply costs the same. Your actual project cost is the packages you buy, plus any paint, adhesive, tools, or hanging hardware you need. Reusing a ribbon spool across several projects usually makes more sense than buying a different finish for each one.
Choose two main colors and one accent for the area you are decorating. Evergreen, ivory, and burgundy work together; so do oatmeal, sage, and natural wood. That is a styling choice, not a requirement. The goal is to make the pieces relate to your room.
Keep scissors, a ruler, and suitable adhesive handy. Choose paint, primer, and glue labeled for the actual surface; test an inconspicuous spot before coating a whole piece. Follow the labels for ventilation, drying, and curing. All the ideas below are intended for indoor decorating. Where a glow is shown, use battery-operated candles; the NFPA recommends considering flameless candles.
1. Give Plain Bells an Aged-Gold Finish
A little uneven color can make glossy craft bells feel more like an old decorative find. This small swag suits an interior door, cabinet handle, or entryway hook.
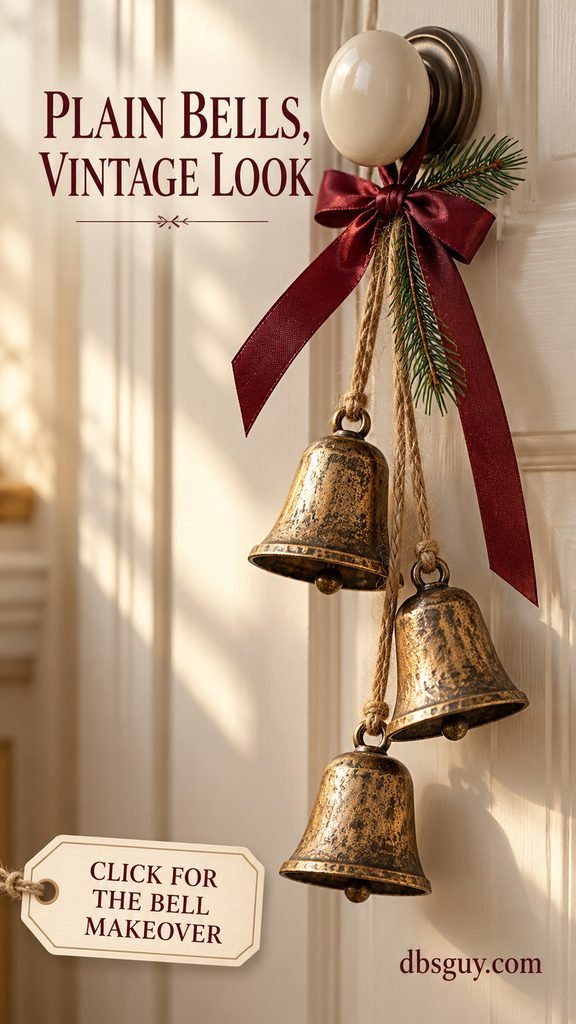
Gather: 3 lightweight bells with hanging loops, about 2 yards of twine, 1 yard of narrow ribbon, one faux pine sprig, dark brown paint, antique-gold paint, and a small brush. Use coatings compatible with your bells; shiny plastic may need an appropriate primer.
- Remove loose tags and decorations, clean the surface as the coating label directs, and let it dry. Keep the hanging loops usable.
- Apply a thin dark-brown base coat. When dry, dab gold lightly over raised areas, leaving some brown visible near the rims and recesses.
- After the finish has cured, tie each bell to a separate piece of twine. Vary the hanging lengths, then knot the three cords together at the top.
- Tie on the ribbon bow and secure the pine sprig behind it. Add a separate hanging loop so the bow does not carry the weight.
The convincing detail is the contrast between darker recesses and brighter edges. An even gold coat looks freshly painted; a lighter touch creates the aged effect. Keep the swag short enough that it will not catch when the door opens, and check that the handle still works freely.
2. Turn Paper Lunch Bags Into a Statement Star
This is a good choice when you want something substantial without buying a large decoration. White bags look airy against a colored wall; kraft bags bring a warmer, more rustic texture.
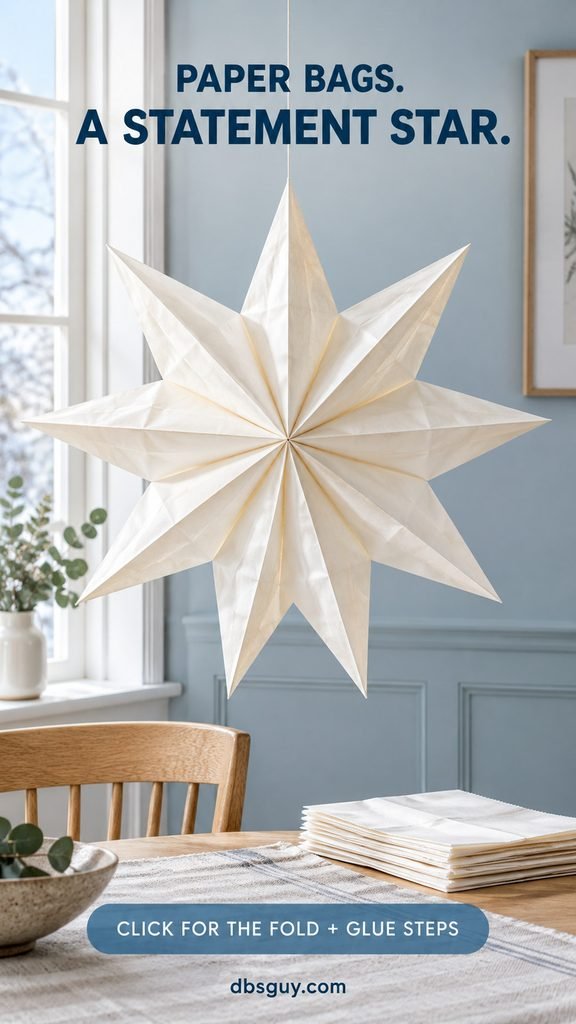
You need: 8–10 matching flat-bottom paper lunch bags, a glue stick or suitable paper adhesive, scissors, and hanging thread. Start with 8 bags, and keep a couple in reserve because bag proportions affect how the star opens.
- Lay the bags flat in the same orientation, with their openings at the top.
- On each bag, apply glue along the closed bottom and straight up the center, forming an upside-down T. Stack the next bag on top and repeat.
- Let the glued stack set. Cut the open end into a centered point, trimming both upper corners. Leave the bottom and central glued area intact.
- Gently fan the stack into a circle. If the ends will not meet without strain, add another prepared bag. Glue the first and last faces together.
- Reinforce a point with a small extra piece of paper before making a hanging hole and adding thread.
The standard T-shaped glue method is illustrated in Stevie Storck’s paper-star tutorial. For your first star, skip decorative cutouts: a clean outline is easier to cut and looks striking on its own. Hang it from hardware appropriate to the surface, away from moisture and heat.
3. Wrap Basic Ornaments in Plaid Fabric
A small amount of leftover fabric can give mismatched ornaments a coordinated, textile-rich look. Lightweight plastic balls are easier to handle for this project than fragile glass ones.
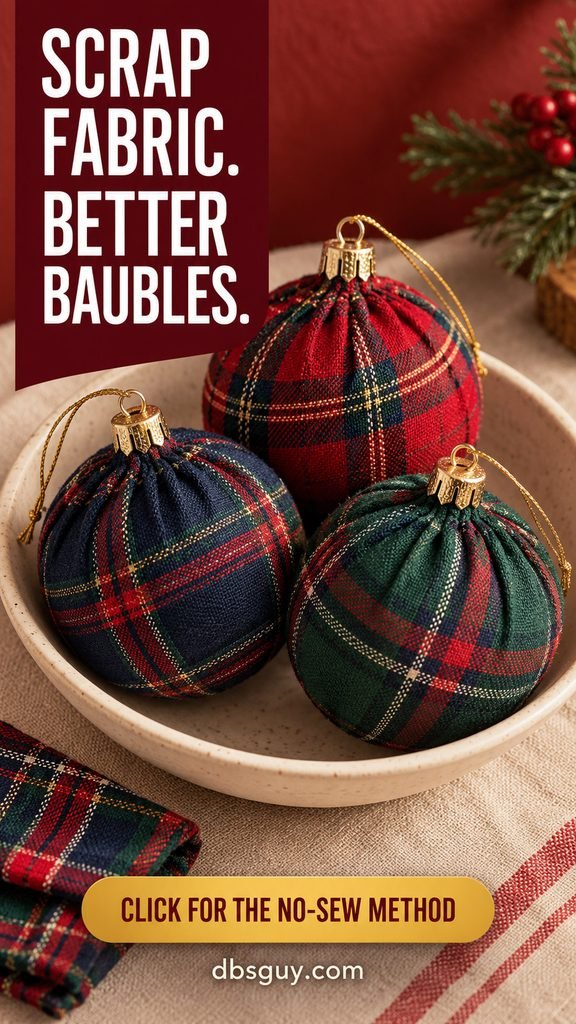
For a small set: gather 3 round ornaments about 2–3 inches across, three approximately 10-inch fabric squares, thin cord, scissors, and optional fabric-compatible adhesive. Check the fit with one square before cutting the rest.
Center an ornament on the fabric, bring the corners toward the hanging cap, and arrange the gathers into narrow folds. Tie cord snugly around the gathered fabric just below the cap. Trim excess material gradually so you retain enough fabric to hold the bundle together. If needed, secure a few overlapping folds with tiny dots of suitable adhesive, keeping the hanging loop clear.
Use a small-scale plaid so its pattern remains recognizable around the curved shape. A thick blanket fabric can make a little bauble look bulky; a lighter woven scrap is easier to gather.
Some pleating is part of this design. Aim for neat gathers at the top rather than a perfectly smooth sphere. Hang the ornaments individually or set them in a shallow bowl, as the concept image shows.
4. Layer Faux Greenery Into a Fuller Wreath
Thin garland often looks better when you treat it as a building material. Two layers can cover a wreath form more convincingly than one loosely wrapped strand.
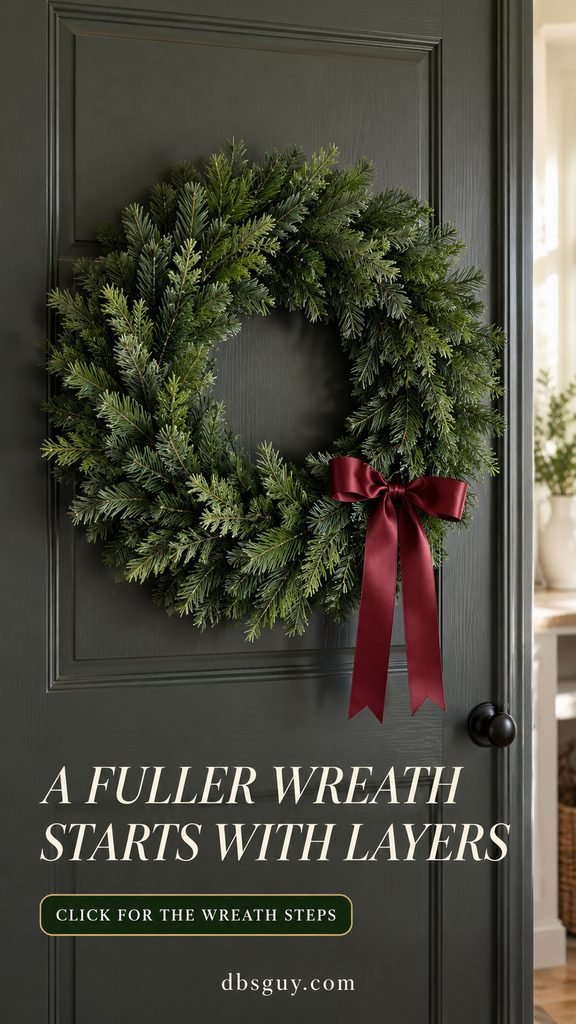
Start with: one 10–12-inch wire wreath form, 2 faux greenery garlands as a starting quantity, floral wire or small cable ties, wire cutters if using wire, and 1–2 yards of ribbon. Garland fullness and form size determine whether you need additional greenery.
- Spread the faux branches outward before attaching anything.
- Lay the first garland around the front of the form and fasten it at several points. Tuck its ends toward the back.
- Add the second layer over visible gaps, turning some branch tips outward so the outline is not perfectly flat.
- Check the wreath upright, then adjust the greenery before tying a single bow slightly off center.
A bow with a little breathing room looks intentional. You do not need ornaments, berries, bells, and a sign on the same wreath. The rich green texture already does most of the work.
Cover or tuck away wire ends so they cannot scratch the door, and use a hanger suitable for the finished weight. If the greenery is labeled for indoor use, keep the wreath on an interior door.
5. Make Mottled-Silver LED Votives
This finish borrows the spotted look of aged silver without claiming to create real mercury glass. Leaving clear gaps is what allows a battery-operated tealight to show through.
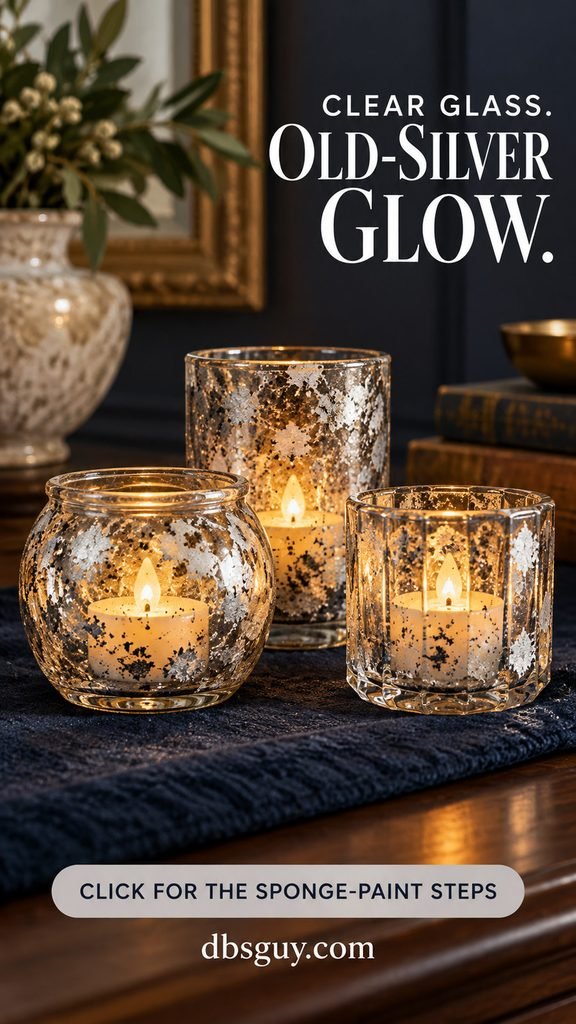
Supplies: 3 small clear glass holders, silver and charcoal paint labeled for glass, a small sponge, scrap paper, and 3 LED tealights that fit comfortably inside.
- Clean and dry the outside of the glass according to the paint directions.
- Load a little silver paint onto the sponge, then dab most of it off onto scrap paper.
- Stipple the exterior lightly, leaving irregular clear spaces. Add only a few charcoal flecks; too much dark paint will overpower the silver.
- Let the coating dry and cure as directed before placing an LED tealight inside.
Do not paint the interior or cover every transparent patch. These are decorative LED holders, and the handmade stippling should remain visible. A dark tray or cloth underneath makes the silvery texture easier to see.
If glass-compatible paint costs more than you want to spend, leave the holders clear and use them elsewhere rather than buying an entire finishing kit for three jars. This project makes the most budget sense when you already have suitable paint.
6. Build a Snowy Woodland Scene in a Glass Jar
An open glass jar gives miniature decorations a boundary, which helps a tiny collection look composed. It also keeps the loose faux snow together.
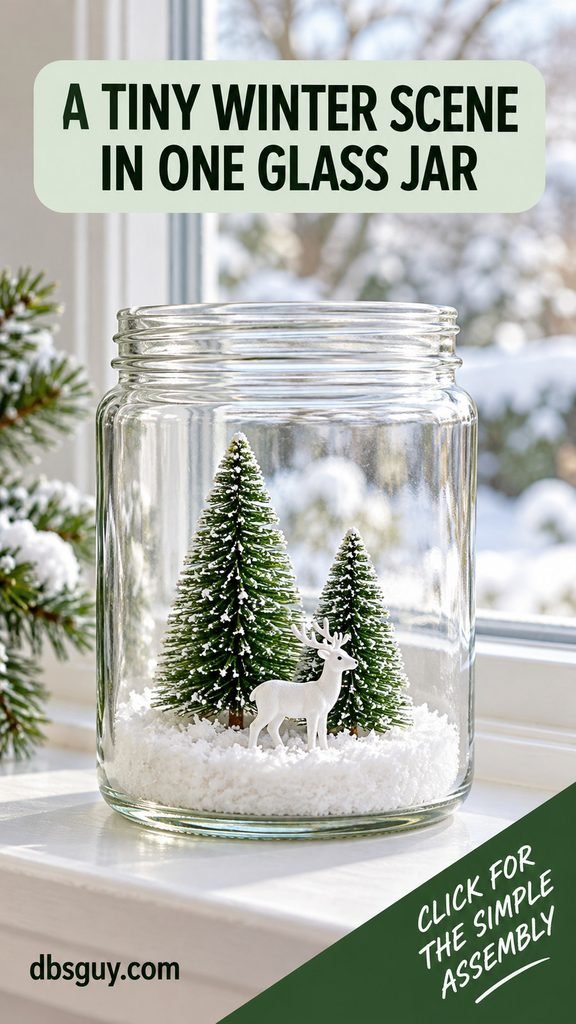
Use: one wide-mouth glass jar about 7–9 inches tall, 2 small bottle-brush trees, 1 miniature deer, and a shallow layer of craft faux snow. Choose trees that fit through the opening and leave space above their tips.
Place the empty trees and deer inside first to check the arrangement. Put the taller tree slightly toward the back, the shorter one to the side, and the deer in front. Remove them, add about half an inch of faux snow, and return the pieces to their positions. For a firmer footing, set the tree bases on the jar bottom and sprinkle snow around them.
Stop while the shapes are still easy to see. Filling the jar halfway with snow or adding several more figurines makes the scene feel crowded.
A clear vase works if you cannot find a suitable jar. Keep it open, as shown, and place it on a stable shelf or windowsill away from children’s reach. This is a dry decorative scene; it does not need water or a candle.
7. Hang Champagne Ornaments in Window Clusters
Use the light from a window to give a few inexpensive ornaments more presence. The effect comes from spacing and staggered heights, rather than a large number of decorations.
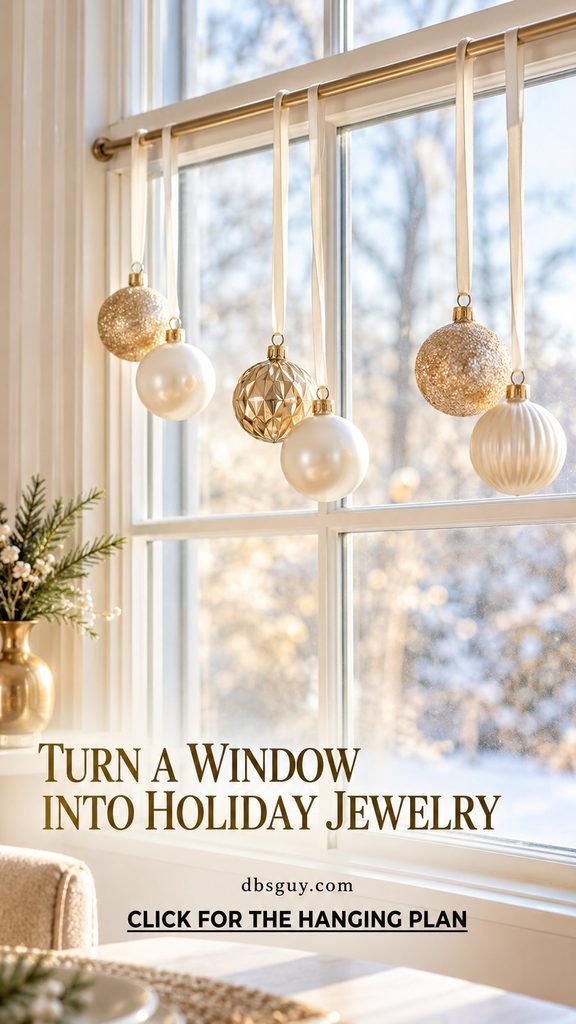
Plan for: 6 lightweight shatterproof ornaments, narrow ribbon, and an existing secure curtain rod or a suitably rated removable rod. Measure the window before cutting ribbon.
- Arrange the ornaments on the table in three loose pairs, mixing pearl-white and champagne finishes.
- Cut six separate ribbons in staggered lengths. Thread each through an ornament’s secure hanging loop and tie it.
- Attach the ribbons to the rod, spreading the three pairs across the window. Step back to adjust heights before trimming excess ribbon.
- Check that curtains, blinds, and window latches still operate freely.
Use a rated mounting solution on a compatible surface, and stay within its total load limit. Do not attach the ornaments to a blind cord or let long ribbons trail toward a heat source.
If you are decorating a narrow window, four ornaments can be enough. Keep the same restrained palette, and let the empty glass between the clusters be part of the design.
8. Frame the Best Part of a Christmas Gift Bag
Some gift bags have a lovely botanical print hidden behind busy lettering or oversized handles. Cropping one small area can turn that print into simple seasonal artwork.
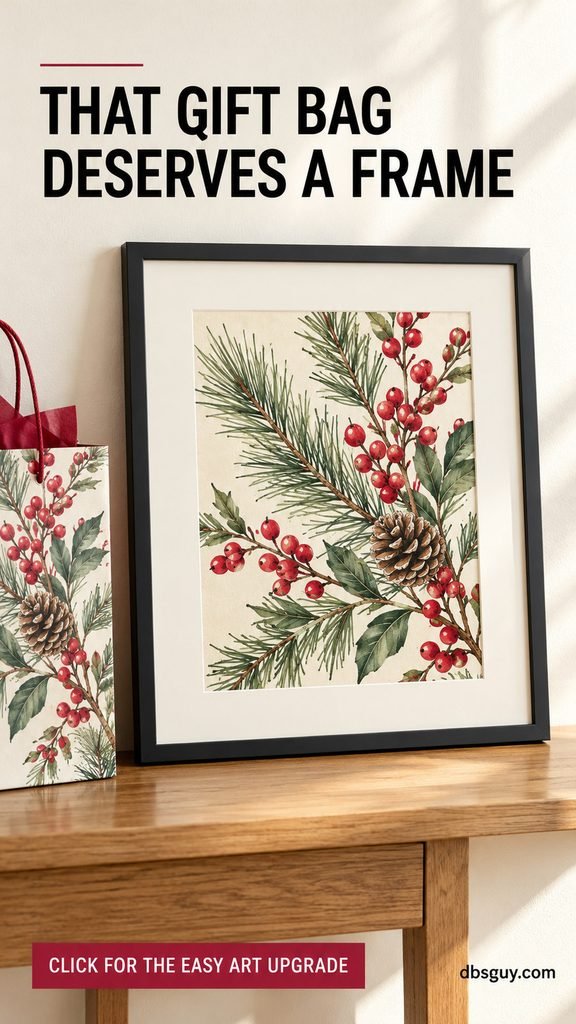
Gather: one slim 8 × 10-inch frame, a printed gift bag, ivory cardstock for a mat, a ruler, scissors or a craft knife, and tape. An existing frame works just as well.
Take out the frame backing and use it to measure the outer cardstock rectangle. Mark an opening that suits the artwork—roughly 5 × 7 inches is a useful starting point for an 8 × 10 frame. Cut the opening neatly, then move the mat over the bag until the best section appears inside it.
Cut the artwork with enough extra border to tape it behind the mat. Avoid a bag crease, punched handle hole, or glittered seam in the visible area. Reassemble the frame and check that its backing closes properly.
The wide ivory border is the detail that makes a busy print feel calmer. Choose a branch, house, or tree motif that fits your room’s palette, and keep unrelated words outside the crop. Display the frame on a secure shelf or use its intended hanging hardware. +
9. Paint Wooden Houses to Look Like Gingerbread
Keep the shapes simple and let the painted “icing” suggest the detail. This gives you a little gingerbread village that can be packed away after Christmas.
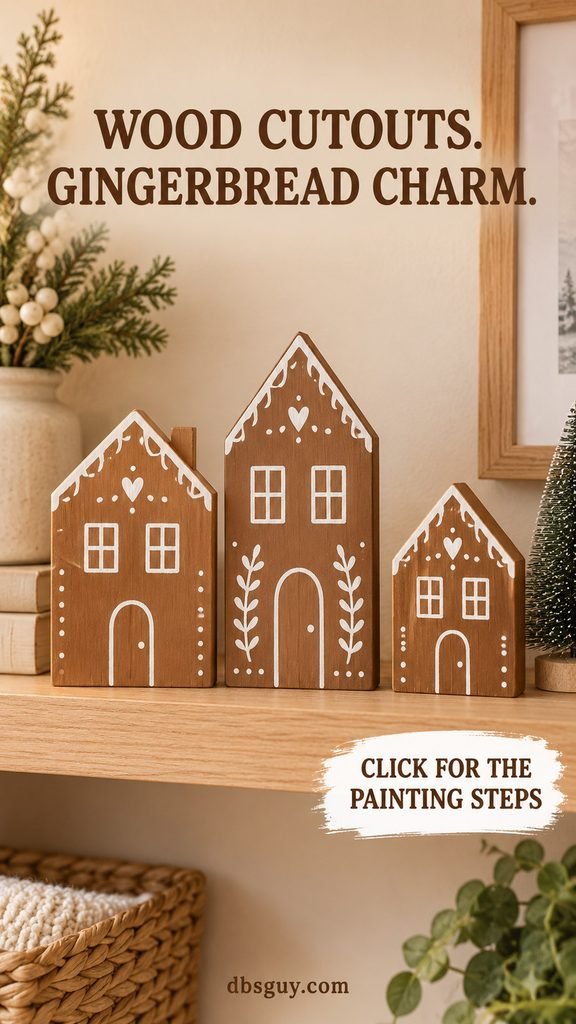
Supplies for the trio: 3 small wooden house blanks, gingerbread-brown paint, a white paint pen, a brush, and optional small wooden blocks for stands. Freestanding blanks are easiest. If Dollar Tree has no house shapes, use blanks from another craft source rather than forcing a different object into the project.
- Paint the front and edges brown, leaving any hanging holes clear if you plan to use them later.
- When dry, test the paint pen on scrap material. Draw a thin line along the roof, then add simple windows and a door.
- Add a few dots or short scallops, stopping before every inch is covered.
- For flat plaques, attach a suitable block to the back with wood-compatible adhesive and let it cure. Check that each house stands securely.
Three houses of slightly different heights look more interesting than three identical outlines. Keep them on one shelf with a small tree nearby. These are painted decorations, so there is no need for real icing, candy, or edible ingredients.
10. Give a Mini Christmas Tree a Woven-Basket Base
The base can be the reason a small artificial tree looks unfinished. A modest basket hides the plastic stand and adds texture without demanding a whole new set of ornaments.
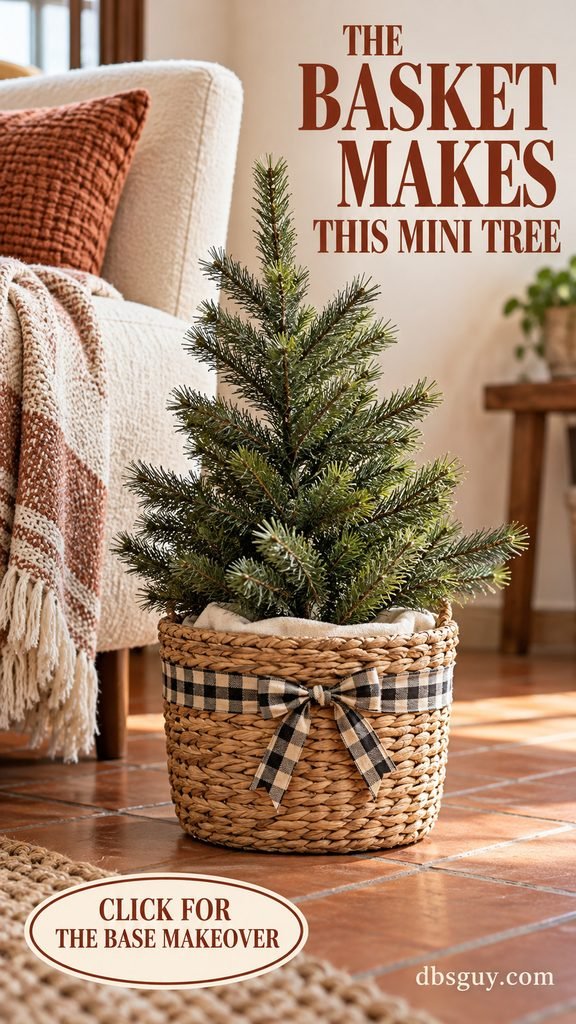
Choose: one tabletop tree, a basket wide enough to hold its original base, folded fabric or paper for packing, a fabric scrap for the top, and optional narrow plaid ribbon. Measure the stand before buying the basket.
Place the tree inside with its original stand intact. Pack folded material around the base to stop it shifting, then cover the packing with a tucked-in scrap of fabric. Keep the fabric below the rim so the basket shape stays visible. Tie a narrow ribbon around the basket if the weave and shape allow it.
Set the arrangement down and gently check that it remains stable. A basket that is too narrow or light can make a top-heavy tree easier to tip; choose a better-fitting base rather than hiding the problem with extra fabric.
This is a good place to reuse a basket you already own. Leave the branches simple, as pictured, or add a few ornaments you have. The useful change is the tidy, well-proportioned base.
11. Repaint Colorful Nutcrackers in Soft Ivory
If a pair of seasonal nutcrackers feels too busy for your room, a limited palette can make their shapes stand out. Matte ivory with a little champagne gold works especially well on a quiet shelf.
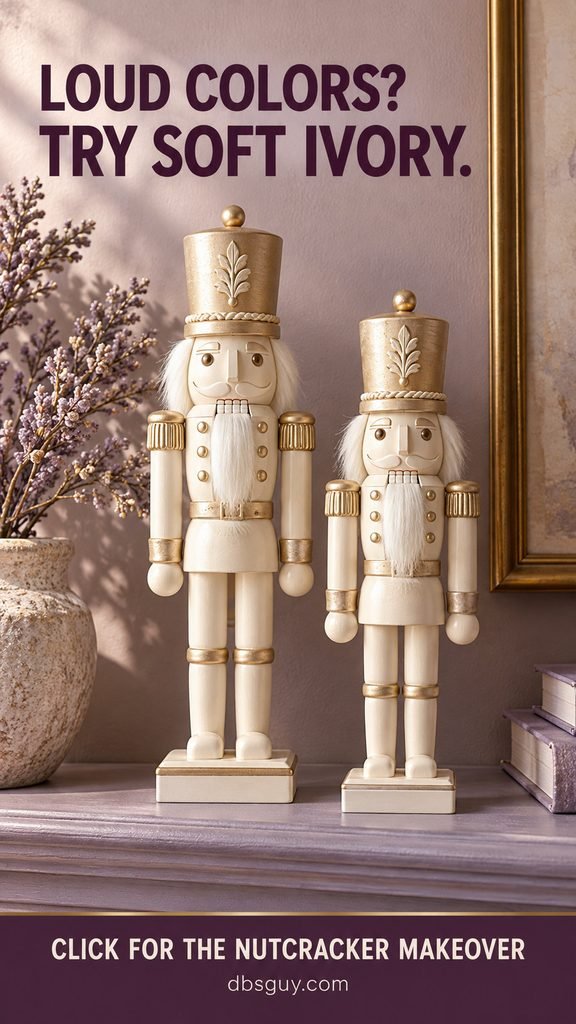
You will need: 2 decorative nutcrackers, paint suitable for their surface, optional compatible primer, a small brush, and a little gold paint. Use decorative figures; this project does not turn them into functional nut-cracking tools.
Check the material and existing finish first. Secure loose parts as appropriate, then clean and prepare the surface according to your chosen coating. Use thin coats of ivory instead of one heavy layer that fills carved details. Let each coat dry as directed.
Once the ivory is ready, add gold to the hats and shoulder details. You can echo the accent on a few buttons, cuffs, or base edges, as the image suggests, while keeping the main body ivory. Avoid coating moving joints, and do not paint through a working mechanism.
On small figures, a smooth finish and a clean base matter more than elaborate decoration. If an area remains rough or shows the original color, touch it up before adding gold. Let both pieces cure before setting them on a shelf or wrapping them for storage.
12. Make Pinecone-and-Twine Napkin Rings
A single pinecone adds enough seasonal texture to a plain napkin. Making a set in the same size is what gives the table a coordinated look.
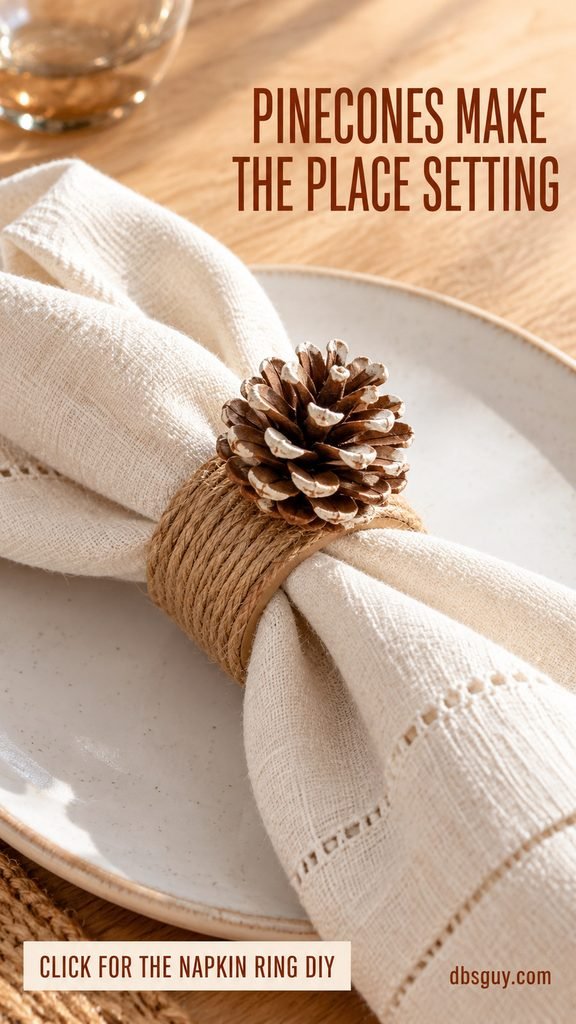
For 4 rings: use 4 small clean, dry craft pinecones, a clean cardboard tube, twine, suitable craft adhesive, and optional ivory paint. A ring about 1–1½ inches wide is a useful starting size.
- Cut four equal sections from the tube and tidy the edges.
- Wrap twine around each ring in close rows, covering the cardboard. Secure the beginning and end on the inside.
- If you want a lightly frosted look, brush a tiny amount of ivory paint across the pinecone tips and let it dry.
- Attach one small pinecone to the top of each ring. Allow the adhesive to cure before threading in the napkins.
Choose pinecones with a reasonably flat attachment point so they do not wobble. Keep them small enough that the napkin is easy to pull out.
These handmade cardboard rings are decorative and cannot be washed like dinnerware. Keep painted and glued parts away from food, spot-clean only as appropriate, and replace a ring if it gets damp or loses its shape.
13. Tie Velvet Bows Around Dining-Chair Backs
This is a low-commitment way to make the dining area feel festive. It works best on chairs with an open back rail you can tie around neatly.
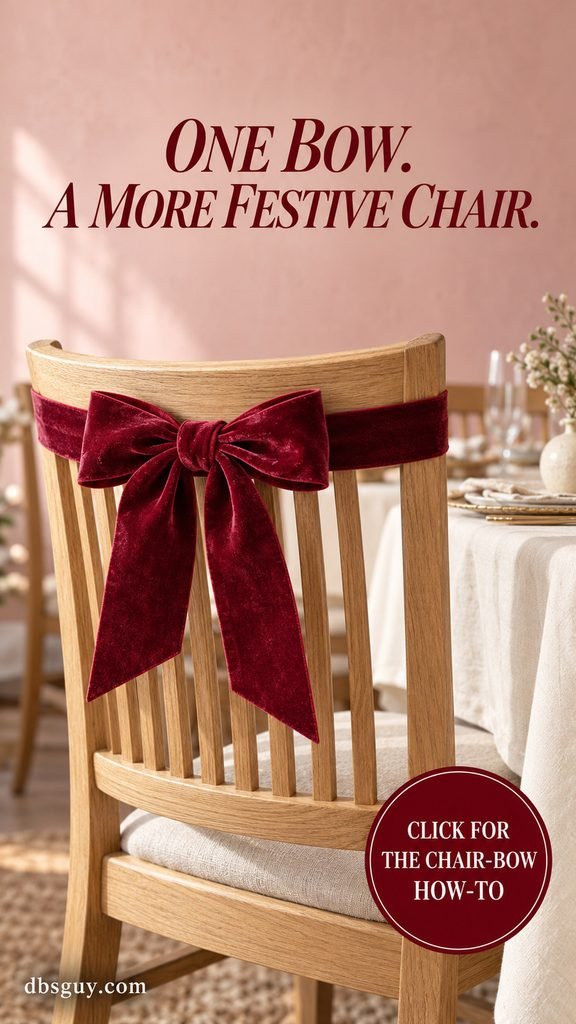
Start with: 1½–2 yards of ribbon per chair as a planning allowance, plus scissors. Actual length depends on the rail, ribbon width, and bow size. Test one chair before cutting enough for the whole table.
Wrap the ribbon around the upper rail, keeping it flat. Tie the bow at the back of the chair, adjust the loops to equal sizes, and trim the tails so they end well above the seat. A 1½–2-inch-wide ribbon gives a generous bow without covering the whole chair.
Velvet has a front and back, so turn each loop until the soft pile faces outward. If the bow slides, reposition it around a rail junction rather than sticking adhesive onto the chair finish.
Decorate the host chairs or every other seat if your ribbon supply is limited. Burgundy looks rich against oak; forest green suits a cream chair. Keep the bow clear of where guests sit, and make sure the chair can move comfortably under the table.
14. Turn Craft Sticks Into Simple Snowflake Ornaments
These eight-spoke ornaments suit a relaxed white-and-wood Christmas palette. Their straight, rounded-ended arms keep the construction easy to understand.
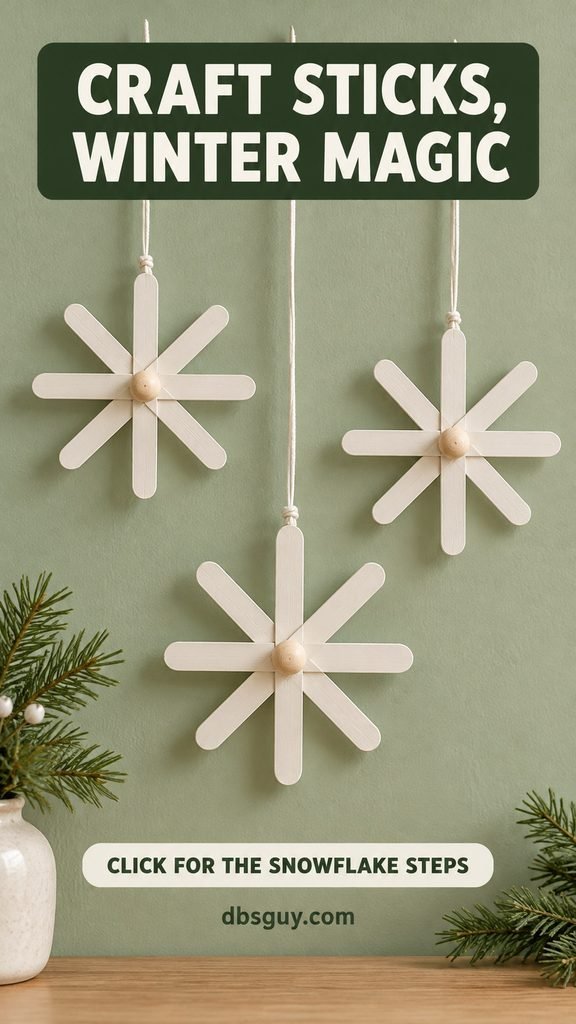
For 3 ornaments: gather 12 matching wooden craft sticks, white paint, 3 small wooden beads, hanging cord, and wood-compatible craft adhesive.
- Paint both sides and the edges of the sticks, then let them dry.
- Cross two sticks at their centers to make a plus sign. Add two more diagonally, spacing the eight spokes evenly. Glue each center overlap.
- Add one small bead to the front center if you want to cover the joins.
- Tie a snug cord loop around the top arm, as shown, or attach the loop securely behind the center. Allow every joint to cure before lifting the ornament.
Keep the sticks flat on a protected surface while the adhesive sets. Make one ornament first so you can check its weight and size on a branch before assembling the other two.
Skip glitter if you want the wood texture and soft white finish to be the feature. If your tree has fine branches, use smaller sticks or display the ornaments from a secure wall hook instead. Do not hang an ornament while the joints are still soft.
15. Wrap Empty Boxes Into an Entryway Gift Stack
You can create the visual feeling of Christmas presents without using real gifts as decor. A few empty shipping or pantry boxes are enough.
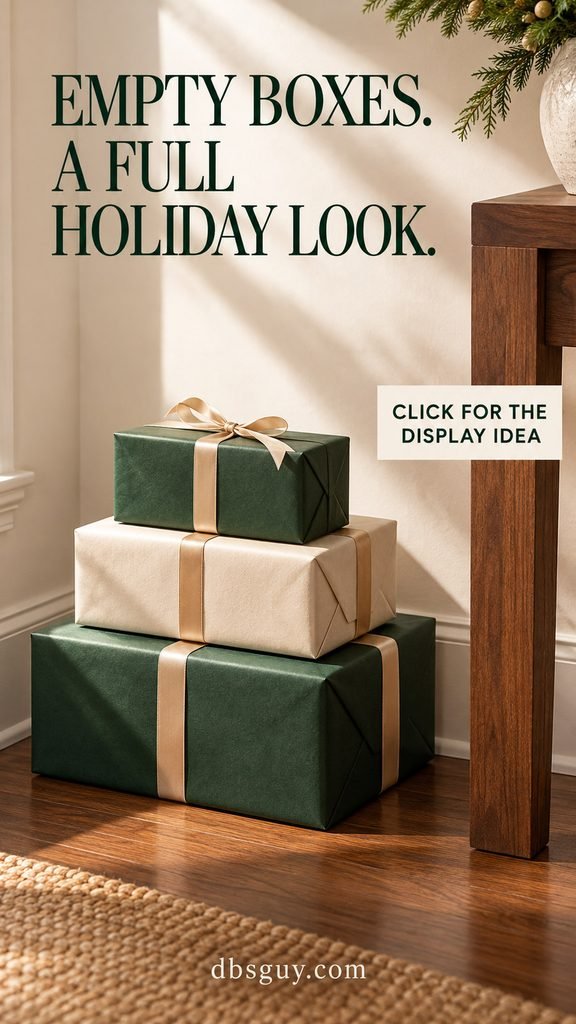
Gather: 3 clean empty boxes in graduated sizes, matte wrapping paper in two related colors, narrow ribbon, and tape. Choose sturdy boxes that sit flat.
Close the boxes fully before wrapping. Use just enough paper to overlap at the seam, fold the corners tightly, and place visible seams toward the back. Tie a simple ribbon around each box. Forest green and ivory with champagne ribbon create the look shown here, but leftover paper can work if the colors relate.
Stack the largest box at the bottom and the smallest at the top. Set the stack in a quiet corner where it cannot block a walkway, vent, or door. If it rocks, rearrange the sizes or display the boxes side by side.
Resist the urge to add a large bow to every box. Crisp wrapping and a consistent ribbon already provide the detail. Put real presents elsewhere, and mark these boxes discreetly underneath so nobody mistakes them for gifts on Christmas morning.
16. Wrap Cones in Cozy Yarn
Yarn-covered cones add a soft texture that contrasts nicely with glass and shiny ornaments. They are useful on a shelf that needs a little height without a busy display.
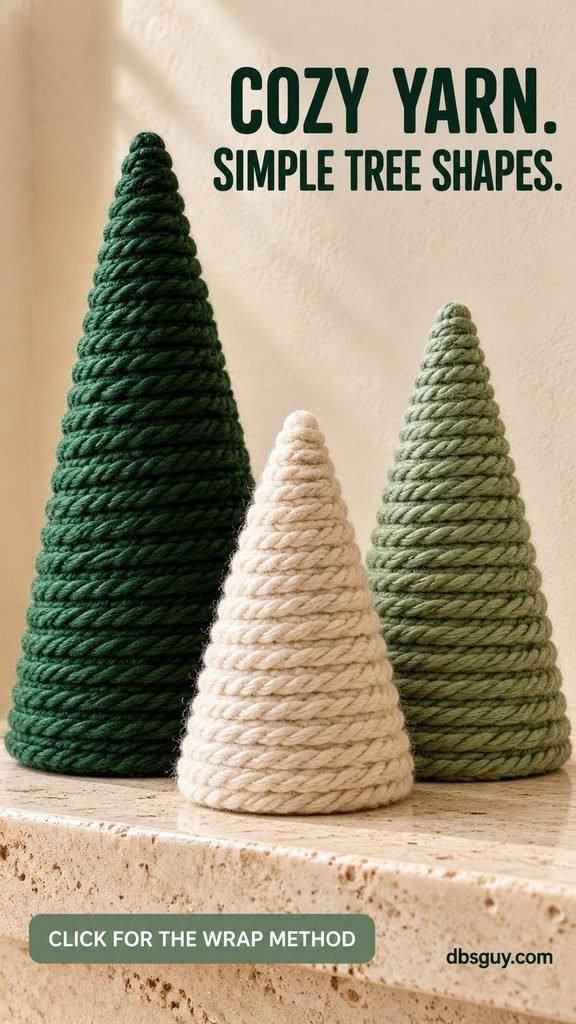
Supplies: 3 craft cones or firm cardstock cones, yarn in oatmeal, sage, and evergreen, scissors, and adhesive compatible with the cone material. A group around 6–10 inches tall works well; you can vary the cardstock cone heights if only one foam size is available.
- Start at the bottom edge and secure the yarn end with a small amount of appropriate adhesive.
- Wrap upward in close horizontal spirals, keeping each row against the last without pulling hard enough to dent the cone.
- Add small dots of adhesive where needed to hold the rows. Finish the tip with a short coil or tucked end.
- Let the adhesive set, then check that the base sits flat.
For a cardstock cone, roll the card into a cone, fasten the overlap, and trim the lower edge level before wrapping. Test the shape on the table first.
Chunky yarn covers quickly, but the amount needed depends on its thickness and your cone size. Wrap one cone before buying yarn for a large set. If using foam, check the adhesive label for foam compatibility and avoid heat or solvent products that can damage it.
17. Make a Ribbon Display for Christmas Cards
Let the cards you receive become part of the decorating. A small hanging display gets them off the counter and makes it easy to add another one.
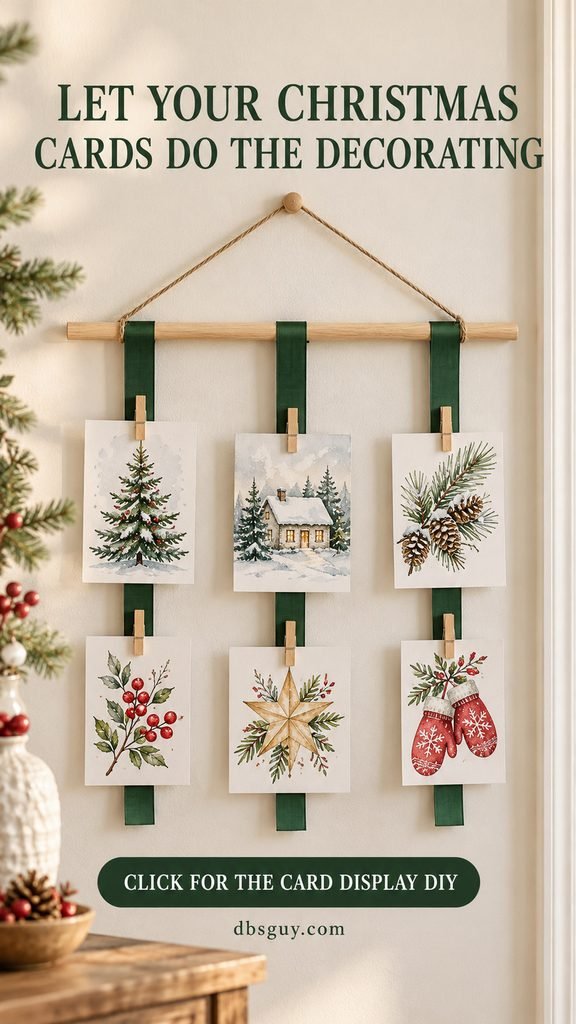
For the display shown: use a 12-inch wooden dowel, 3 strips of sturdy ribbon about 24 inches long, twine for a hanger, 6 small clothespins, and up to 6 light paper cards. Adapt the spacing to the cards you actually have.
- Fold the top of each ribbon over the dowel and fasten it securely with suitable adhesive or a few stitches. Space the strips evenly.
- Tie twine to both ends of the dowel to make a hanging loop.
- Hang the empty display from hardware suitable for the surface and total weight.
- Clip two cards to each ribbon, leaving enough room to see their designs. Adjust the spacing so cards do not overlap.
Grosgrain or another sturdy ribbon helps the clips stay put better than a very thin, slippery ribbon. Keep bulky cards on a shelf if they pull the display out of balance.
You can begin with just a few cards and let the display fill naturally through December. Pack the dowel, ribbons, and clips together afterward so the whole piece is easy to use again next year.
Questions That Help You Choose a Project
Which Dollar Tree Christmas DIY should a beginner try first?
The snowy jar and chair bows have the fewest preparation steps. Gift-bag artwork is also approachable if you are comfortable measuring and cutting a mat. Start with one item before making a matching set; it is easier to adjust supplies after a small trial.
Do all the supplies have to come from Dollar Tree?
No. These are Dollar Tree-friendly projects, with common substitutes and reused materials where they make sense. Use the frame, basket, fabric, boxes, or ribbon you already own. Paint for glass, specialty adhesive, and exact-size blanks may require another shop. Buying a whole new tool kit can erase the savings on a small decoration.
Can these decorations be used outside?
These versions are planned for indoor use. Paper stars, cardboard rings, and wrapped boxes are especially vulnerable to moisture. An outdoor adaptation needs materials, coatings, lights, adhesive, and mounting hardware labeled for the intended conditions. A clear topcoat alone does not make the complete project weatherproof.
When should I buy Christmas craft supplies?
For a U.S. holiday schedule, check your local selection in the fall when you are ready to plan your projects, then allow time for painting and curing before decorating. Seasonal stock changes, so there is no guaranteed nationwide date when every item is available. Buy enough matching material for the project you have chosen rather than relying on a later restock.
How do I keep the finished decorations from looking cluttered?
Start with one main project in each area. Give a paper star space on the wall, keep the mini tree’s base tidy, or let three bells be the focus of a door swag. Repeat one ribbon color or finish nearby, and stop when the individual shapes are still easy to see.