
Build a Christmas treat tray without turning on the oven: choose a creamy bite, a crunchy cookie, and something peppermint. These 31 no-bake Christmas cookies and treats include complete small-batch recipes, with ingredients, steps, setting times, and storage notes so you can choose what fits your day.
Start here: For easy gift bags, try the pretzel rods (#6), cracker cookies (#7), or candy cane hearts (#30). For a refrigerated party dessert, choose Oreo truffles (#1) or mini cheesecake cups (#17). For a classic cookie texture, start with the chocolate oatmeal cookies (#4).

The images are AI-generated food concepts, not photographs of kitchen-tested batches. These research-informed recipes have not been kitchen-tested for this article; yields and timing are estimates, and brands can affect texture.
Before You Start: What “No-Bake” Means Here
None of these recipes needs an oven. Some use a microwave or stovetop to melt chocolate, marshmallows, or caramel. The date bites, coconut snowballs, cream cheese mints, and icebox squares are assembled without cooking. Allow the full chilling time even when hands-on prep is short.
- Measure in U.S. cups and spoons. Ingredient ounces describe weight; a 14-ounce can of sweetened condensed milk is not evaporated milk.
- Use candy coating where specified. It is sold as melting wafers or candy melts. Follow the package directions; plain melted chocolate may need tempering for a firm room-temperature shell.
- Keep melting bowls dry. For chocolate without package directions, use 50% microwave power in 20–30-second bursts and stir thoroughly between bursts.
- Check ingredient labels. Milk, wheat, soy, peanuts, tree nuts, and other allergens occur throughout this collection. No-bake does not automatically mean gluten-free or suitable for a school event.
If you are combining oven-free treats with a baked option, see Quick and Easy Choc Chip Cookies for First-Time Bakers.
1. Oreo Christmas Truffles
A dark cookie center under a white shell gives these two-bite treats a striking contrast. Use regular sandwich cookies, filling included; extra-stuffed cookies change the texture.
Makes about 36 | Hands-on: 25 minutes | Chill/set: about 1 hour | Heat: microwave

Ingredients
- 36 regular Oreo cookies, finely crushed
- 8 ounces full-fat block cream cheese, softened
- 16 ounces white candy coating, melted
- 2 tablespoons red and green sprinkles
How to Make Them
- Mix the crumbs and cream cheese until no white streaks remain. Roll into 36 roughly 1-inch balls on a parchment-lined tray.
- Refrigerate for 30 minutes, until firm. Melt the coating according to its package directions.
- Dip each ball with a fork, tap off excess coating, and return to the tray. Add sprinkles before the shell sets; refrigerate for about 30 minutes.
Helpful detail: Keep most of the centers chilled while dipping a few at a time. Very cold, frozen centers can crack their coating as they warm.
Storage: Refrigerate airtight and use within 4 days. Carry in an insulated bag with an ice pack.
2. Peanut Butter Buckeyes
Leave a small patch of peanut butter showing when you dip these. That tan circle is what separates a buckeye from an ordinary chocolate-covered peanut butter ball.
Makes about 24 | Hands-on: 25 minutes | Chill/set: 1 hour | Heat: microwave

Ingredients
- 1 cup conventional creamy peanut butter
- 4 tablespoons unsalted butter, softened
- 2 cups powdered sugar, plus 2–4 tablespoons if needed
- 1 teaspoon vanilla extract
- 10 ounces dark chocolate candy coating
How to Make Them
- Beat peanut butter, butter, and vanilla together. Work in powdered sugar until the mixture can be rolled; add a little more only if it remains sticky.
- Roll into 24 balls and chill for 30 minutes. Melt the coating as directed on its package.
- Use a toothpick to lower each ball most of the way into the coating, leaving a tan circle uncovered. Set on parchment, smooth the toothpick hole, and chill until firm.
Helpful detail: Stirred natural peanut butter can make the centers oily or loose. Use a conventional creamy spread for this version.
Storage: Refrigerate airtight for up to 1 week; serve cool so the centers hold their shape.
3. Cornflake Christmas Wreaths
These chewy, crunchy rings bring bright color to a mostly chocolate tray. Have the candies ready before melting the marshmallows so you can shape while the mixture is pliable.
Makes about 18 | Hands-on: 20 minutes | Set: 45–60 minutes | Heat: stovetop

Ingredients
- 4 tablespoons unsalted butter
- 10 ounces mini marshmallows
- 1 teaspoon vanilla extract
- Green gel food coloring, a drop at a time
- 5 cups cornflakes
- 54 small red candies; optional edible green holly-leaf decorations
How to Make Them
- Line two trays with parchment. Melt butter in a large saucepan over low heat; stir in marshmallows until just melted.
- Remove from heat. Stir in vanilla and enough coloring for a green tint, then gently fold in cornflakes.
- Let cool briefly until safe to touch. With lightly buttered fingers, divide into 18 mounds and open a hole in each center. Press on three red candies and optional sugar leaves. Let set.
Helpful detail: Use low heat and a light touch. Hard-boiling the marshmallows or crushing the flakes makes the wreaths denser.
Storage: Keep airtight at cool room temperature for 2 days for the best texture. Separate layers with parchment.
4. Chocolate Oatmeal No-Bake Cookies
This is the stovetop cookie in the collection: cocoa syrup binds the oats as it cools. Set out your lined trays and measure the oats before starting the saucepan.
Makes about 24 | Hands-on: 15 minutes | Set: 45–60 minutes | Heat: stovetop

Ingredients
- 2 cups granulated sugar
- ½ cup unsalted butter
- ½ cup whole milk
- ¼ cup unsweetened cocoa powder
- ½ cup conventional creamy peanut butter
- 1 teaspoon vanilla extract
- 3 cups quick-cooking oats
How to Make Them
- Combine sugar, butter, milk, and cocoa in a medium saucepan. Stir over medium heat until evenly bubbling across the surface.
- Once a full rolling boil begins, boil for 1 minute while stirring, then remove from heat.
- Stir in peanut butter and vanilla, followed by oats. Immediately scoop 24 mounds onto parchment. Leave undisturbed until firm.
Helpful detail: Start timing at the rolling boil. Too little cooking can leave a loose cookie; too much can make it dry. Old-fashioned oats give a chunkier result than quick oats.
Storage: Store airtight at cool room temperature for up to 3 days, or refrigerate for up to 1 week.
5. Layered Peppermint Bark
Thin layers are easier to bite than a thick chocolate slab. Crushed candy canes provide the mint flavor, so there is no need to add a liquid extract to melted chocolate.
Makes about 20 pieces | Hands-on: 20 minutes | Set: 45–60 minutes | Heat: microwave

Ingredients
- 8 ounces dark chocolate candy coating
- 8 ounces white candy coating
- ⅓ cup crushed candy canes
How to Make Them
- Melt the dark coating as directed and spread into a roughly 9-by-12-inch rectangle on parchment.
- Allow it to become mostly firm but still slightly tacky. Melt the white coating, let it cool briefly while remaining spreadable, and spread gently over the dark layer.
- Scatter crushed candy canes on top, pressing very lightly. Let set completely, then break into pieces.
Helpful detail: Do not pour piping-hot coating onto the lower layer. If the two colors swirl slightly, let that be part of the finish rather than repeatedly spreading.
Storage: Keep airtight in a cool, dry room for up to 1 week. Humidity makes peppermint pieces sticky.
6. Chocolate-Dipped Pretzel Rods
Long pretzel rods are easy to portion into individual treat bags. Leaving the bottom third bare gives everyone a clean handle.
Makes 16 | Hands-on: 20 minutes | Set: about 30 minutes | Heat: microwave

Ingredients
- 16 large pretzel rods
- 6 ounces dark chocolate candy coating
- 6 ounces white candy coating
- 3 tablespoons Christmas sprinkles
How to Make Them
- Line a tray with parchment. Melt each coating separately according to its package directions.
- Pour a coating into a narrow heatproof cup, or spoon it over the upper two-thirds of each rod. Let excess drip off.
- Lay flat on parchment and add sprinkles while wet. Repeat with the second color and leave until completely set.
Helpful detail: A tall cup helps with dipping, but it must be stable. Spoon the coating over the rod if your cup is too shallow.
Storage: Store airtight at cool room temperature for up to 1 week. Bag only after the coating is firm.
7. Peanut Butter Cracker Cookies
Buttery crackers give these sandwich cookies a crisp, lightly salty middle. A thin filling works better than an overstuffed sandwich, which can slide apart during dipping.
Makes 20 | Hands-on: 25 minutes | Set: about 30 minutes | Heat: microwave

Ingredients
- 40 round buttery crackers
- ½ cup conventional creamy peanut butter
- 12 ounces dark chocolate candy coating
How to Make Them
- Spread about 1 teaspoon peanut butter on 20 crackers and top with the remaining crackers. Chill for 10 minutes if the filling feels soft.
- Melt the coating according to the package. Lower each sandwich into it with a fork, turn to coat, and lift out.
- Tap gently against the bowl to release excess coating. Slide onto parchment and allow to set.
Helpful detail: Avoid squeezing hard when assembling; small cracks can spread once the cracker meets warm coating.
Storage: Keep airtight in a cool room for up to 5 days. Pack in a single layer or with parchment dividers.
8. Butterscotch Haystacks
Crunchy ready-to-eat chow mein noodles make these look delightfully untidy. They add a different shape and texture beside smooth fudge and round truffles.
Makes about 24 | Hands-on: 15 minutes | Set: 45 minutes | Heat: microwave

Ingredients
- 11 ounces butterscotch baking chips
- ¼ cup conventional creamy peanut butter
- 3 cups crispy ready-to-eat chow mein noodles
- ½ cup roasted peanuts
How to Make Them
- Combine chips and peanut butter in a dry microwave-safe bowl. Heat at 50% power in 20-second bursts, stirring well, until smooth.
- Fold in noodles and peanuts without crushing the strands.
- Spoon 24 small mounds onto parchment. Let set in a cool room, or refrigerate briefly until firm.
Helpful detail: Choose the crisp salad-topping noodles, not uncooked noodles that require boiling. Butterscotch chips scorch easily, so use gentle heat.
Storage: Store airtight at cool room temperature for up to 5 days; refrigerate if the coating softens.
9. Rocky Road Clusters
These rough little clusters combine soft marshmallow pockets with peanut crunch. Let the chocolate lose its heat before adding marshmallows so they stay recognizable.
Makes about 24 | Hands-on: 15 minutes | Set: 45 minutes | Heat: microwave

Ingredients
- 12 ounces dark chocolate candy coating
- 2 cups mini marshmallows
- 1 cup roasted salted peanuts
How to Make Them
- Melt the coating as its package directs. Stir and let it stand for a few minutes until warm rather than hot, while still fluid.
- Fold in marshmallows and peanuts until coated.
- Drop tablespoon-size clusters onto parchment and let them firm up. Use a second spoon to push sticky mounds off the first.
Helpful detail: Adding marshmallows straight to very hot chocolate can turn the mixture into a sticky mass instead of separate clusters.
Storage: Keep airtight at cool room temperature for up to 5 days. Avoid packing them beside strongly mint-flavored candy.
10. Coconut Snowballs
A snowy coconut coating makes these a bright, simple addition to a holiday plate. This version uses sweetened condensed milk to bind the filling, without raw eggs or flour.
Makes about 24 | Hands-on: 20 minutes | Chill: 1 hour | Heat: none

Ingredients
- 3 cups finely shredded sweetened coconut, plus ½ cup for rolling
- ½ cup sweetened condensed milk
- ½ teaspoon vanilla extract
- ⅛ teaspoon fine salt
How to Make Them
- Mix 3 cups coconut with condensed milk, vanilla, and salt. Let stand for 10 minutes to allow the coconut to absorb moisture.
- Squeeze a small portion together; if it crumbles, add condensed milk 1 teaspoon at a time. If loose, add a little more coconut.
- Shape into 24 small balls, roll in the remaining coconut, and refrigerate until firm.
Helpful detail: Finely shredded coconut packs together more readily than broad coconut flakes. Briefly pulse very long shreds in a food processor.
Storage: Refrigerate airtight and use within 4 days. Place in small paper cups before serving.
11. No-Bake Chocolate Salami
This egg-free dessert log gets its name from the pale biscuit pieces scattered through each dark slice. It is a useful option when you want something different from another tray of balls.
Makes about 18 slices | Hands-on: 20 minutes | Chill: at least 3 hours | Heat: microwave

Ingredients
- 8 ounces semisweet chocolate, chopped
- 4 tablespoons unsalted butter
- ⅓ cup heavy cream
- 6 ounces plain tea biscuits, roughly broken
- ⅓ cup shelled roasted pistachios, chopped
- 1 tablespoon powdered sugar
How to Make Them
- Melt chocolate, butter, and cream together at 50% microwave power in 20-second bursts, stirring between each. Let cool until thick but still stirrable.
- Fold in biscuit pieces and pistachios. If loose, refrigerate for 15–20 minutes, checking often, until moldable.
- Spoon onto parchment and roll into a log about 9 inches long. Wrap tightly and refrigerate for at least 3 hours. Unwrap, dust lightly with powdered sugar, and cut into thin slices.
Helpful detail: Keep some biscuit pieces about ½ inch across; powdered crumbs alone will not give the distinctive speckled slices.
Storage: Refrigerate airtight and use within 4 days. Slice while cold and return unused portions to the refrigerator.
12. Chocolate Peanut Butter Bars
A graham-crumb base makes these firmer and more cookie-like than buckeyes. Cut them small: the dense peanut butter layer is rich.
Makes 25 small squares | Hands-on: 20 minutes | Chill: 2 hours | Heat: microwave

Ingredients
- ½ cup unsalted butter, melted
- 1 cup fine graham cracker crumbs
- 1 cup powdered sugar
- ½ cup conventional creamy peanut butter, plus 2 tablespoons for topping
- 6 ounces semisweet chocolate, chopped
How to Make Them
- Line an 8-inch square pan with parchment, leaving an overhang. Mix melted butter, crumbs, sugar, and ½ cup peanut butter; press evenly into the pan.
- Melt chocolate with the remaining 2 tablespoons peanut butter at 50% power in short bursts, stirring until smooth. Spread over the base.
- Refrigerate for about 2 hours, until firm. Lift out and let stand for 5–10 minutes before cutting with a sharp knife.
Helpful detail: A brief rest before slicing helps the chocolate top bend slightly instead of shattering over a cold base.
Storage: Refrigerate airtight for up to 1 week, with parchment between layers.
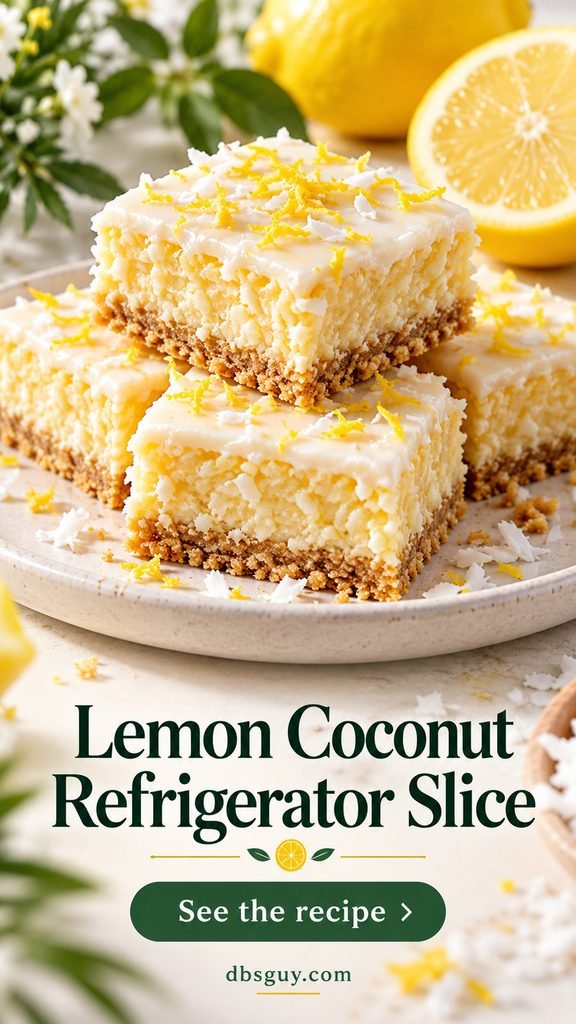
13. Lemon Coconut Refrigerator Slice
Lemon adds a welcome bright note to a chocolate-heavy Christmas plate. A graham base, coconut filling, and thin lemon icing make three distinct layers, all set in the refrigerator.
Makes 16 squares | Hands-on: 20 minutes | Chill: 3 hours | Heat: microwave
Ingredients
- 2 cups fine graham cracker crumbs
- ½ cup unsalted butter, melted
- 2 cups finely shredded sweetened coconut
- ½ cup sweetened condensed milk
- 1 tablespoon finely grated lemon zest, plus a little to garnish
- 2 tablespoons fresh lemon juice, divided
- 1 cup powdered sugar
- 1–2 teaspoons milk, only if needed
How to Make Them
- Line an 8-inch square pan with parchment. Mix graham crumbs and melted butter, press firmly into the pan, and refrigerate for 20 minutes.
- Mix coconut, condensed milk, zest, and 1 tablespoon lemon juice into a thick filling. Press gently over the chilled base.
- Stir powdered sugar with the remaining 1 tablespoon juice; add milk a few drops at a time only if needed for thick spreadable icing. Spread thinly over the coconut, add a little zest, and refrigerate for at least 3 hours before cutting.
Helpful detail: Use the yellow part of the peel for zest; the white pith underneath adds bitterness.
Storage: Refrigerate airtight and use within 4 days. These are chilled dessert squares rather than a room-temperature shipping cookie.
14. Gingerbread Date Bites
Dates and walnuts provide the body here, while molasses and warm spices supply gingerbread flavor. There is no raw flour or gingerbread dough involved.
Makes about 18 | Hands-on: 20 minutes | Chill: 30 minutes | Heat: none

Ingredients
- 1 cup packed pitted soft Medjool dates
- ¾ cup roasted walnuts
- ½ cup rolled oats labeled ready to eat
- 1 tablespoon molasses
- 1 teaspoon ground ginger
- ½ teaspoon ground cinnamon
- ⅛ teaspoon fine salt
- 1 tablespoon unsweetened cocoa for optional dusting
How to Make Them
- Pulse walnuts and oats in a food processor until finely chopped. Add dates, molasses, spices, and salt; process until a pinched portion holds together.
- If crumbly, add water 1 teaspoon at a time; if too sticky, add a little more oats.
- Roll into 18 balls. Dust lightly with cocoa if desired and chill for 30 minutes.
Helpful detail: If the dates are dry, soak in warm water for 10 minutes, then drain and pat very dry before measuring. Check that every pit has been removed.
Storage: Refrigerate airtight and use within 4 days. Let stand a few minutes before serving for a softer bite.
15. Peppermint Cream Cheese Mints
Tiny fork-pressed mints bring a soft pastel accent to the plate. Make them smaller than a cookie; they are sweet, concentrated little candies.
Makes about 60 small mints | Hands-on: 25 minutes | Chill: 1 hour | Heat: none

Ingredients
- 4 ounces full-fat block cream cheese, softened
- 4 cups powdered sugar, plus extra for pressing
- ¼ teaspoon peppermint extract, plus more to taste
- Pink and green gel food coloring, optional
How to Make Them
- Beat cream cheese and peppermint extract until smooth. Mix in powdered sugar gradually to make a firm dough. Taste a tiny piece before adding any more extract.
- Divide and tint portions if desired. Roll ½-teaspoon pieces into balls and set on parchment.
- Dip a fork in powdered sugar and press each mint gently. Refrigerate uncovered until the surface firms, about 1 hour, then cover.
Helpful detail: Use peppermint extract, not peppermint essential oil. Different extracts vary in strength, so begin with the smaller amount.
Storage: Keep refrigerated in a covered container and use within 4 days. Serve in small batches.
16. Easy Chocolate Fudge
Sweetened condensed milk makes this a melt-and-chill fudge, without a boiling sugar syrup. Check the can carefully: evaporated milk is not an interchangeable ingredient.
Makes 36 small squares | Hands-on: 10 minutes | Chill: 3 hours | Heat: microwave

Ingredients
- 18 ounces semisweet chocolate chips
- 1 can (14 ounces) sweetened condensed milk
- 1 teaspoon vanilla extract
How to Make Them
- Line an 8-inch square pan with parchment. Combine chocolate and condensed milk in a dry microwave-safe bowl.
- Heat at 50% power in 30-second bursts, stirring thoroughly each time, until smooth. Stir in vanilla.
- Spread into the pan and refrigerate for at least 3 hours, until firm throughout. Lift out and cut into 36 squares.
Helpful detail: Keep the chocolate-to-milk ratio intact. Swapping white chocolate or adding a liquid flavoring can change how firmly this sets.
Storage: Refrigerate airtight for up to 1 week. Serve small pieces and keep the remainder cool.
17. Mini Christmas Cheesecake Cups
Spoonable cheesecake cups suit a dessert table better than a cookie tin. Small clear cups show the crumb base, and there is no crust to bake.
Makes 12 small 3-ounce cups | Hands-on: 25 minutes | Chill: 4 hours | Heat: microwave for butter

Ingredients
- ¾ cup fine graham cracker crumbs
- 2 tablespoons unsalted butter, melted
- 8 ounces full-fat block cream cheese, softened
- ⅓ cup powdered sugar
- 1 teaspoon vanilla extract
- ¾ cup cold heavy whipping cream
- 1 tablespoon red and green sprinkles
How to Make Them
- Mix crumbs and butter; divide between 12 small cups and press lightly.
- Beat cream cheese, powdered sugar, and vanilla until smooth. In a separate cold bowl, whip cream to stiff peaks; fold gently into the cream cheese mixture.
- Spoon or pipe over the crumbs. Cover and refrigerate for at least 4 hours. Add sprinkles just before serving.
Helpful detail: These are soft dessert cups, not freestanding cheesecakes. Do not unmold them or use low-fat tub cream cheese in this formulation.
Storage: Refrigerate covered and use within 3 days. Keep chilled until service.
18. Rice Krispies Christmas Trees
Flat triangles turn a classic cereal treat into Christmas trees without special molds. A pretzel trunk gives each one an easy-to-recognize silhouette.
Makes about 16 | Hands-on: 25 minutes | Cool: 30–45 minutes | Heat: stovetop
Ingredients
- 3 tablespoons unsalted butter
- 10 ounces mini marshmallows
- 6 cups crispy rice cereal
- Green gel food coloring
- 16 short pretzel-stick pieces
- 2 tablespoons small holiday sprinkles
- 1 tablespoon melted candy coating, optional, to attach sprinkles
How to Make Them
- Line a 9-by-13-inch pan with parchment. Melt butter over low heat, add marshmallows, and stir just until melted. Remove from heat and tint green.
- Fold in cereal and press gently into the pan with a buttered spatula. Cool until firm enough to handle, about 30 minutes.
- Lift out, cut into triangles, and gently insert a short pretzel piece in each bottom edge. Press on sprinkles; use tiny dots of melted candy coating if the surface is no longer tacky.
Helpful detail: Compress only enough to hold the slab together. Hard packing makes cereal treats tougher to bite.
Storage: Store airtight at room temperature for up to 2 days. Separate layers with parchment.
19. Cranberry White Chocolate Popcorn
Dried cranberries and pistachios add red and green without needing a bowlful of candy. This is a snack mix to scoop into cups, rather than an individually shaped cookie.
Makes about 10 cups | Hands-on: 15 minutes | Set: 30 minutes | Heat: microwave

Ingredients
- 8 cups popped plain popcorn, unpopped kernels removed
- 10 ounces white candy coating
- ¾ cup dried cranberries
- ½ cup shelled roasted pistachios, roughly chopped
How to Make Them
- Spread popcorn on two parchment-lined trays. Melt the coating as directed on its package.
- Drizzle over the popcorn and turn gently with two spoons. Scatter on cranberries and pistachios while the coating is wet.
- Allow to set, then break apart any large clumps.
Helpful detail: Remove hard kernels before adding coating; they are much harder to spot after everything turns white.
Storage: Keep airtight in a cool, dry room and enjoy within 2 days for the best crunch.
20. Chocolate Almond-Stuffed Dates
A whole almond inside each date makes a compact sweet with a chewy center and a little crunch. Half-dipping keeps the fruit visible.
Makes 20 | Hands-on: 20 minutes | Set: 30 minutes | Heat: microwave

Ingredients
- 20 soft Medjool dates
- 20 roasted unsalted almonds
- 6 ounces dark chocolate candy coating
- A small pinch of flaky salt
How to Make Them
- Slit each date lengthwise and remove the pit, even if the package says pitted. Tuck one almond inside and press the date closed.
- Melt the coating as directed. Dip each date halfway, let excess drip off, and place on parchment.
- Add a few salt flakes while the coating is wet, then let set.
Helpful detail: Choose plump, pliable dates. Dry dates will not close neatly around the almond.
Storage: Refrigerate airtight for up to 1 week. Allow a short rest before serving so the date softens.
21. Chocolate Orange Truffles
Unlike crumb-based cookie balls, these have a smooth ganache center. Fresh orange zest adds aroma without thinning the chocolate with juice.
Makes about 24 | Hands-on: 25 minutes | Chill: 3 hours | Heat: stovetop

Ingredients
- 8 ounces semisweet chocolate (about 60% cacao), finely chopped
- ½ cup heavy cream
- 1 teaspoon finely grated orange zest
- ¼ cup unsweetened cocoa powder
How to Make Them
- Place chocolate in a heatproof bowl. Warm cream and zest in a small saucepan until steaming, without a vigorous boil. Pour over the chocolate and leave for 3 minutes.
- Stir slowly from the center until smooth. Cover and chill for 2–3 hours, until scoopable. If very firm, let stand briefly.
- Scoop small portions, roll quickly with cool hands, and coat in cocoa. Refrigerate again until firm.
Helpful detail: Use chopped chocolate bars for a smooth center. Do not replace the cream with orange juice.
Storage: Refrigerate airtight and use within 4 days. Serve cool, allowing only a few minutes to soften.
22. Marshmallow Reindeer
This decorating project suits a relaxed afternoon: adults can manage the warm coating while children add faces once it has cooled enough to handle safely.
Makes 12 | Hands-on: 30 minutes | Set: 30 minutes | Heat: microwave

Ingredients
- 12 large marshmallows
- 8 ounces dark chocolate candy coating
- 12 small pretzel twists, carefully broken into 24 antler pieces
- 24 candy eyes
- 12 small red candy noses
How to Make Them
- Line a tray with parchment and sort the decorations. Melt the coating according to its package.
- Dip the top and upper half of a marshmallow into the coating, leaving the lower part white. Let excess drip off and set upright on the tray. While the coating is soft, press two pretzel pieces into its upper sides.
- Attach two eyes and a red nose, using a dot of coating as glue when needed. Repeat and leave until firm.
Helpful detail: Check the pretzel pieces before starting. A wide, branched piece reads as an antler more clearly than a short straight fragment.
Storage: Keep airtight at cool room temperature for up to 2 days; humidity softens the pretzels.
23. Snowman Sandwich Cookies
A white-coated sandwich cookie becomes a snowman face with just a few dots. Keep the expression simple so the decorating stays manageable.
Makes 20 | Hands-on: 30 minutes | Set: 30 minutes | Heat: microwave

Ingredients
- 20 regular chocolate sandwich cookies
- 12 ounces white candy coating
- 2 tablespoons mini chocolate chips or dark decorating icing
- 20 small orange carrot-shaped sprinkles
How to Make Them
- Melt white coating according to its package. Dip cookies individually with a fork, tap off excess, and set on parchment.
- Before the coating firms, add two small chocolate eyes and an orange sprinkle nose. Use extra mini chips for a dotted smile, or pipe the smile with dark icing once the white shell sets.
- Let stand until firm before lifting or stacking.
Helpful detail: Keep dark icing off your dipping fork; even a small smear can muddy the next white cookie.
Storage: Keep airtight at cool room temperature for up to 5 days, with parchment between layers.
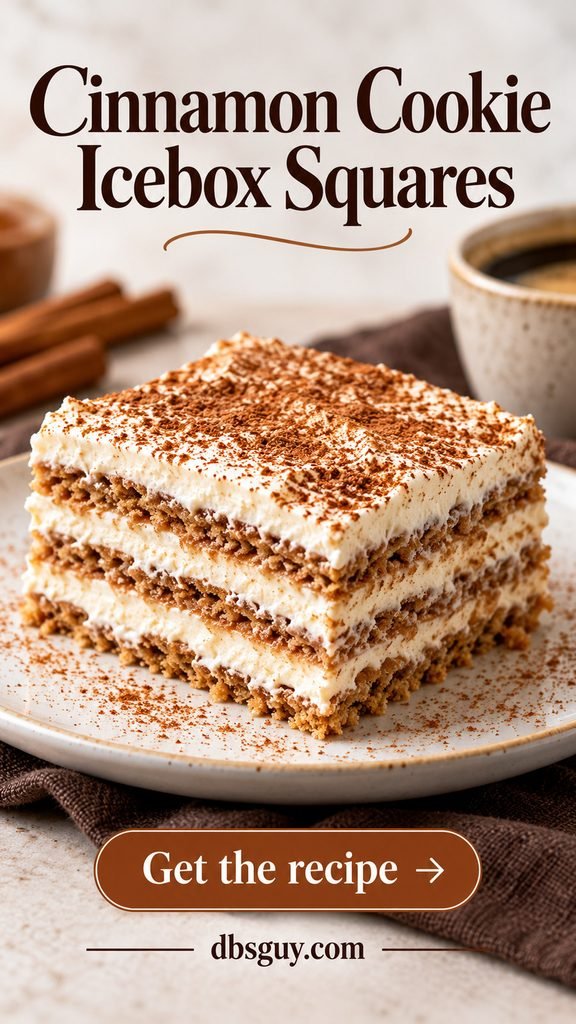
24. Cinnamon Cookie Icebox Squares
An overnight chill softens thin spiced cookies into cake-like layers. This is a fork dessert for a holiday gathering, rather than a treat to pack in a gift bag.
Makes 9 small dessert squares | Hands-on: 20 minutes | Chill: 8–12 hours | Heat: none
Ingredients
- 2 cups cold heavy whipping cream
- ¼ cup powdered sugar
- 1 teaspoon vanilla extract
- ½ teaspoon ground cinnamon, plus a little for the top
- About 30 thin caramelized spiced biscuits, such as Biscoff
How to Make Them
- Line an 8-inch square pan with parchment or food wrap. Whip cream, sugar, vanilla, and ½ teaspoon cinnamon to stiff peaks.
- Spread a thin layer of cream in the pan. Add a single layer of biscuits, breaking a few to fit. Repeat with cream and cookies to make three cookie layers, finishing with cream.
- Cover and refrigerate for 8–12 hours. Dust lightly with cinnamon, lift carefully, and cut with a clean knife. Serve with a spatula.
Helpful detail: Use thin crisp cookies. Thick sandwich cookies take longer to soften and will give a different result.
Storage: Refrigerate covered and use within 3 days. Return the pan to the refrigerator between servings.
25. Chocolate-Dipped Apricots
Orange apricots look cheerful against dark chocolate, and a little chopped pistachio adds another texture. They are quick enough for a small last-minute plate.
Makes about 24 pieces | Hands-on: 15 minutes | Set: 30 minutes | Heat: microwave

Ingredients
- 24 soft dried apricot halves
- 6 ounces dark chocolate candy coating
- ¼ cup shelled roasted pistachios, finely chopped
How to Make Them
- Pat apricots dry if the surfaces feel damp. Melt the coating as directed.
- Dip each apricot halfway, let the excess run off, and place on parchment.
- Sprinkle chopped pistachios over the wet coating. Let set fully before moving.
Helpful detail: Use moist, pliable dried apricots rather than hard, leathery ones. Keep the undipped orange half visible.
Storage: Keep airtight in a cool, dry room for up to 5 days, following any stricter storage directions on the fruit package.
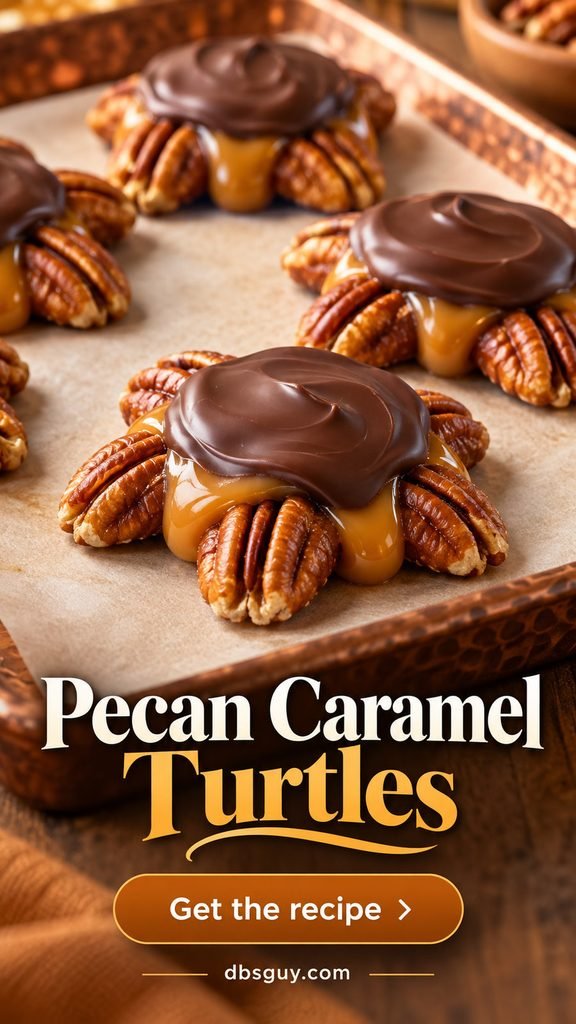
26. Pecan Caramel Turtles
Pecan halves form the base for a spoonful of caramel and chocolate. The nuts should extend beyond the center so the clusters keep their turtle-like shape.
Makes 20 | Hands-on: 25 minutes | Set: 45–60 minutes | Heat: microwave
Ingredients
- 100 roasted pecan halves (about 2 cups)
- 8 ounces soft individually wrapped caramels, unwrapped
- 1 tablespoon heavy cream
- 8 ounces dark chocolate candy coating
How to Make Them
- Arrange pecans in 20 small groups of five on parchment.
- Heat caramels and cream in a microwave-safe bowl in 20-second bursts, stirring carefully until smooth. Spoon about 1 teaspoon over each nut group. Allow to firm slightly.
- Melt the chocolate coating as directed and spoon a little over each caramel center. Let set, refrigerating briefly if needed.
Helpful detail: Caramel is very hot and sticky when melted. Handle the bowl carefully, and keep children away from that step.
Storage: Refrigerate airtight and use within 4 days. Let stand for a few minutes before serving so the caramel is easier to bite.
27. Christmas Puppy Chow
This powdered-sugar cereal snack is also called muddy buddies. Despite the name, it is a chocolate treat for people and must be kept away from pets.
Makes about 10 cups | Hands-on: 20 minutes | Cool: 30 minutes | Heat: microwave

Ingredients
- 9 cups rice or corn square cereal, such as Chex
- 1 cup semisweet chocolate chips
- ½ cup conventional creamy peanut butter
- ¼ cup unsalted butter
- 1 teaspoon vanilla extract
- 1½ cups powdered sugar
- ¾ cup red and green candy-coated chocolates
How to Make Them
- Put cereal in a very large bowl. Melt chips, peanut butter, and butter at 50% microwave power in 20-second bursts, stirring until smooth; add vanilla.
- Pour over cereal and fold gently until coated. Let cool briefly, then add to a large food-safe zip-top bag with powdered sugar. Work in two batches if needed.
- Seal and shake gently to coat. Spread on parchment to cool completely, then mix in red and green candies.
Helpful detail: Add the colored candies only after cooling. Warm chocolate can smear their shells and melt the sugar coating.
Storage: Refrigerate airtight and use within 3 days for the best texture. Let the sealed container stand briefly before opening to limit condensation.
28. Cherry Coconut Chocolate Cups
Finely chopped cherries add tiny red flecks to a coconut filling inside a dark shell. Drying the fruit well is the key to keeping the center manageable.
Makes 18 mini cups | Hands-on: 30 minutes | Chill/set: 1 hour | Heat: microwave

Ingredients
- 12 ounces dark chocolate candy coating
- 1½ cups finely shredded sweetened coconut, plus a little extra for optional garnish
- ⅓ cup sweetened condensed milk
- ⅓ cup maraschino cherries, drained, thoroughly dried, and finely chopped, plus a little extra for optional garnish
How to Make Them
- Line 18 mini muffin wells with paper liners. Melt the coating according to its package and spoon a thin layer into each liner, brushing it slightly up the sides. Chill for 10 minutes.
- Mix coconut, condensed milk, and cherries. Divide into small mounds and press one into each shell, keeping the filling below the rim.
- Cover with the remaining coating. If desired, add a few dry cherry bits and coconut shreds as garnish before it sets. Chill until firm, about 45 minutes.
Helpful detail: Add a little more coconut if the filling is loose. Avoid pouring cherry syrup into the melted coating.
Storage: Refrigerate airtight and use within 4 days. Keep in paper liners for serving.
29. Caramel Pretzel Bites
A soft caramel layer joins two square pretzels for a small, salty sandwich. Half-dipping leaves the shape and filling easy to see.
Makes 24 | Hands-on: 30 minutes | Set: 30 minutes | Heat: microwave

Ingredients
- 48 small square pretzels
- 24 soft caramel candies, unwrapped
- 8 ounces dark chocolate candy coating
- A small pinch of flaky salt, optional
How to Make Them
- Place 6 pretzels at a time on a microwave-safe plate lined with parchment, each topped with one caramel. Microwave in 5-second bursts just until caramels are soft enough to press, without bubbling.
- With a second pretzel, carefully press each warm caramel into a sandwich. Let cool and firm before dipping.
- Melt the coating as directed. Dip each sandwich halfway, place on parchment, and add a few salt flakes if desired. Leave until set.
Helpful detail: Caramel sizes vary. If your candies overhang the pretzel heavily, cut them smaller before warming; stop heating as soon as they soften.
Storage: Keep airtight at cool room temperature for up to 3 days. Choose a cool serving spot to limit softening.
30. Candy Cane Chocolate Hearts
Two mini candy canes make the outline, and a spoonful of white coating holds the heart together. Arrange the canes first so the centers can be filled quickly.
Makes 12 | Hands-on: 20 minutes | Set: 30 minutes | Heat: microwave

Ingredients
- 24 mini candy canes, unwrapped
- 8 ounces white candy coating
- 1 tablespoon small red and green sprinkles
How to Make Them
- On parchment, arrange pairs of candy canes facing inward, with their curved ends and bottom tips touching to form hearts.
- Melt coating according to its package. Spoon into each heart, spreading gently so it touches the inside edges and joins the two canes.
- Add sprinkles and let set fully. Peel the parchment away carefully, supporting each heart underneath.
Helpful detail: Pick pairs of similar size. Large gaps between the candy canes make the outline more fragile.
Storage: Keep airtight at cool room temperature for up to 1 week. Wrap individually only once firm and keep dry.
31. Chocolate Potato Chip Clusters
Ridged potato chips add a thin, salty crunch to these irregular chocolate bites. This is a useful way to finish a tray with something less tidy and more textured.
Makes about 20 | Hands-on: 15 minutes | Set: 30 minutes | Heat: microwave

Ingredients
- 10 ounces dark chocolate candy coating
- 3 cups thick ridged potato chips, lightly broken into bite-size pieces
- A tiny pinch of flaky salt, optional
How to Make Them
- Melt the coating as directed on its package. Let it cool for a minute while remaining fluid.
- Fold in the chip pieces gently, leaving some ridged edges visible rather than crushing them into crumbs.
- Drop small spoonfuls onto parchment. Add a few salt flakes only if the chips need it, then leave until firm.
Helpful detail: Taste the chips before adding extra salt. Thick ridged chips hold their texture better than very thin chips.
Storage: Keep airtight in a cool, dry room and enjoy within 2 days for the best crunch.
Make a Tray That Fits Your Plans
You do not need to make all 31 recipes. A small selection with different textures is easier to shop for and more interesting to eat than several similar chocolate balls.
- A gift-bag trio: peppermint bark, dipped pretzel rods, and cracker cookies. Let every coating set before packing.
- A family decorating afternoon: cornflake wreaths, marshmallow reindeer, and snowman cookies. Adults handle heat; younger helpers add decorations appropriate for their age.
- A chilled dessert spread: cheesecake cups, chocolate orange truffles, and lemon coconut slices. Keep the reserve portions in the refrigerator.
Buy shared ingredients once: parchment, candy coating, sprinkles, and a conventional creamy peanut butter cover several recipes. Check the quantities for the batches you actually choose before shopping.
Make-Ahead, Storage, and Gifting
Make the fudge and chilled bars ahead, then save popcorn, potato-chip clusters, and cereal treats for closer to serving so they keep their crunch. The storage times above are conservative home-storage guidelines, not laboratory shelf-life testing. Follow a shorter ingredient-package limit whenever one applies.
Keep cream cheese, whipped cream, ganache, and other perishable treats at 40°F or below. Limit their total time out of refrigeration to 2 hours, or 1 hour above 90°F. Offer a small plate and replenish it with chilled portions. The FDA’s food-storage guidance explains these temperature and time limits.
For freezing, start with a small trial portion of a dense treat such as buckeyes, fudge, or peanut butter bars. Freeze set pieces in a single layer, then pack airtight with parchment between layers; aim to use within a month for quality. Thaw sealed in the refrigerator to limit condensation. Do not assume popcorn, candy cane decorations, or whipped desserts will keep the same texture after freezing.
Use food-safe bags, boxes, or tins and separate strong peppermint flavors from mild cookies. Label ingredients and refrigeration needs. A refrigerated truffle belongs in a chilled hand-delivered box, not a room-temperature mailed gift. For presentation ideas, browse 30 DIY Christmas Gift Basket Ideas That Are Perfect for Anyone.
Frequently Asked Questions
Which treats are easiest if I have very little time?
Choose dipped apricots, potato-chip clusters, or rocky road clusters. Each has a short ingredient list and about 15 minutes of hands-on prep, but still needs time for the coating to set.
Why are my no-bake oatmeal cookies not setting?
The syrup may not have reached a full rolling boil before the minute was timed, or an ingredient measurement may be off. Give the cookies the full cooling period. If they remain loose, refrigerate and serve chilled rather than promising they will work for a cookie exchange.
Can I use ordinary chocolate instead of candy melts?
Yes, but it is a different coating choice. Plain melted chocolate can stay soft or develop pale streaks at room temperature unless properly tempered. For the simple dip-and-set methods here, candy coating is the more convenient option; use real chocolate where the recipe specifies it for ganache, fudge, or bars.
Which recipes can I pack for a cookie exchange?
Start with bark, coated pretzels, cracker cookies, haystacks, or snowman cookies. Check the event’s allergen rules and avoid a hot venue. Cream cheese truffles, mints, and whipped desserts need an appropriate cold-storage plan.
Can I replace peanut butter with a seed butter?
It may work in some recipes, but texture and oil content vary. Do not make a one-for-one swap in the whole batch without a small trial. For an event with allergies, check every ingredient label and cross-contact requirement rather than relying on a substitution alone.
Do I need raw flour or raw eggs for any of these recipes?
No. These versions use packaged ready-to-eat cookies, cereal, nuts, coconut, or oats as directed. Do not add untreated raw flour or raw eggs to make a mixture thicker.