13 Valentine’s Day Updo Hairstyles With Soft Buns and Romantic Braids

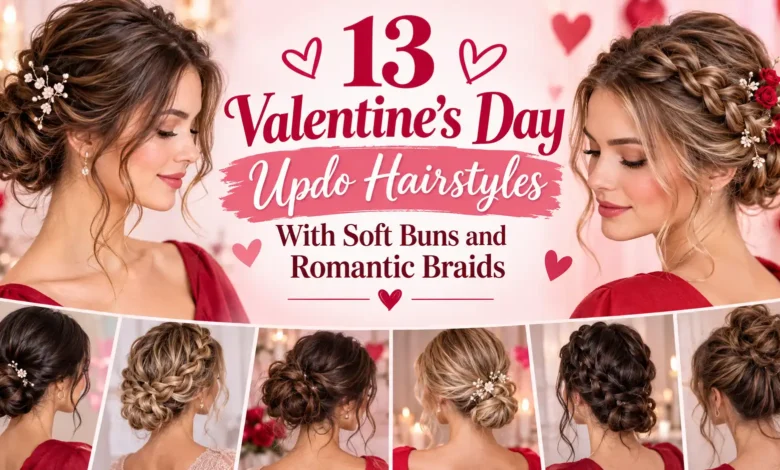
A soft bun with a little movement around the face can feel dressed up without looking stiff. A braid gives you a different kind of detail: something to notice from the side or back, even when the rest of your outfit is simple.
These 13 Valentine’s Day updo hairstyles range from a low loop bun you can practice at home to braided looks worth taking to a stylist. Start with the shape your hair can comfortably make, then choose the finish.
- For a straightforward starting point: try the low loop bun in look 1.
- For natural curls: look 6 keeps the curl pattern visible.
- For noticeable braid detail: compare the single Dutch braid in look 8 with the paired braids in look 9.
- For long hair without a bun at the nape: consider the milkmaid crown in look 10.
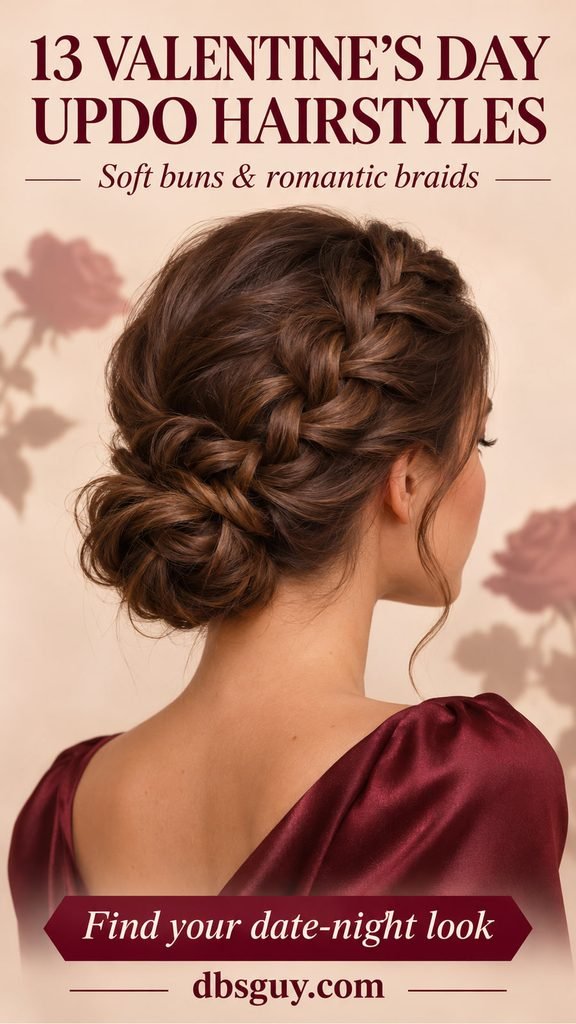
The images are AI-generated styling concepts, not photographs of completed salon work. Use them to discuss shape and placement; your hair’s length, density, layers, and texture will affect the result.
Before you start: choose a shape your hair can hold
Check whether your hair reaches a low ponytail, a high ponytail, or neither without pulling. Shoulder-length hair may manage a small nape bun while leaving shorter layers to pin separately. A crown made from two plaits needs enough length for each braid to reach over the head. If it stops short, choose another shape instead of stretching it into place.
Set out covered hair elastics, bobby pins close to your hair color, sectioning clips, and a handheld mirror. U-shaped hairpins can help with a fuller bun. For slippery hair, a small amount of a styling product you already tolerate may add grip; skip heavy layers of product that make the hair harder to adjust.
You do not need to straighten curls or heat-style your whole head for these looks. Work with your existing texture where possible. Most importantly, a bun should feel comfortable: the American Academy of Dermatology advises loosening styles that pull. Pain or stinging is a reason to undo the style and reduce the tension.
1. Low Loop Bun With Face-Framing Wisps
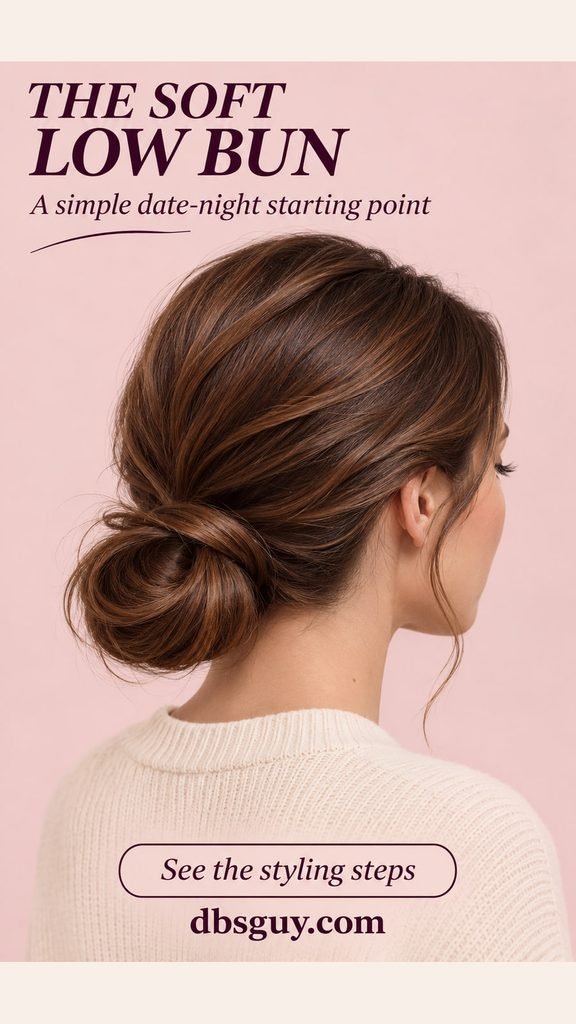
This is a useful first choice when you want your hair up but do not want to braid it. The folded loop gives the bun a soft outline, while a narrow wisp near the cheek keeps the front from looking swept flat.
- Leave out any face-framing pieces you want, then gather a comfortable low ponytail at the nape.
- On the elastic’s last pass, pull the ponytail only partway through to make a loop. Keep the remaining ends outside the loop.
- Fan the loop gently, wrap the ends around the elastic, and pin them underneath. Catch some of the ponytail’s base with each pin.
Medium-length hair can make a compact version. With longer hair, wrap the extra length around the base before pinning. Keep the loop small enough to support itself; pulling it very wide can leave the center looking thin.
2. Crossed-Twist Chignon
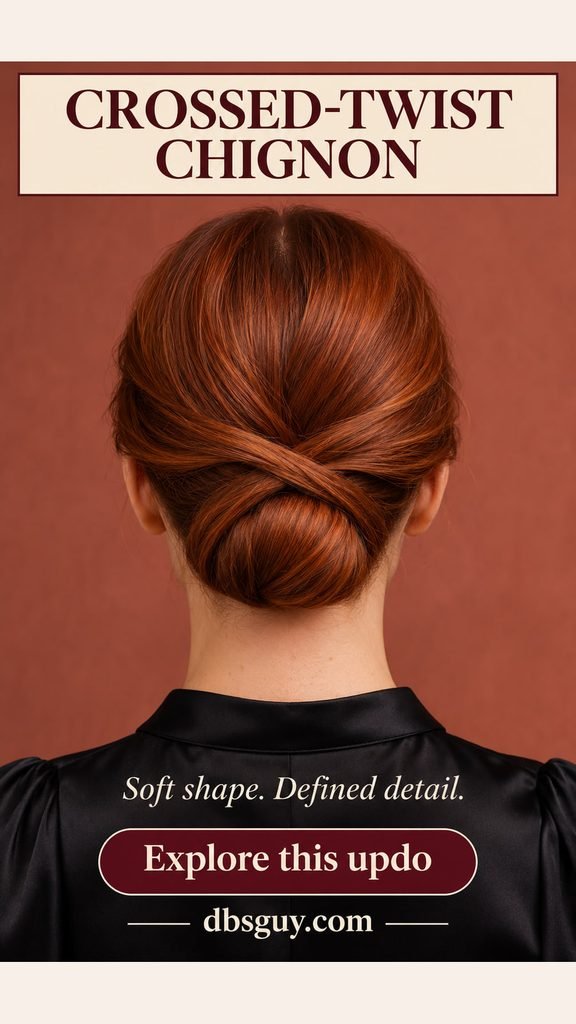
The crossed sections above this chignon create a clear focal point without a braid. It suits a dinner outfit with a clean neckline, especially when you want the back of the hairstyle to look more deliberate than a loose everyday bun.
Set aside a section on each side of the face. Gather the remaining hair into a low ponytail, then roll its length inward into an oval and pin it against the base. Bring one reserved side section across the top of the roll and secure it beneath the opposite edge. Cross the other section over it, tucking its end out of sight.
There must be enough side length to reach the opposite side without pulling. If yours falls short, ask a stylist for a smaller crossed detail. Keep the chignon rounded and close to the head so the crossing stays visible above it.
3. Soft High Bun With Curtain Bangs
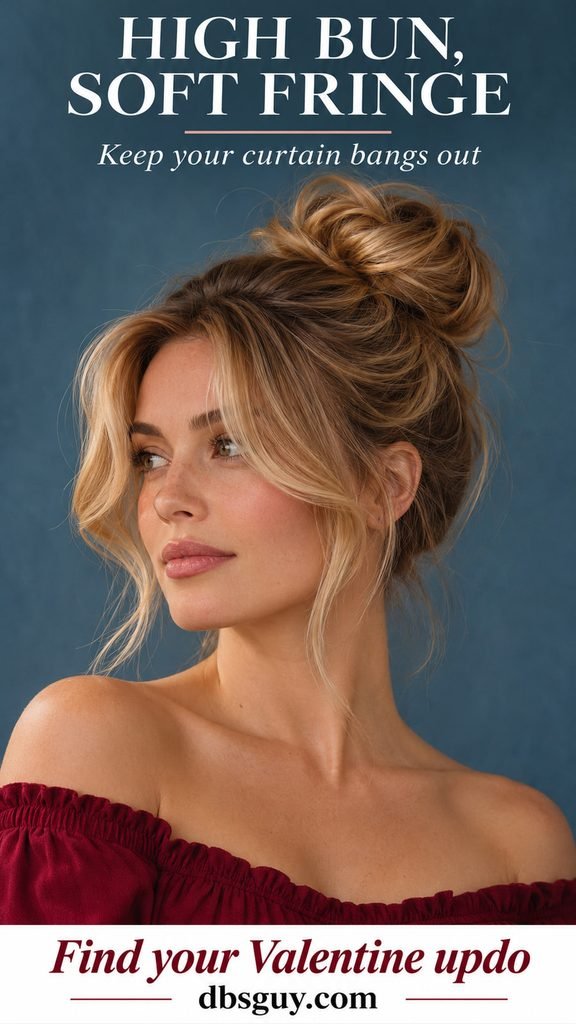
A high bun changes the whole silhouette: the volume sits above the face, and the neck stays clear. Curtain bangs balance that height with movement at the cheeks. This works best when the back sections can reach the crown comfortably.
Separate the bangs before gathering a high ponytail. Loosely twist the ponytail, lay it around its base, and pin the outer edges rather than winding it into a hard, tight knot. Leave the bangs in their usual part and guide them away from the eyes.
Short nape layers may escape this height. Pin them gently or choose the lower bun in look 1. If your fringe needs a little reshaping, the DBSGuy guide to styling curtain bangs with long hair has more ways to work with it.
4. Low Side Bun With a Wavy Sweep
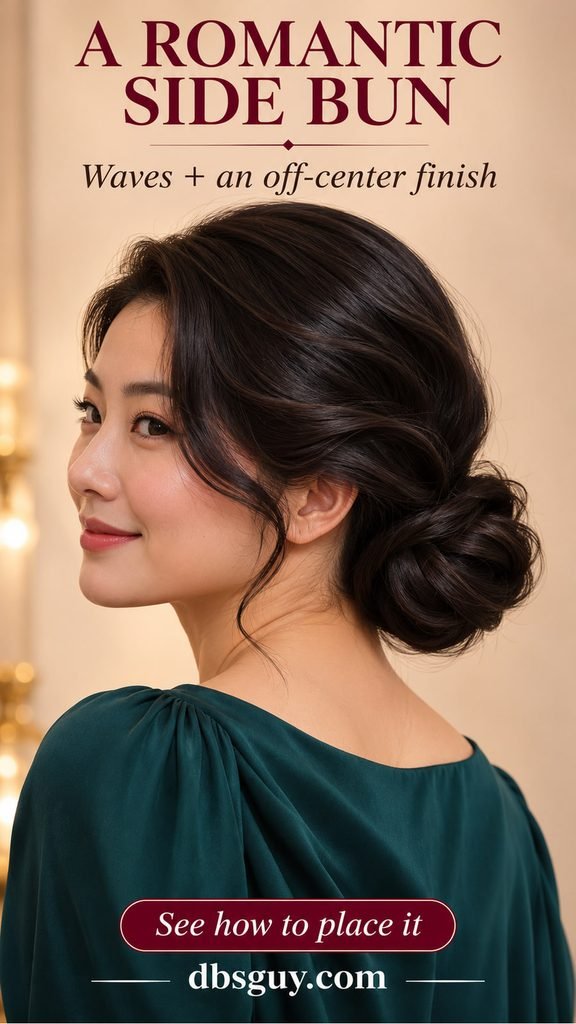
Moving the bun behind one ear makes it visible in profile. The broad wave above the ear adds to the asymmetry, so this is a good option when a centered bun feels too formal for your plans.
Choose the bun’s position before putting in the elastic. Gather the hair just behind one ear, leaving a little room in the opposite side so it does not pull across the scalp. Coil the ponytail into a low bun and secure it around the base. Use your existing waves to shape the side sweep rather than combing every bend flat.
Put on your coat or scarf during a practice run. If the collar pushes against the bun, move it slightly higher behind the ear. Check earrings, too: a long dangling pair can catch in a bun placed very close to the earlobe.
5. Small Twist-and-Pin Updo for Shorter Layers
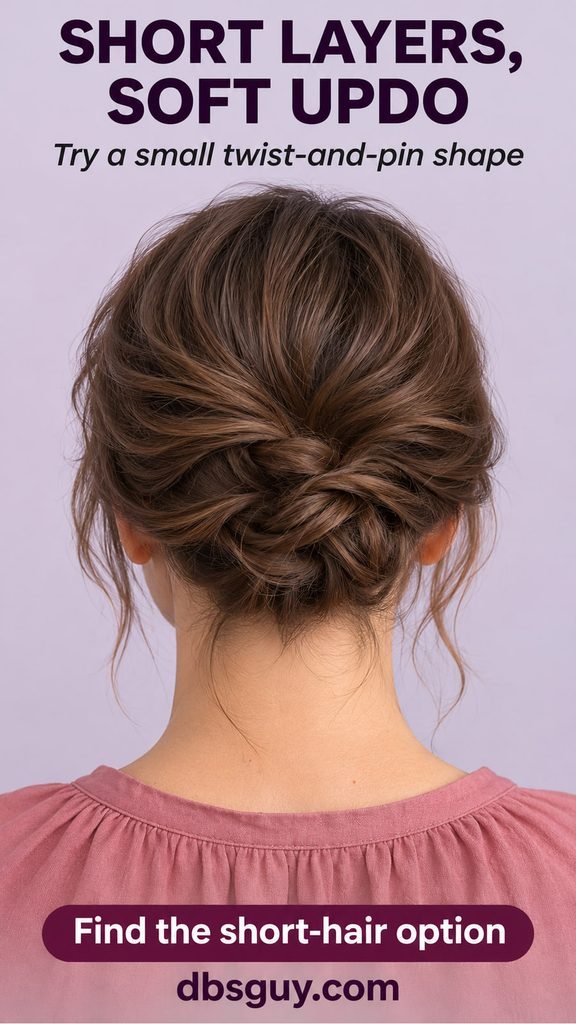
When your ends reach the nape but do not wrap around a full bun, several small pinned twists can make a soft gathered shape. The goal is a compact cluster, like the concept image, rather than the volume of a long-hair updo.
Make a small twist at the back as an anchor and pin it into place. Bring neighboring sections toward that anchor one at a time, twisting and tucking their ends into the cluster. Work in sections short enough that you can hold the ends while inserting a pin. Finish by guiding the side pieces back.
A chin-length bob or very short top layers may not reach this shape. Leave a few intentional wisps, but do not keep adding pins to force every tiny piece into the same spot. For other shapes to discuss with your stylist, explore DBSGuy’s short-hair updo ideas.
6. Natural-Curl Low Bun
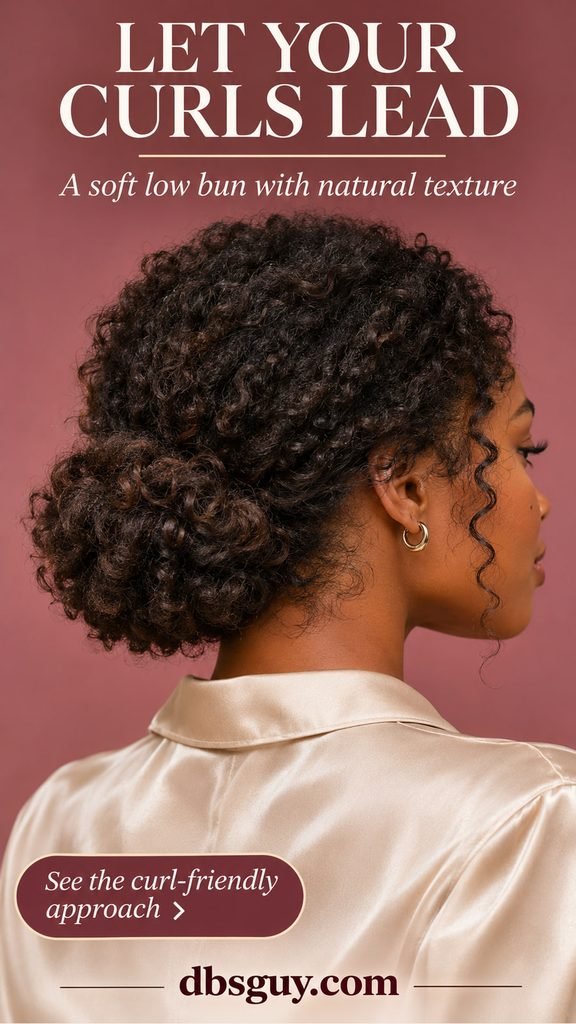
Here, the curl pattern supplies the detail. The roots stay softly gathered, and the bun has a rounded outline made from visible curls rather than a smooth twisted rope.
Start with detangled hair and curls arranged as you normally wear them. Gather the hair low with your hands and a covered elastic, keeping the hairline comfortable. Fold the ends toward the base in small curl clusters, then pin each cluster loosely enough to preserve its shape. A cheek curl can stay out if it falls there naturally.
Judge the available length with the curls in their finished state. If shrinkage leaves too little hair to fold, this particular bun may need a different placement or a stylist’s adaptation. Avoid pulling the roots tighter just to make the ends reach.
7. Classic Three-Strand Braided Wrap Bun
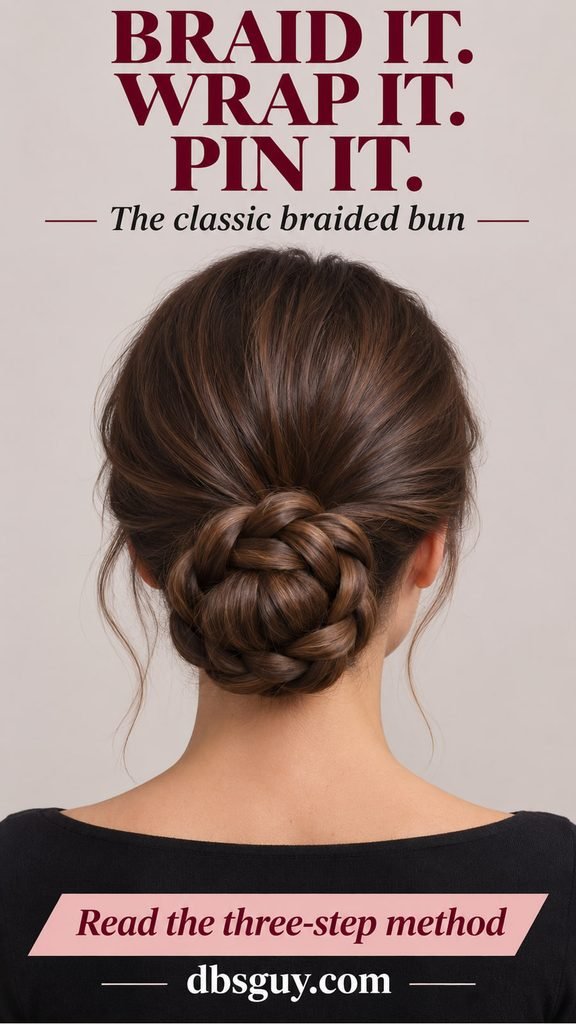
This bun puts all the braid detail at the nape. The top and sides remain simple, which makes it a practical way to add a braid when you do not want to weave hair along your scalp.
- Secure a low ponytail. Divide its length into three sections and make an ordinary braid, alternating the outside sections over the middle.
- Tie the braid’s end. Gently ease out its outer edges while holding the base steady.
- Wrap the braid around the ponytail’s base, tuck the tip underneath, and pin around the coil so it is supported from several sides.
You need enough ponytail length to make a visible braid and wrap it. Keep the loops modest if your hair is fine; a smaller bun can show the woven detail more clearly than a braid pulled so wide that layers fall out.
8. Single Dutch Braid Into a Low Side Bun
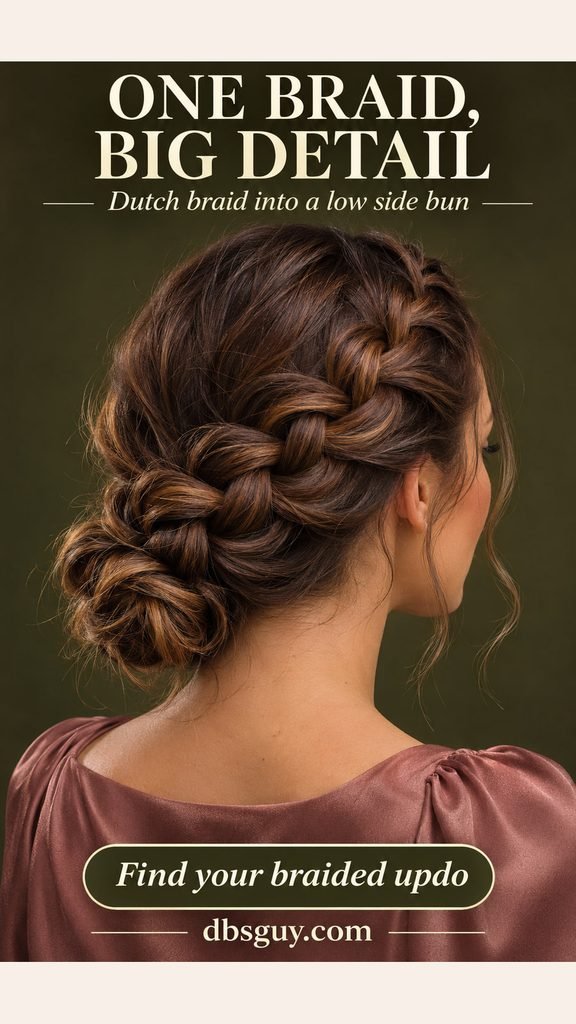
A Dutch braid sits raised against the head, making its path easy to see. In this version, one braid travels diagonally toward an off-center bun. The direction of that line is what separates it from a simple braided wrap.
Start near one temple with three sections. Cross the outside sections under the middle, adding neighboring hair as you work diagonally toward the opposite nape. Once all the hair has been incorporated, braid the remaining length, secure the end, and coil it into the side bun.
This is a more involved option to do on yourself. If the diagonal sectioning feels awkward, take the image to a stylist and request one raised braid, a low off-center bun, and comfortable tension at the hairline. Loosen only the braid’s outer loops, not the anchored roots.
9. Double Dutch Braids Into One Low Bun
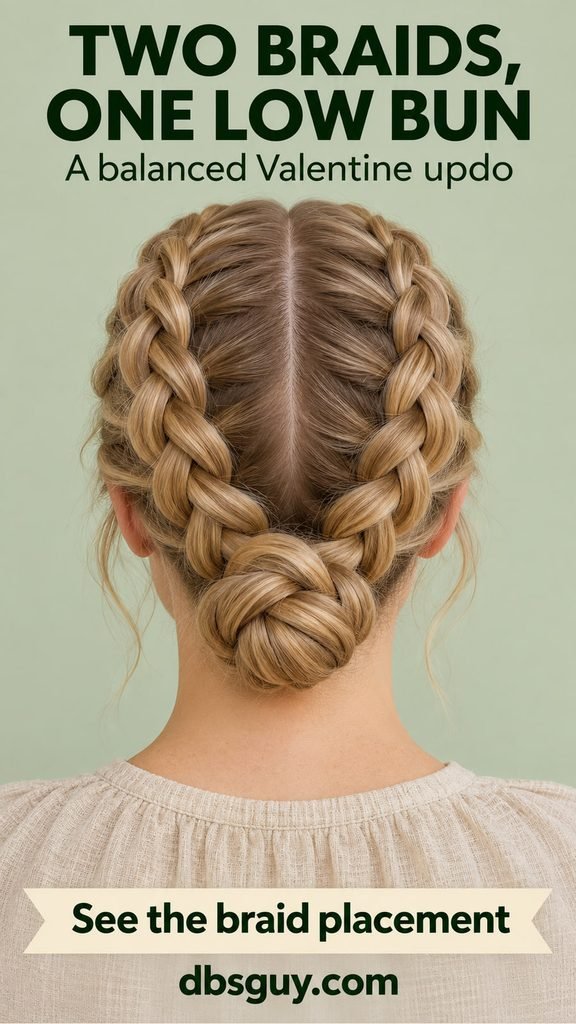
Two braids make a balanced frame down the back of the head. Choose this when you like a defined part and a more structured braid pattern, while keeping the bun itself small and soft.
- Part the hair down the center to the nape and clip one half aside.
- Dutch-braid each half by crossing the outside sections under the middle and adding hair as you go. Finish and tie each tail separately.
- Coil one braided tail at the nape, pin it, then wrap the other around that coil and tuck both tips underneath.
Check that neither side pulls when you turn your head. You do not need identical braid widths if your density differs across the part. For thick hair, pin the first coil securely before adding the second so one small pin is not carrying the entire bun.
10. Milkmaid Crown Braid
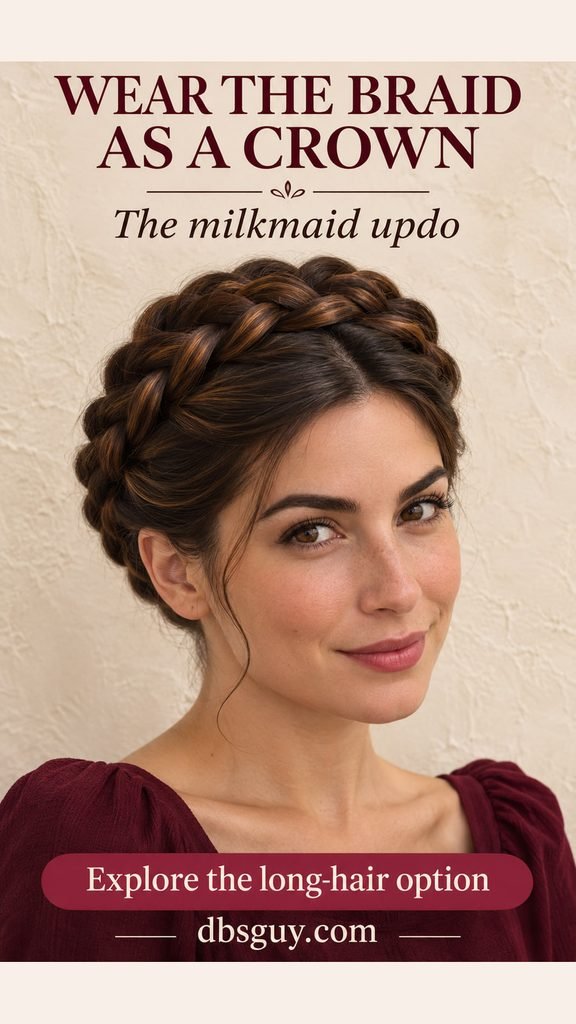
This is the bun-free option in the lineup. Two plaits travel up and over the head to form a crown, leaving the nape clear. It is especially worth considering with a high neckline that would press against a low bun.
Divide the hair into two low sections behind the ears and braid each one. Lift the first plait over the head and pin it along the crown. Bring the second across from the other side, overlapping the first and hiding the tips beneath the woven sections. Add support pins where the braids meet.
Try the reach before loosening the braids: each plait needs to travel over the head without tugging at its base. If it does not reach, choose a low braided bun. Leave a little space between the braid and the front hairline so the crown looks settled into the hairstyle.
11. Fishtail-Coil Side Bun
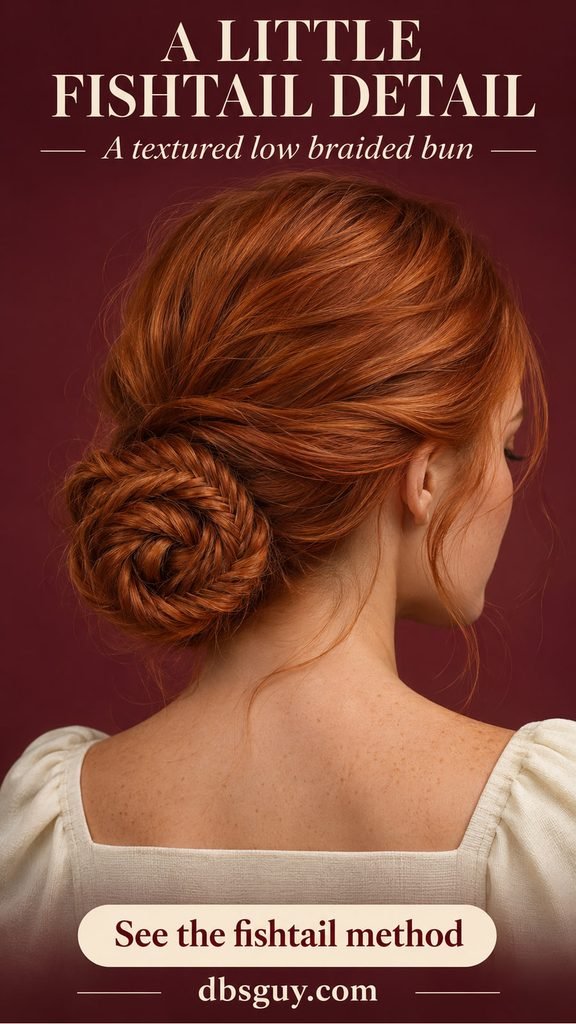
The fishtail brings smaller, more intricate lines to a low bun. Its woven texture is the reason to choose it over the chunkier three-strand version in look 7. Allow yourself a practice attempt if this braid is new to you.
- Make a comfortable low side ponytail and split the length into two halves.
- Take a small piece from the outside of the left half and move it across to the right half. Repeat from the right to the left, continuing down the length.
- Tie the end, lightly widen the edges, and coil the braid around the ponytail base. Pin the coil with the patterned surface facing outward.
Smaller transferred pieces create finer detail, but they also take more work. Short layers can poke through an aggressively widened fishtail, so start with small adjustments. The finished bun may be more compact than a similarly placed twisted bun.
12. Tucked French-Braid Updo
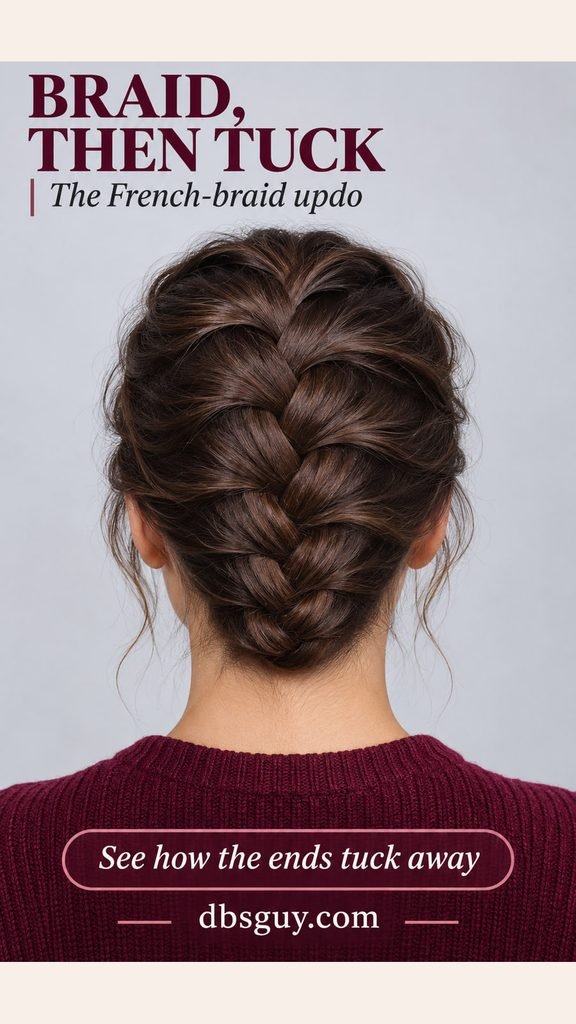
A tucked French braid gives you a woven line down the center of the head without a separate round bun. The end folds underneath at the nape, keeping the overall shape close to the head.
Begin near the crown with three sections. Cross the outside sections over the middle, adding loose hair from each side as you move down. Once all the hair is incorporated, finish the braid and tie the end. Fold that tail underneath, into the space behind the braid at the nape, and pin through the folded section into the hair beneath it.
The tuck should sit comfortably without poking pins into your neck. A very long, thick braid may make too bulky a fold; one of the coiled braided buns may be a better fit. If the tail will not stay hidden, do not solve it by tightening the scalp sections.
13. Rope-Twist Detail With a Soft Low Bun
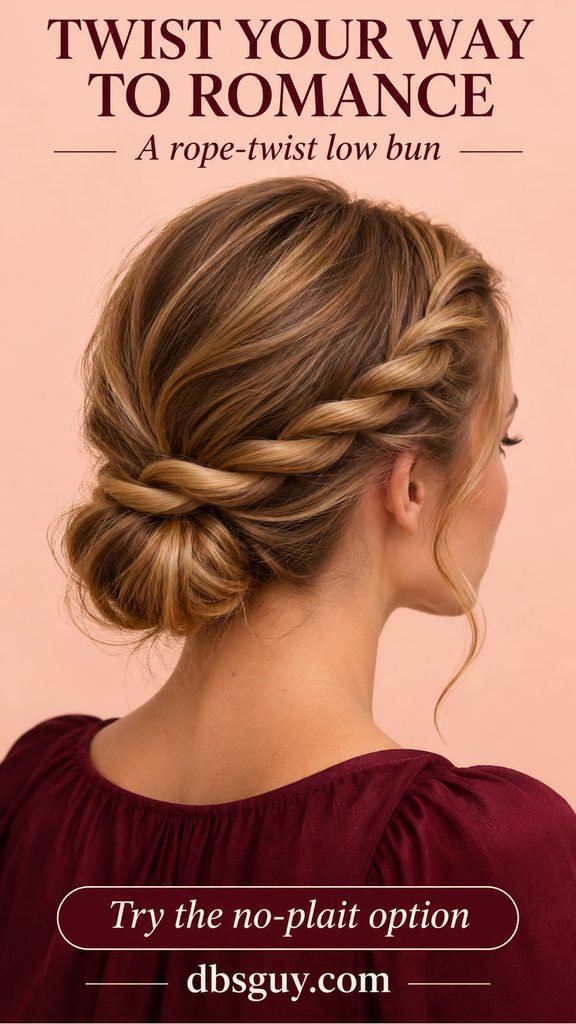
A rope twist gives you a smooth spiral along the side of the head. It is a useful alternative when you like the direction of a side braid but would rather handle two sections than three.
Reserve a generous front section on one side and make a low bun with the remaining hair. Divide the reserved section in two. Twist both pieces individually in the same direction, then wrap them around one another in the opposite direction. Secure the end with a small elastic.
Lay the rope along the side and across the top of the bun, hiding its tip underneath. Keep slack near the temple. The opposing twist directions matter: simply winding two untwisted pieces together can let the rope unravel as you pin it. If the front section is too short to reach, choose the crossed chignon or a smaller side detail.
Make the shape work with your outfit and evening
Try the hairstyle with your actual neckline, earrings, and outerwear. A low bun needs room above a collar; a high bun needs enough nape length to gather comfortably. A crown braid leaves the neck clear but takes more length across the top.
Before leaving, turn your head, look down, and gently nod. If a bun shifts, reposition its support pins closer to the anchored base. Add an accessory only after the style supports itself. A bow or decorative clip should finish the look rather than hold the whole bun together.
For a salon appointment, show the relevant image and name three priorities: the bun’s position, the kind of braid or twist, and how much hair you want around the face. Ask what your own length and density can achieve before choosing extra volume.
Questions About Valentine’s Day Updos
Which look is the simplest to try without braiding?
The low loop bun in look 1 has the most straightforward sequence here: gather, fold, wrap, and pin. Practice the size of the loop before adding face-framing detail. The crossed chignon adds another step, while the high bun depends on whether your shorter back sections reach the crown.
Can fine hair look soft without a large bun?
Yes. Keep the bun proportionate to the hair you have and ease out only a few outer edges. The low loop bun and crossed chignon let you focus on a clear shape. You do not need a large bun to make the style look finished, and the volume shown in a concept image is not a guarantee.
What is the difference between French and Dutch braids?
Both add hair from the sides as you braid. A French braid crosses the outside sections over the middle; a Dutch braid crosses them under, creating a more raised line. Use look 12 for a central French-braid tuck and looks 8 or 9 for visible Dutch-braid detail.
Do I need to wash my hair the day before?
There is no single schedule that suits everyone. Start with a comfortable scalp and hair prepared for its texture. Freshly washed hair can be styled, too; if yours is slippery, use a little familiar grip product rather than assuming it needs to be dirty. Follow your stylist’s preparation instructions if you have booked an appointment.
How do I stop short pieces from falling out?
Gather them into smaller sections and pin them toward an existing anchor, as in look 5. If a piece cannot reach without pulling, leave it as an intentional wisp or choose a lower placement. Do not keep tightening the elastic to solve a length problem.