Japanese-Inspired Valentine Nails With Chocolate Art and Delicate Details

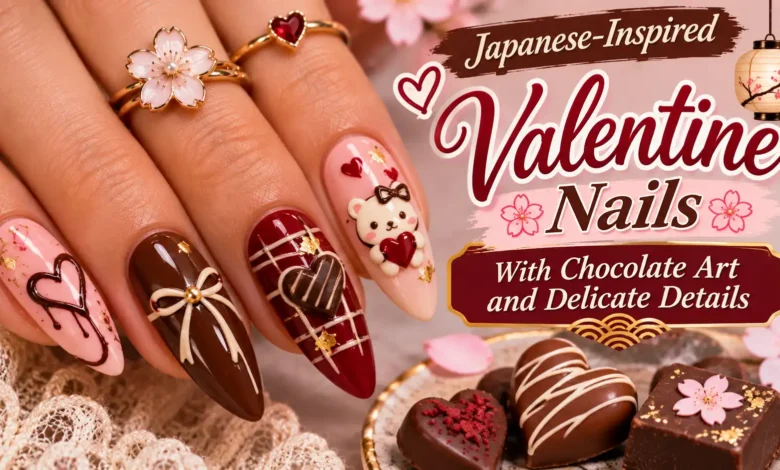
For Japanese-inspired Valentine nails, start with a detail you’d spot in a chocolate box. Fine strands of dark and white chocolate become a lattice on one nail, a glossy dip becomes a French tip, and a pinch of gold foil turns matte cocoa into a truffle accent. The woven set is the clearest nod to Japanese chocolate. The drip tips or fine-line bow are good starting points if you want most of the nail to stay sheer.
The images are AI-generated manicure concepts for dbsguy.com.

Decide how much of the nail you want the artwork to cover before you pick colors. A tiny bow or a slim drip fits short nails with room to spare. A chocolate-bar grid needs a broader surface, so it’s easiest to read on a soft square. If you’re still choosing a shape or deciding how much artwork to wear, browse our Valentine nail ideas for February first.
1. Sasha-Inspired Chocolate Lattice
Look closely at Lotte’s Sasha chocolate and you’ll see why it lends itself to nail art. Fine chocolate strands cross over one another to create a woven surface. For the manicure, use an ivory accent nail with thin cocoa and cream diagonals and paint the surrounding nails a solid milk-chocolate brown.

Ask for a loose weave with a few clearly separated lines in each direction. On short squovals, there’s only so much room before the pattern starts reading as plaid. A flat painted version keeps the lattice crisp if you prefer smooth nails.
2. Sheer Pink With Chocolate Drip Tips
On a sheer pink base, a slim dark-brown French tip gives the manicure its chocolate color without hiding the natural nail. On one accent nail, let the tip dip down into one or two rounded drips. The drips should connect to the tip so the brown reads as one continuous edge.

For very short ovals, keep the plain tips narrow and put the drip slightly off-center. That leaves a clear patch of pink beside it, where the curved edge is easiest to see. If you like the small accent but prefer a different shape, the placement ideas in our classy Valentine nail guide translate well to chocolate brown.
3. Matte Cocoa With a Truffle Fleck
A soft matte finish makes deep brown look like the powdered surface of a truffle. Use the same cocoa shade across the set and put one irregular fleck of gold foil close to a side edge on the accent nail. A little fine speckling on that nail can echo cocoa dust while the other nails stay smooth and even.

Ask to keep the gold in one small cluster. The foil is there to catch the light when you turn your hand, so it can be much smaller than a heart or a charm.
4. Strawberry Pink With a Dark Chocolate Dip
Pick an opaque strawberry-milk pink and a warm dark brown. Alternate the solid colors across the hand, then give one pink nail a broad chocolate tip with a clean curved seam. That deeper dip and the solid pink base give this design the look of a two-tone candy, even on a short squoval.

If pink is the color you want to see first, make it the majority color and keep just one solid brown nail beside the dipped one. A glossy finish makes both sections look like part of the same candy shell.
5. Matcha and White Chocolate Half-Moons
Go green if the chocolate palette feels too brown. A muted matcha shade and a small warm-ivory half-moon suggest matcha and white chocolate. Put the ivory curve at the base of the nail, following the arc by the cuticle, and carry the green all the way to the tip.
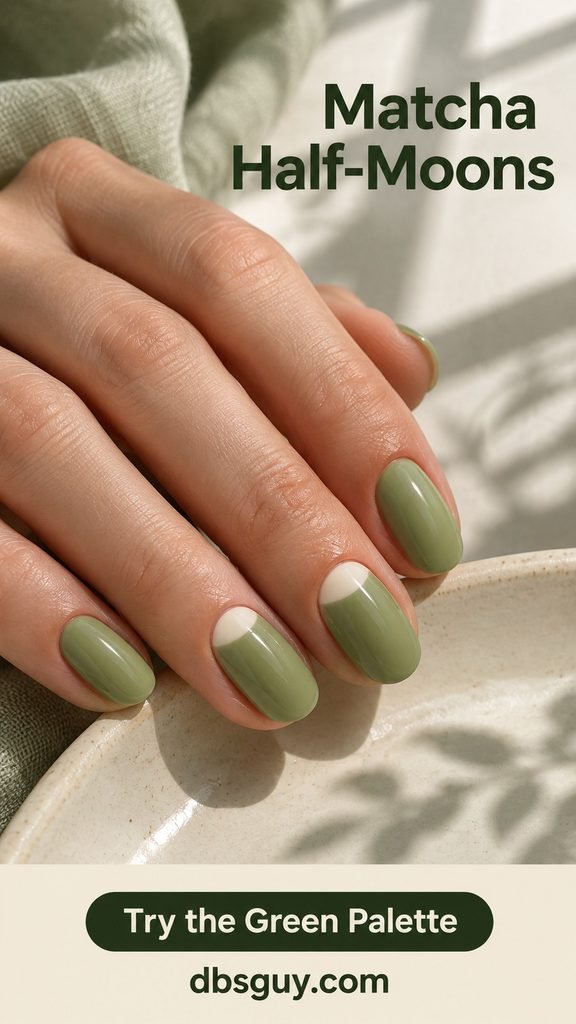
Keep the half-moons to one or two nails per hand and leave the others solid green. Ask for a shallow arc if your nail beds are short, so there’s still a generous patch of green above the cream.
6. A Fine-Line Bow on Sheer Blush
Borrow the ribbon from the bonbon box. Set a fine champagne-gold bow low on a sheer blush accent nail and use glossy milk chocolate on the neighboring nails. Two tiny loops and a pair of tapered tails are enough to make the detail readable.

A flat metallic decal is an option if you want to do this with regular polish and the loops are too fine to paint comfortably. Check the size against your nail before applying it. You want a little clear blush around both tails.
7. A Molded Dark Chocolate Bar Accent
Put the raised detail on the broadest soft-square nail. A shallow grid of chocolate-brown rectangles makes the surface resemble a molded bar, especially when light catches the edges. Keep the surrounding nails smooth and glossy in dark chocolate and mocha.
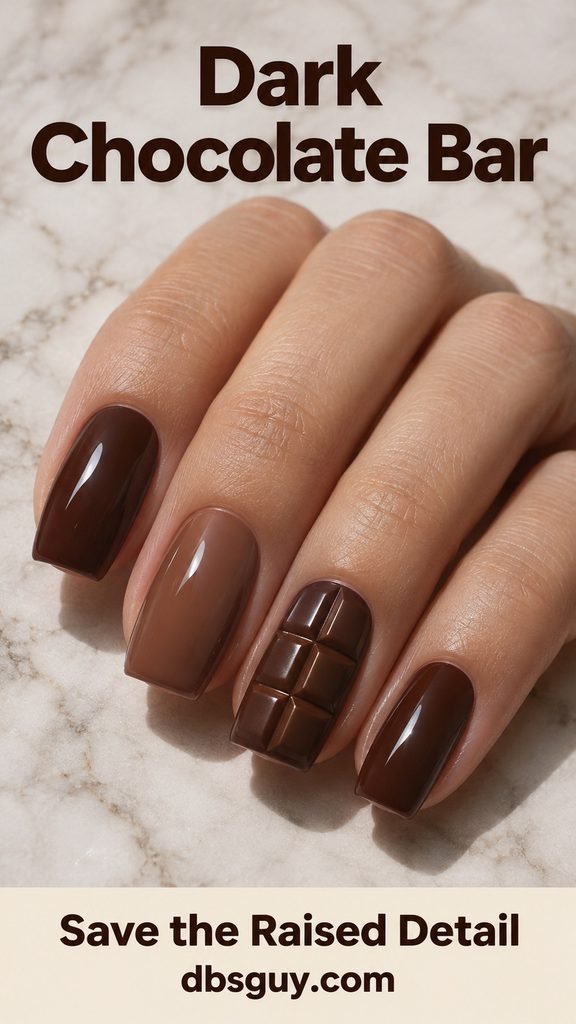
Show the image when you book if you want sculpted lines. Ask for a low profile and a simple grid. On a narrow nail, fewer segments leave room for visible grooves between them. If you want a completely smooth surface, a painted grid with subtly shaded edges can suggest the same shape.
Before You Book
Save the one image that shows the detail you care about most. Then tell your nail artist your usual length and whether you want the accent painted flat or slightly raised. For example, ask for “short squovals, milk-chocolate solids, and one ivory accent per hand with thin crossed cocoa lines.” That gives the artist enough direction to adapt the design to your nails.
Frequently Asked Questions
Which chocolate design works on very short nails?
Try the sheer drip tips or the matte truffle set. The drip uses the free edge and the foil fleck only needs a small corner. If you want the woven effect, keep fewer crossing lines so each one stays visible.
Can I get this look with regular nail polish?
Yes. Choose the two-tone strawberry set, a matte cocoa finish, or the flat bow decal. If you’re painting the strawberry dip, let the pink base dry before adding the brown curve with a small nail-art brush. Save the raised lattice or molded-bar texture for a salon appointment if the relief is what you like.