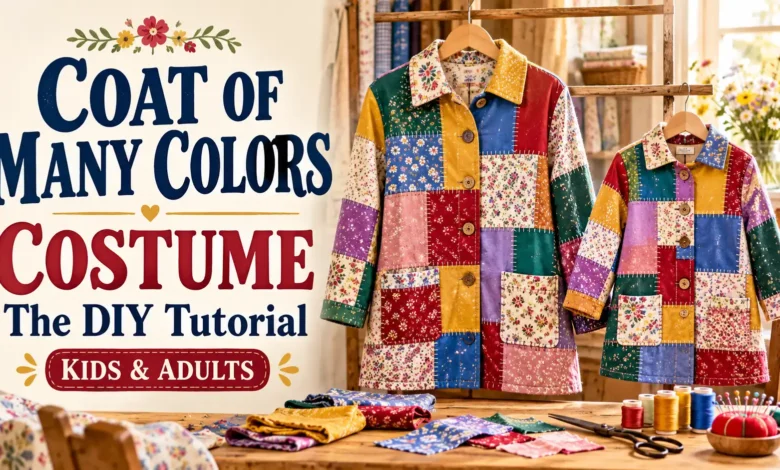
To make a Coat of Many Colors costume, start with a roomy button-front shirt or light jacket, arrange colorful fabric patches over it, and attach them with fabric glue or stitching. Keep the collar, cuffs, pockets, and front opening usable, then finish with a simple outfit underneath. The same approach works for a child’s jacket or an adult overshirt; you do not need to draft a coat pattern.
This tutorial creates a Dolly Parton–inspired patchwork costume. The childhood-style look pairs the coat with a plain dress and everyday shoes; the adult version adds jeans, blonde curls if desired, and a touch of country styling. Neither requires an exact replica of the movie wardrobe.
Project at a glance: Beginner-friendly garment decorating. Allow an afternoon for cutting, arranging, and attaching patches, with extra time for a larger coat or hand sewing. A glued version also needs the adhesive’s full drying and curing time before wear. Start ahead of Halloween, a school dress-up day, or your party rather than counting on wet glue to hold that evening.
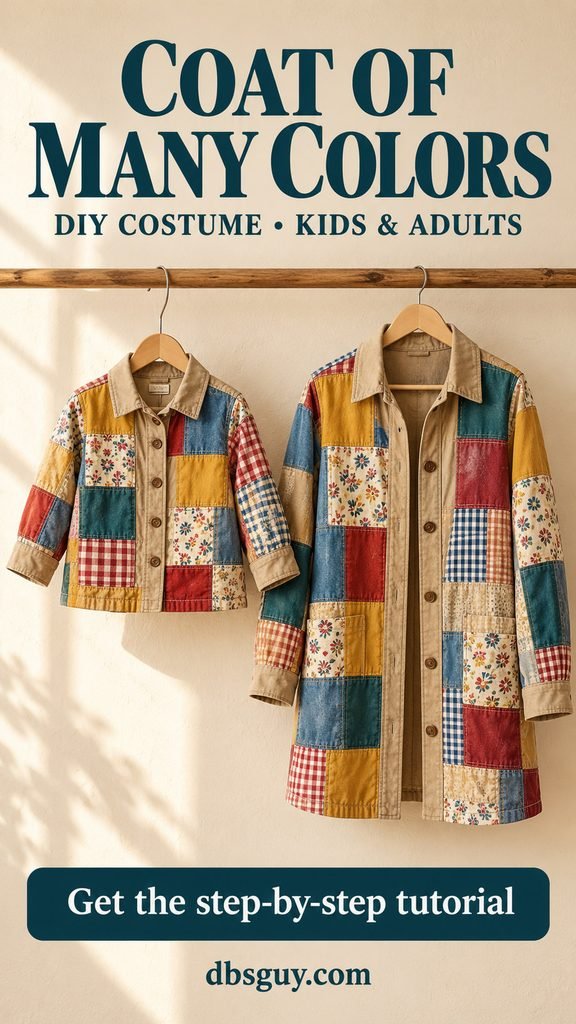
The images in this tutorial are AI-generated costume and process concepts. They illustrate the proposed design, not a photographed, tested build. Patch sizes and quantities below are planning suggestions; adjust them to your garment.
What makes this a Coat of Many Colors costume?
The patchwork is the story. Dolly’s song recalls a coat her mother made from fabric scraps, so a mixture of modest florals, checks, and solids makes sense here. You can celebrate that handmade spirit with clean, cheerful fabric and comfortable clothes. There is no need to distress the outfit or imitate poverty.
For this design, choose five or six repeating colors: mustard, tomato red, teal, faded blue, cream, and a warm tan base. Repeat each color in several places so the coat feels connected. Mix a few small prints with solids; too many large prints can make individual patches hard to see.
Also read: Dolly Parton Costume Guide for a Fun and Authentic Look.
Supplies: an existing jacket does the hard part
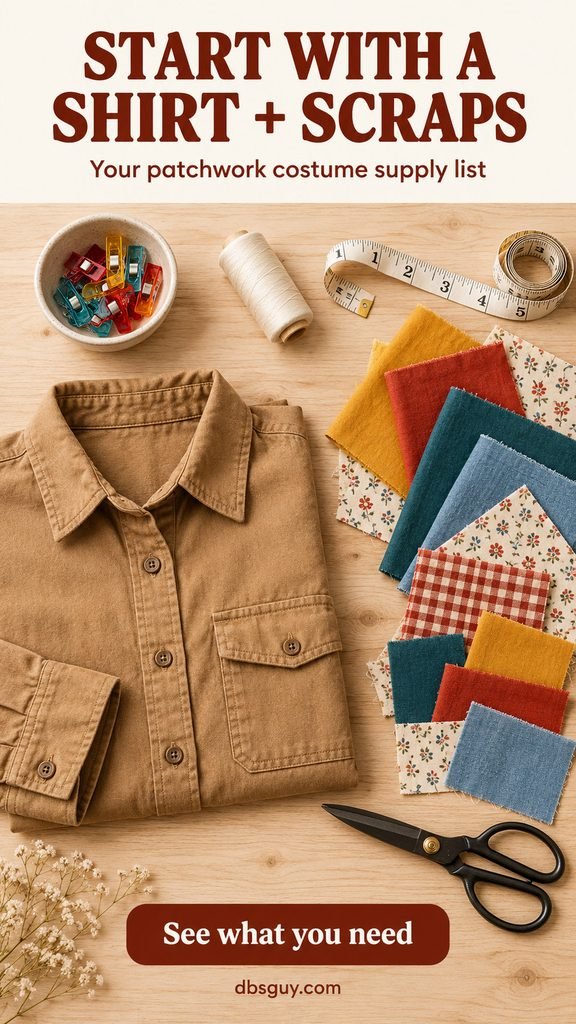
- One button-front shirt-jacket or overshirt that fits comfortably over the clothes you will wear underneath. A light, nonstretch woven cotton base is straightforward to decorate.
- Lightweight fabric scraps in several colors. Clean cotton shirt fabric and quilting cotton are useful starting points. Choose similar fabric weights so one patch does not pull down its neighbors.
- Fabric scissors, a ruler or tape measure, and washable fabric chalk. Pinking shears are optional.
- Sewing clips for holding edges where accessible. Adults can use pins during construction, then remove every one before a fitting.
- For the glue route: flexible fabric adhesive compatible with both fabrics, plus a protective nonstick sheet specified as suitable by its manufacturer.
- For the sewn route: a needle and all-purpose thread, or a sewing machine with a needle appropriate for the fabric.
- Simple clothes and sturdy shoes for the finished costume.
How much fabric should you gather?
For a child’s jacket, begin by cutting about 25–35 patches with visible sizes around 3–4 inches across. For an adult overshirt, start with about 35–50 patches around 4–5 inches across. Include rectangles as well as squares. These are starter batches for an appliqué layout with some base fabric showing, not guaranteed quantities for complete coverage.
Before buying more fabric, lay your first batch over the front, back, and sleeves. A longer coat or edge-to-edge coverage will need more patches. If you are shopping for scraps, take the garment and a paper sketch of the areas you want to cover; that is more useful than relying on a universal yardage estimate.
Use a base you are comfortable permanently changing. Glue can leave residue, and removing stitches may leave small holes. If you want to keep your everyday jacket untouched, decorate a separate thrifted overshirt.
Also read: 21 Thrift-Flip Ideas So Good You’ll Start Looking at Old Clothes Differently.
How to make the coat: 5 practical steps
1. Check the fit and prepare your base
Try the undecorated garment on over the planned outfit. Button it, sit down, reach forward, and raise your arms. You should be able to move without the shoulders pulling. A coat that already feels tight will not improve after you add patches.
For children, choose a hem well clear of the ground and sleeves that leave the hands free. A hip-length or upper-thigh jacket is easier to manage than a trailing coat. Use the wearer’s actual fit rather than automatically sizing up.
Wash and dry the base and washable scraps according to their care labels, then press them if permitted. For adhesive work, follow the glue label’s fabric-preparation directions, including any instruction to avoid fabric softener. Skip coated rainwear, slippery linings, and very stretchy knits for this beginner version.
Lay the base flat. Mark the areas that must stay functional: buttonholes, buttons, the center opening, pocket openings, cuffs, and any vents. Keep the original tan collar and front placket visible as a tidy frame around the patchwork.
2. Cut patches that suit the size of the coat
Start with the visible patch sizes above, then cut a few narrower rectangles to fill awkward spaces. A small jacket looks more balanced with smaller pieces; an adult back panel can take larger ones. You do not need dozens of identical squares.
For folded sewn edges, add ½ inch to both the desired width and height, then turn each edge under ¼ inch. For example, cut a 4½-inch square for a finished 4-inch patch. Press the folds if the fabric’s care instructions allow.
For a casual glued finish, cut to the intended visible size and use pinking shears if you have them. Pinked edges can reduce obvious fraying, but they do not seal fabric permanently. Avoid very loosely woven scraps, and trim away loose threads. Felt is another option, though a heavy felt layer can make a light jacket stiff.
3. Arrange the whole coat before attaching anything
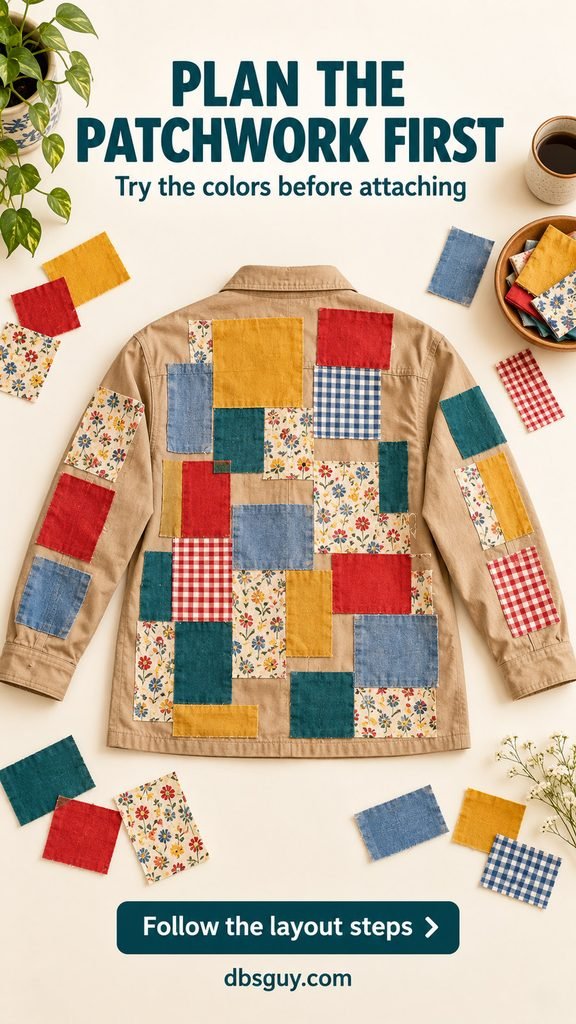
Spread patches over the back first, then plan the fronts and sleeves. Put a larger patch near the center of the back and work outward. Alternate light and dark pieces, and repeat your strongest colors across different parts of the coat.
Leave small tan gaps if that makes the layout easier. You are decorating an existing garment, so the patches do not have to form a perfectly joined quilt. Keep patches away from buttonholes and pocket mouths; allow roughly ½ inch of clear space around these working edges, adjusting to the garment.
Use smaller pieces around sleeve curves and keep the underarms lightly decorated so they can bend. Never attach a patch across the two front halves of the coat. Photograph each planned panel on your phone so you can rebuild the arrangement as you work.
4. Attach the patches with glue or stitches
Choose one main method before you begin. Fabric glue avoids sewing but needs a successful fabric test and curing time. Stitching takes more handling, especially by hand, and lets you secure individual corners as you go.
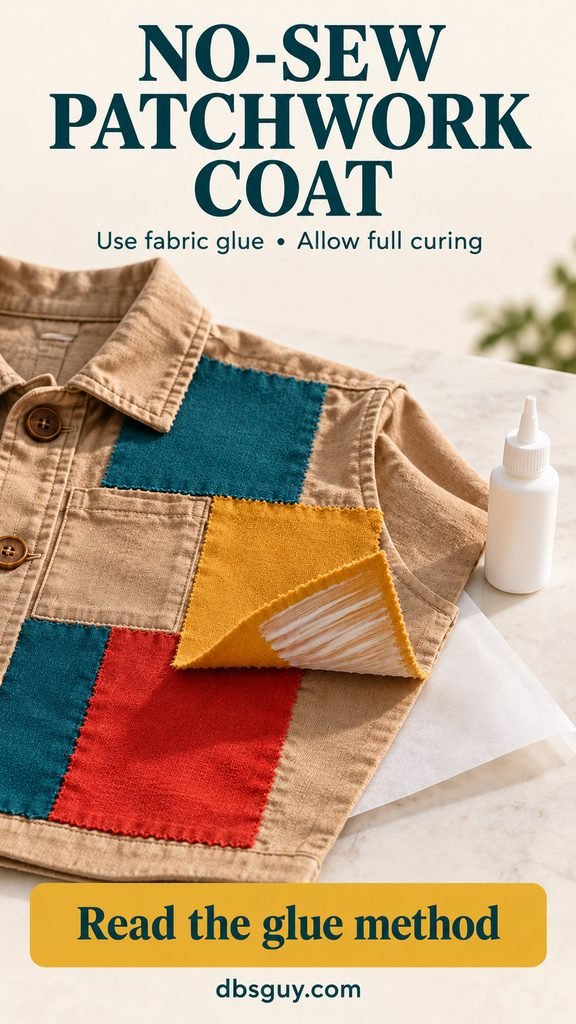
Option A: the no-sew fabric-glue method
- Test first. Attach a spare patch to a hidden or spare piece of the base fabric. Let it cure as directed. Check for staining, stiffness, and lifting before committing to the coat.
- Separate the layers. Slide the adhesive manufacturer’s recommended protective barrier beneath the panel you are decorating. Keep the back of the coat, sleeve underside, and pocket bags out of the bond.
- Follow the adhesive label. Lift one patch at a time, apply the specified amount and pattern of glue, and press it into position. Avoid heavy puddles that soak through or squeeze past the edges.
- Work in sections. Let a panel dry flat as directed before turning the garment to decorate the next one. Reposition the barrier whenever you move to another layer.
- Wait for full curing. Dry to the touch does not necessarily mean ready to wear or wash. Use the product’s stated times, then gently check the patch edges before a fitting.
Adults should handle adhesive application and follow the product’s ventilation and handling directions. Ordinary school glue is not a substitute for a fabric adhesive. Do not iron over glued areas unless the adhesive and both fabrics explicitly allow it.
Option B: the sewn-patch method
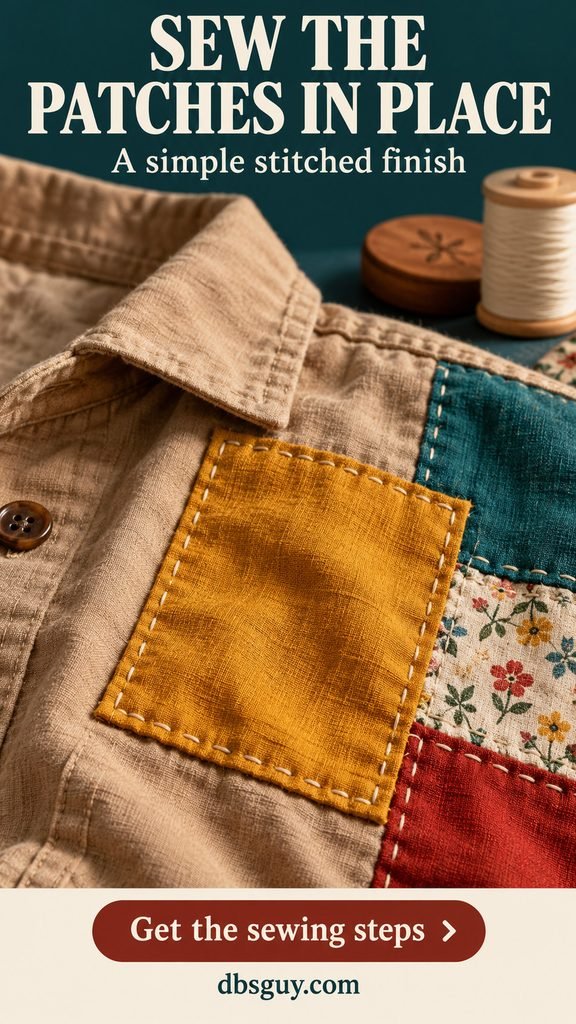
- Hold one patch in place. Clip or pin it with the coat lying flat. Check that the garment is relaxed rather than stretched beneath it.
- Keep the layers separate. Sew through the patch and the intended outer panel only. On a lined garment, decide whether you can comfortably reach the outer fabric; a simple unlined base is easier for beginners.
- Sew around all four sides. For a folded edge, make small running stitches through the fold and base, or machine-stitch close to the folded edge. For a cut edge, use a suitable zigzag or a hand-sewn edge stitch to help contain fraying.
- Secure the start, finish, and corners. Fasten the thread on the inside without drawing the fabric into puckers. A patch held by only a stitch at each corner can flap and catch.
- Repeat panel by panel. For sleeves, hand sewing may be easier than fitting a narrow tube onto a machine. Keep the opposite sleeve wall clear of the needle.
Visible cream stitches can become part of the handmade look. Matching thread gives a quieter finish. If you want to add decorative stitching over glued patches, do so only after curing and only if the adhesive manufacturer says it can be sewn through.
5. Finish the edges and do a movement check
Remove every pin and clip, trim loose threads, and check that no needle is left in the garment. Run a hand gently over each patch to find lifting corners. Reattach any loose edges, allowing a fresh glue application its full cure time.
Open and close every button. Put a hand into each pocket. Bend both elbows and reach forward to find places where a patch pulls across a seam. Adjust those areas before adding accessories.
Finally, try the costume on with the intended clothes and shoes. Walk, sit, and use stairs while checking the hem and cuffs. The coat should still behave like comfortable clothing, with the patchwork adding color rather than restricting movement.
Kids’ version: let the little patchwork coat lead
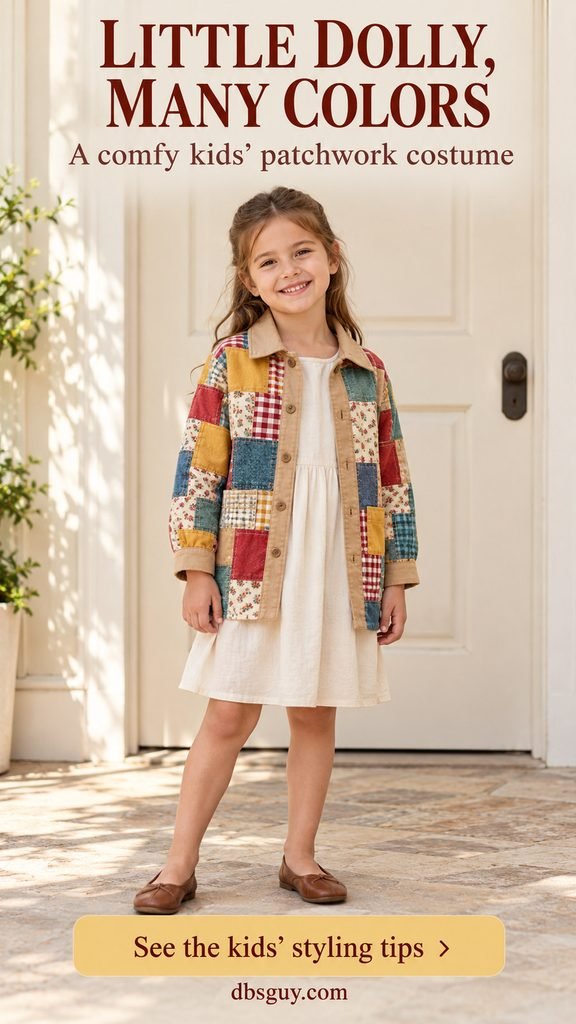
For a childhood-inspired Dolly look, put the finished jacket over a plain cream or soft-blue dress, or over a T-shirt and leggings if that suits your child better. Brown flats or familiar low boots keep the outfit practical. The pictured concept uses a simple cream dress and brown shoes so the colored patches stay easy to see.
Natural hair or a simple half-up style is enough. A wig, makeup, toy microphone, and guitar are optional; the coat carries the theme on its own. Keep extra pieces age-appropriate and check the school’s costume rules before planning props.
For Halloween, follow the U.S. Consumer Product Safety Commission’s costume-safety guidance: prioritize well-fitting clothing and sturdy shoes, keep clear of flames, and choose appropriate flame-resistant labeled costume pieces when buying them. This scrap-fabric DIY has not been flame tested; a label on the original garment does not establish the safety of the decorated coat. Use flameless decorations nearby.
Adults’ version: patchwork, jeans, and a little Dolly styling
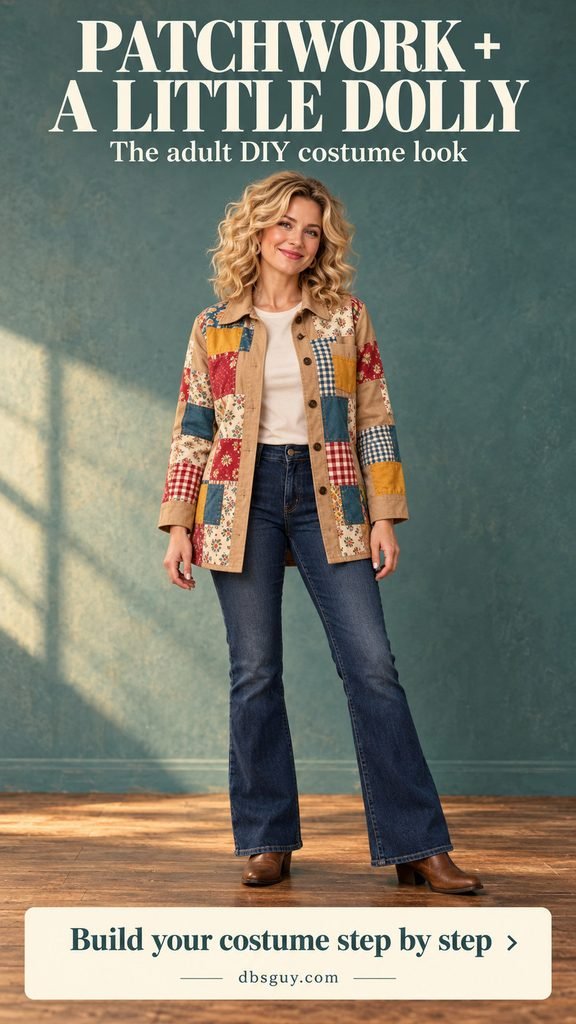
Wear the decorated overshirt open over a cream tee and blue bootcut jeans. Low-heeled brown boots give the outfit a country feel without competing with the coat. Choose a hip- or upper-thigh-length base so the jacket remains the main feature.
For a more recognizable Dolly-inspired finish, add blonde curls or a comfortable blonde wig, small earrings, and an optional handheld microphone prop. Keep the neckline simple and the coat unbelted so people can see the patchwork. This is a modern costume interpretation; it does not reproduce a documented stage outfit.
The same construction works across adult sizes: choose a base that fits the wearer, then scale the patches to its panels. If you want a coordinated family pair, repeat the same fabric palette on the child and adult jackets without forcing identical patch placement.
Also read: DIY Dolly Parton Costume Under $50 (Thrift Store Edition).
Quick fixes before costume day
- A patch lifts at a corner: Reattach it with your chosen compatible method. Allow glue to cure again before wearing.
- The coat feels stiff: Stop adding layers. Reduce bulky overlap or replace thick patches; more glue will not restore softness.
- A pocket no longer opens: Carefully remove and reposition the patch that bridges its opening. Check the pocket bag before attaching it again.
- The patchwork looks busy: Replace a few competing prints with solids and repeat an existing color instead of adding another.
- You have only one evening: Use a smaller sewn-on patch layout or a patchwork garment you already own. Do not shorten adhesive curing time to meet a deadline.
Also read: Last-Minute Dolly Parton Costume: 13 Things in Your Closet That Work.
Coat of Many Colors costume FAQs
Can I make this costume without a sewing machine?
Yes. Use compatible fabric glue after testing it, or attach the patches by hand. Glue still needs its full curing time, while hand sewing usually takes longer as the number of patches grows.
Do I need a printable coat pattern?
No pattern is needed for this version because the shirt-jacket already supplies the sleeves, collar, and fit. The tutorial covers adding patches to that garment. If you want to sew the whole coat from scratch, you will need a separate garment pattern in the wearer’s size.
Will fabric glue wash out so I can reuse the original jacket?
Do not assume so. Many fabric adhesives are intended to form permanent bonds, and removal can damage the fabric. Use a dedicated costume base and follow the adhesive and garment care directions.
Can I wash the finished costume?
Follow the most restrictive care instructions among the base garment, patches, and adhesive. Wait through the adhesive’s stated prewash interval. Check for loose edges first, and spot-clean when a full wash is unnecessary.
Is this the same as a Joseph costume?
This tutorial styles a patchwork jacket for a Dolly Parton–inspired costume. If your school or church assigned Joseph, confirm its preferred tunic or robe shape before you start; a short modern jacket may not suit that brief.
A comfortable base, a repeated color palette, and securely attached patches are enough to make this costume feel complete. Finish the coat first, check that it moves easily, and let the handmade colors do the work.