15 Valentine’s Day Hairstyles for School That Keep Hair Out of the Way

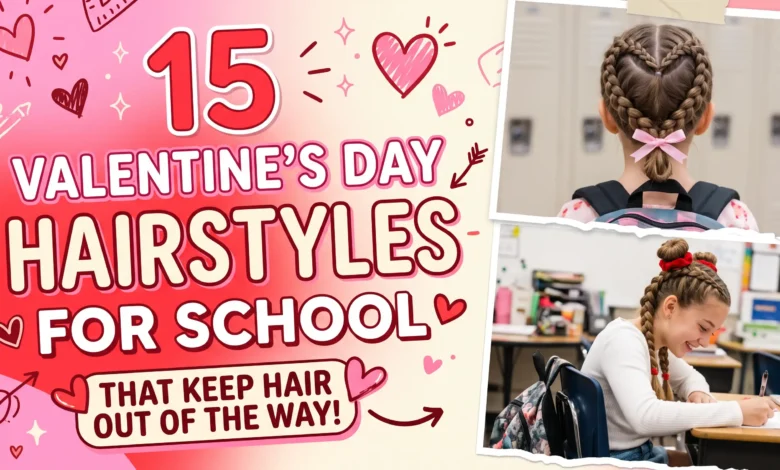
For a school morning, start with a hairstyle you already know, then add one Valentine detail: a burgundy bow, pink ties, or a small braided heart. A low ponytail is the simplest starting point; a braid or tucked bun also gathers the length when loose ends would get in the way.
These 15 Valentine’s Day hairstyles for school include options for long hair, natural curls and coils, existing twists, and short bobs. The short-hair looks focus on keeping the front clear; the fully gathered styles give you more control over the back, too.
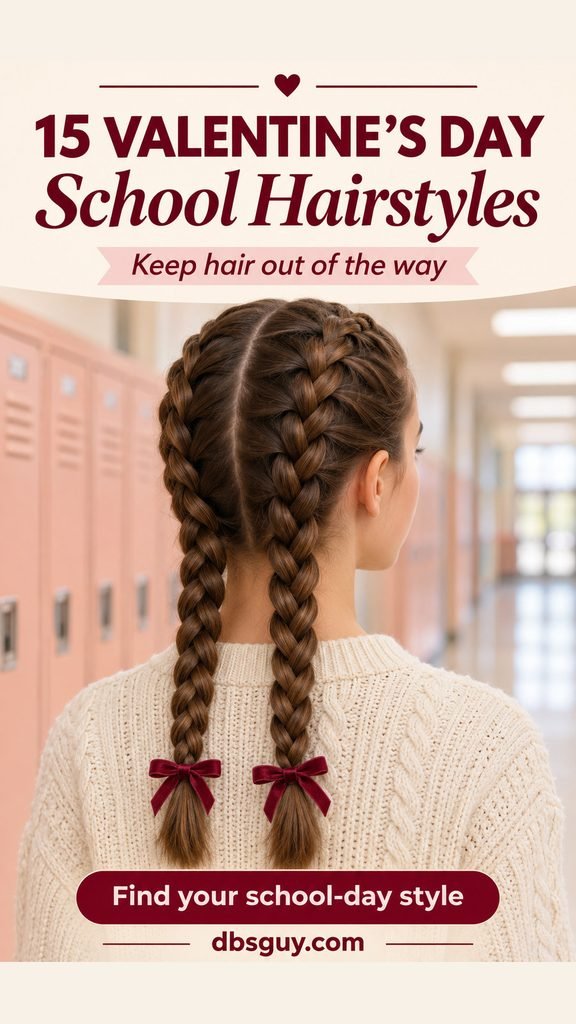
The images are AI-generated styling concepts. They illustrate the shapes and accessory placement, rather than documenting hairstyles tested on students.
Choose a style for the school day you have
- For a rushed morning: Choose the low bow ponytail, a puff you already wear comfortably, or the soft headband bob.
- For long hair during art, lunch, or PE: A braid controls the tail; a braided low bun also tucks the ends away. Follow your teacher’s activity-specific hair and accessory rules.
- For shorter front layers: Try the side braid, crossed twists, or mini-braid bob. A ponytail at the back alone may leave those pieces loose.
- For a clear Valentine motif: Save the braided heart for a morning when someone can help with the back.
Gather a comb, your usual detangling tool, covered hair ties, and any small pins or fabric accessories the style needs. Detangle in sections before gathering; use your normal curl-friendly routine for curls and coils instead of brushing them straight to copy an image.
Keep every base comfortable. The American Academy of Dermatology advises loosening hairstyles that pull and changing a style immediately if it causes pain or stinging. A smoother hairline is not a reason to keep tightening the tie.
1. Low bow ponytail
Choose it when: Your hair reaches a nape ponytail and you want the Valentine detail to come from an accessory.
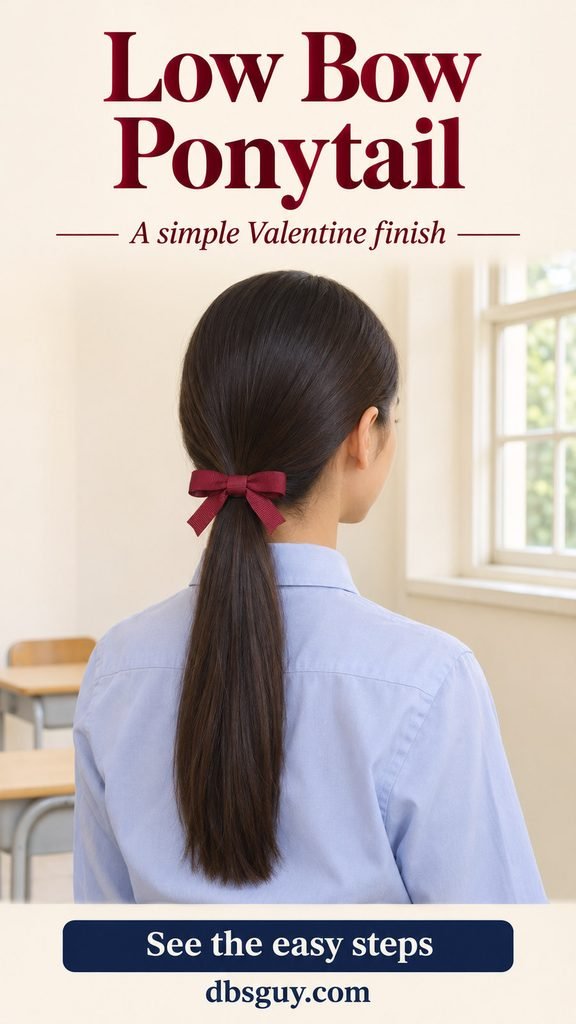
Gather the hair low at the back, including the sections in front of your ears, and secure it with a covered tie. Add a small burgundy bow over the tie. The elastic holds the hair; the bow supplies the color.
Keep the ribbon tails short enough to sit near the ponytail base rather than trailing down your back. If front layers slip free, pin them back separately instead of pulling the ponytail tighter. For an activity that requires the length contained, braid the tail or choose the low bun below.
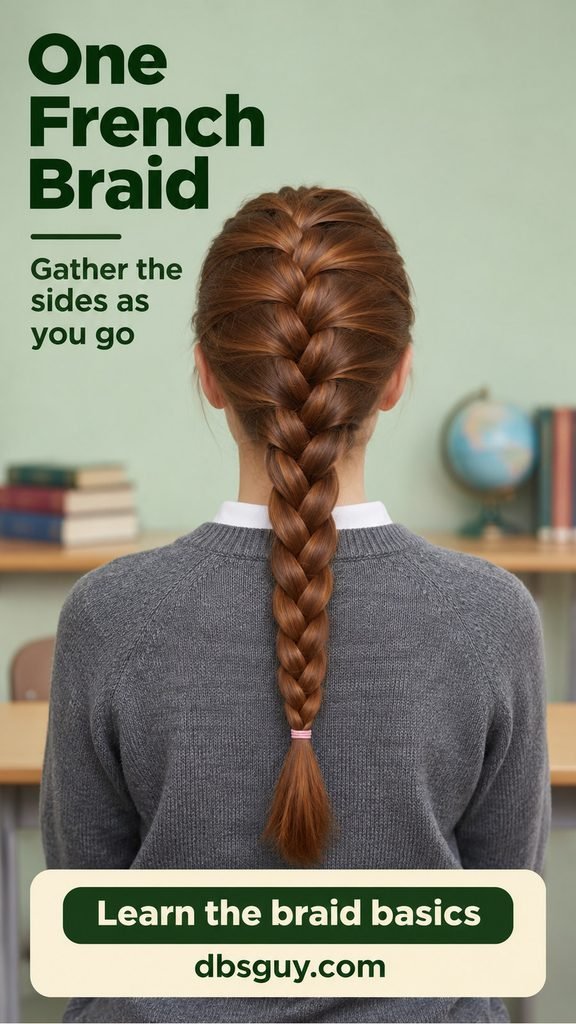
2. One French braid with a pink tie
A French braid gathers the sides into one central path, so there is no separate ponytail swinging loose. It suits hair long enough for the side sections to reach the braid as you work.
Take a section at the top back of the head and divide it into three. Cross an outside strand over the middle, then repeat from the other side. Before each following crossover, add a small section of loose hair from that same side.
Continue toward the nape. Once all the loose hair is included, finish with an ordinary three-strand braid and a pink tie. Keep the sections manageable rather than tugging hard to make the braid perfectly flat. If you are braiding your own hair, practice the hand movement before the school morning.
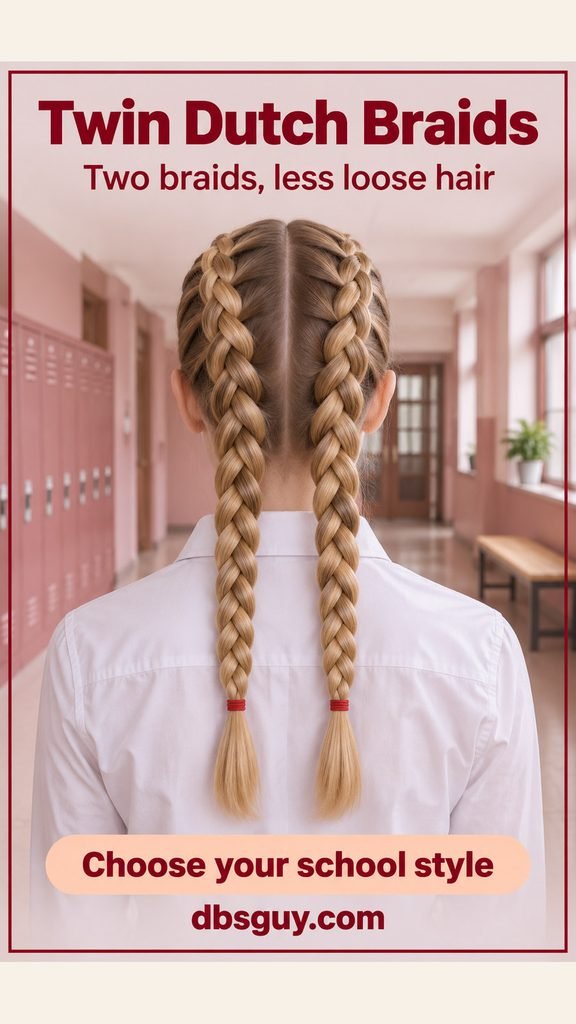
3. Twin Dutch braids with red ends
Two Dutch braids divide the hair into smaller working areas. They are useful when side pieces can reach a nearby braid more easily than one in the center.
Part from forehead to nape and clip one half aside. Start with three small sections near the front of the working half. Cross the outer strands under the middle, adding hair from the same side before each crossover. That underhand movement creates the raised braid.
At the nape, continue as a regular braid and secure the end with a red tie. Repeat on the other half. Aim for comfortable roots and similar placement rather than identical braid thickness. Leave the braid edges fairly compact for school instead of pulling them into oversized loops.
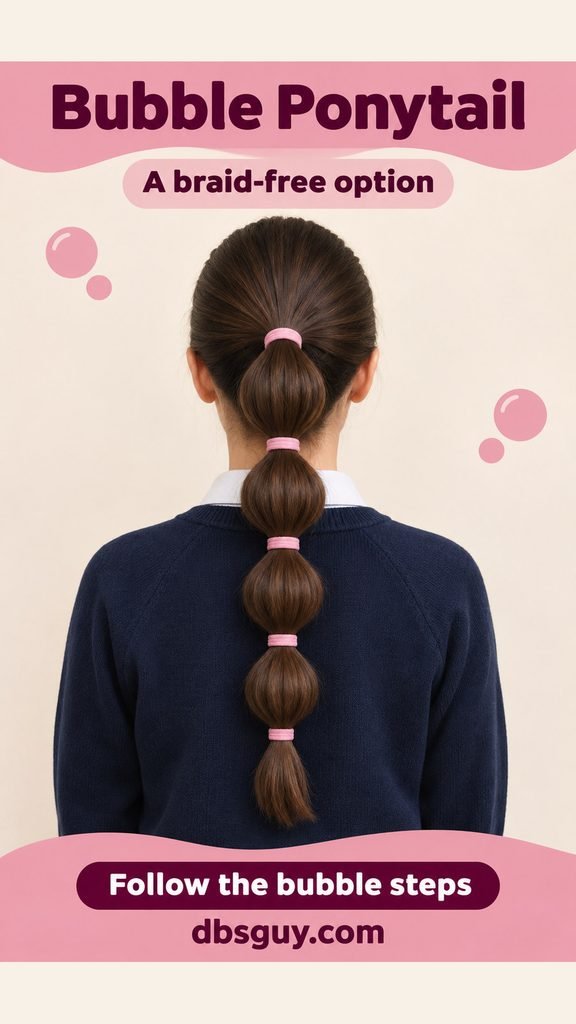
4. Bubble ponytail with pink ties
Pink ties give a long ponytail a Valentine finish without any braiding. You need enough length below the base tie to create separate rounded sections.
Secure a mid-height ponytail first. Add another small covered tie farther down the tail, then gently ease out the hair between the two ties to make one rounded section. Continue down the length, leaving a short, unsegmented tip.
The image shows four bubbles. Use fewer if your hair is shorter; the ties should fit the length you have. Shape each bubble before adding the next tie, and hold the section steady so you are not pulling against the scalp. Modest bubbles are easier to keep clear of a backpack than very wide ones.
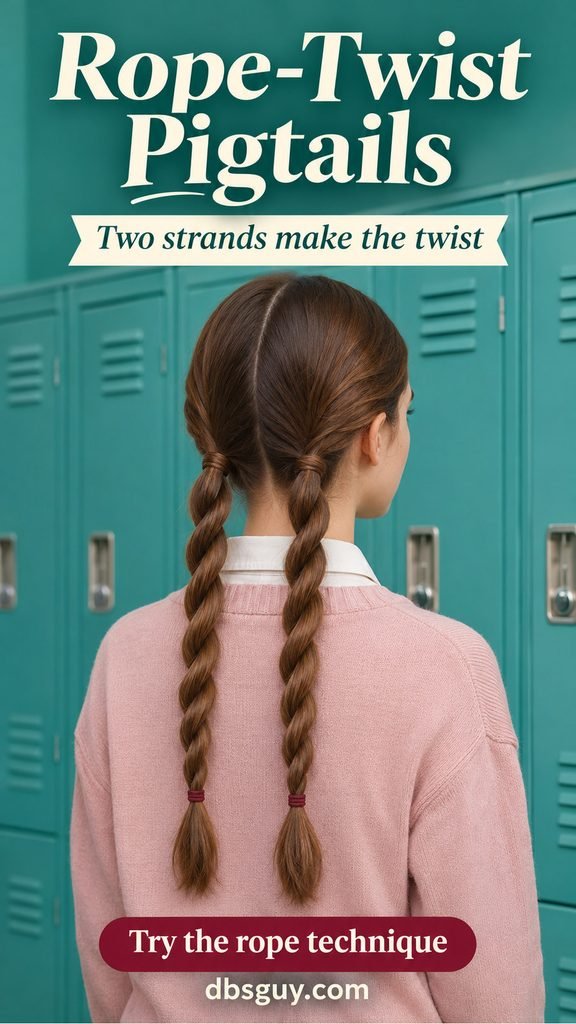
5. Rope-twist pigtails
Choose it when: Two-strand twisting feels more manageable than moving three strands between your hands.
Make two low ponytails with a center part. Divide one ponytail into two equal sections. Twist each section in the same direction, then wind the two sections around each other in the opposite direction. Secure the end before letting go. Repeat on the other side.
For example, twist both individual sections to the right, then wrap them around each other to the left. Simply wrapping two untwisted sections together can unravel easily. Keep the upper ties as the anchors and use small burgundy ties at the ends for the Valentine finish.
Also Read: Quick Hairstyle 2026: Cute Easy Braids, Ponytails & Simple Updos for Work, School and Everyday Life.
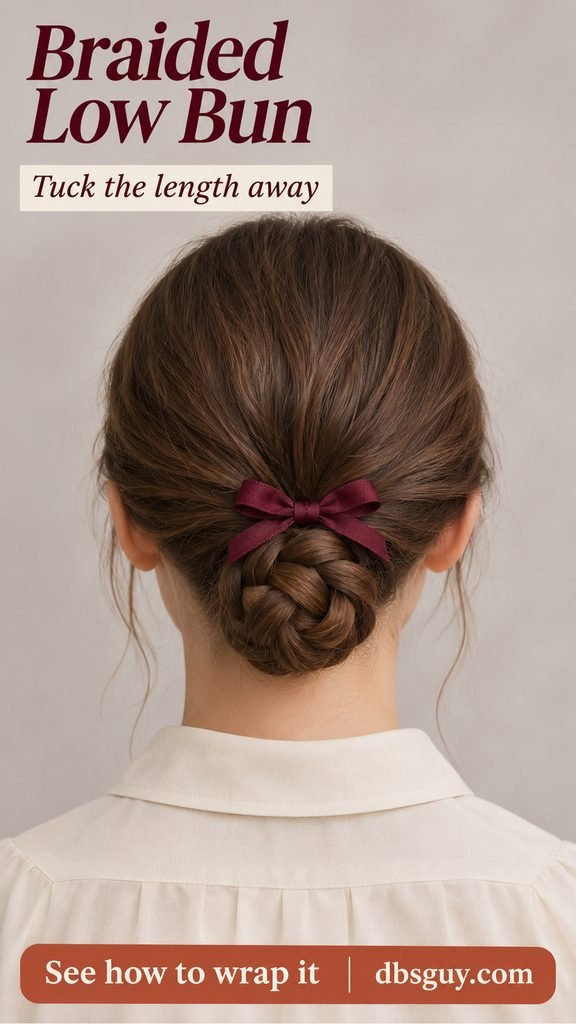
6. Braided low bun
A compact braided bun tucks away the ends that would otherwise hang over a desk or coat collar. Your ponytail needs enough length to wrap around its base.
Make a low ponytail, braid the tail, and tie its end. Wrap the braid around the ponytail base to form a compact coil. Tuck the tip underneath, then anchor the coil with hairpins, catching both the bun and some hair at its base without pressing into the scalp.
Add a small bow above the bun where it will not hide the braided texture. If the coil feels heavy, do not solve that by tightening the roots. A single hanging braid may be more comfortable. Check school rules before using pins for PE or sports.
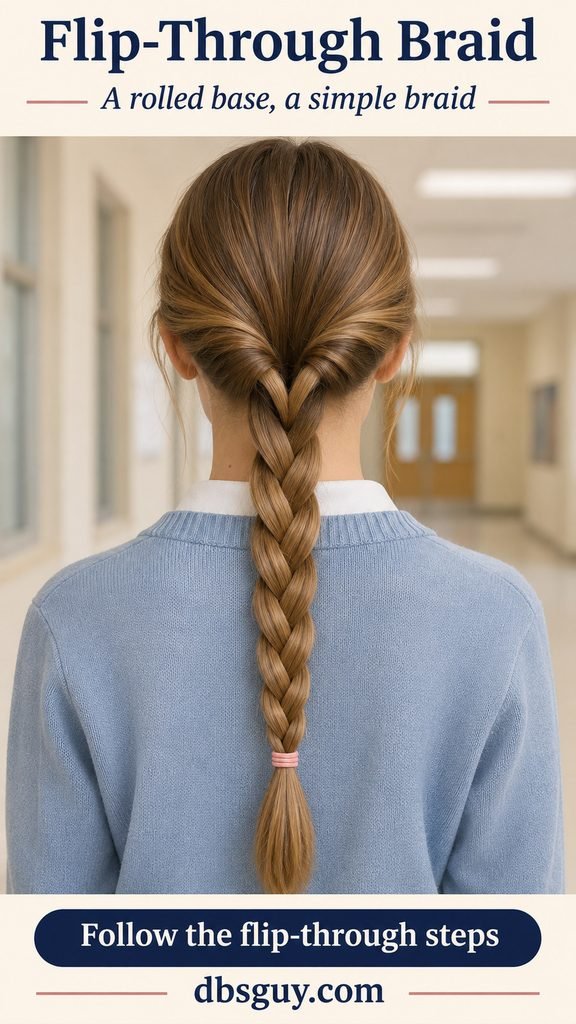
7. Flip-through braid
The rolled detail at the nape comes from flipping a ponytail once before braiding it. This gives a familiar low braid a different starting shape without adding scalp braiding.
Make a low ponytail and slide its elastic down just enough to create a gap above it. Divide the hair above the elastic into two sides. Lift the ponytail up, pass it through the gap from top to bottom, and let it fall down your back.
That single flip makes the inward rolls shown in the image. Braid the tail and secure it with a pink tie. If the opening collapses before the tail passes through, loosen the base and try again. Repeated flipping can overtwist the sides; one pass is enough for this version.
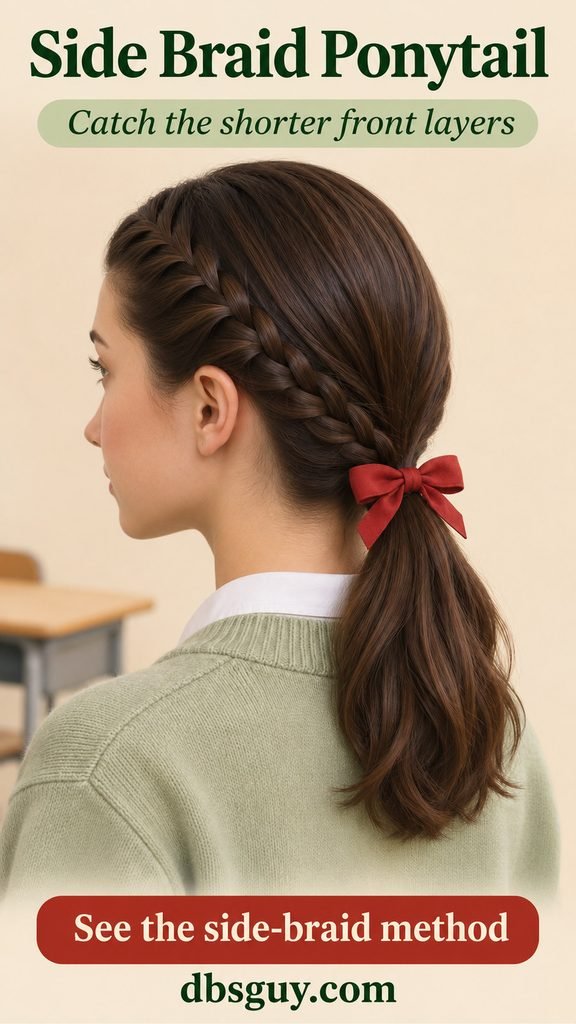
8. Side French braid into a low ponytail
Choose it when: The front section on one side keeps slipping out of your usual ponytail.
Make a side part and begin a small French braid on the fuller side, close enough to the front to collect those escaping layers. Add hair as you braid backward above the ear. Once the braid reaches the back, gather it with the remaining hair into a low ponytail.
Place a short red bow over the main tie. Keep the face clear instead of leaving a long decorative tendril beside the eye. If a section is too short to reach the braid, use a small school-approved clip rather than repeatedly tugging it into place.
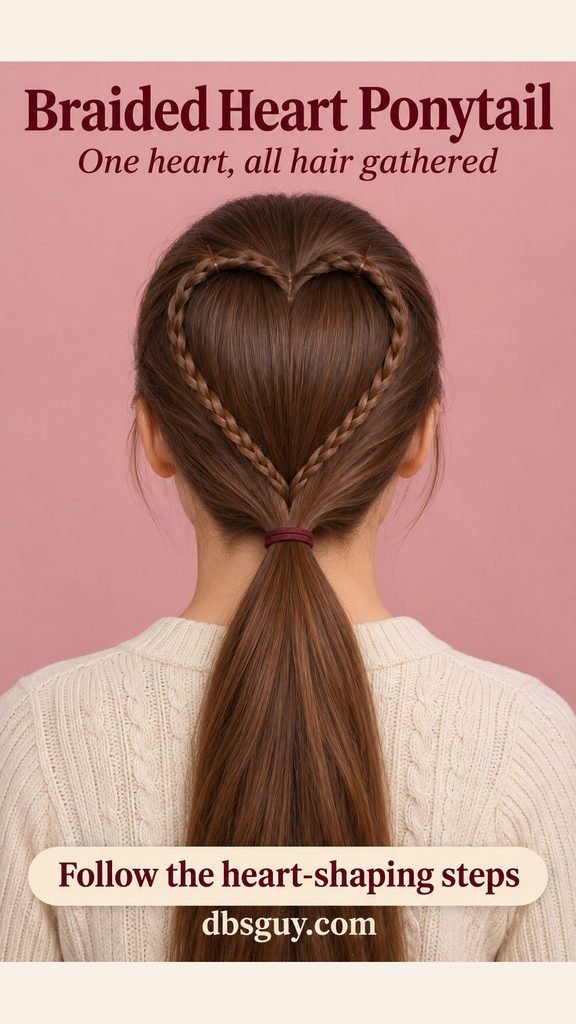
9. Braided heart above a full ponytail
Set this one aside for long hair and a morning when a helper can arrange the back. The heart needs enough braid length for two rounded curves, plus time to check the pins.
This version gathers the lower hair, too, so the finished heart does not sit over loose lengths.
- Separate an upper section from temple to temple and split it down the center. Keep the lower hair out of your working area.
- Make a slim three-strand braid from each upper half, starting near the center back. Temporarily tie the ends.
- Curve each braid outward and upward near its starting point to form a rounded lobe. Pin the curves gently against the hair beneath.
- Bring both braids inward and down until their ends meet at a heart-shaped point.
- Gather those ends and all the lower hair into one nape ponytail. Secure it, then remove temporary end ties that are no longer needed.
Keep the heart small enough for the available braid length. If the lobes need constant repinning, choose a bow ponytail for school and practice the heart another day.
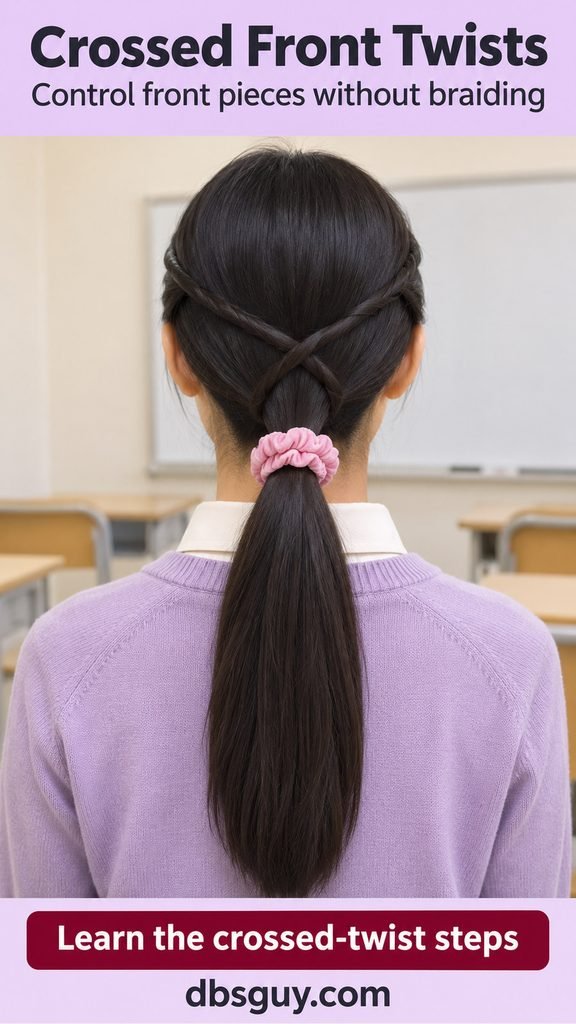
10. Crossed front twists into a ponytail
Crossed twists give front sections their own anchors before they join the ponytail. This is an option when rolling hair back feels easier than French braiding.
Set aside a narrow section near each temple. Gather the rest into a low ponytail. Roll each front section backward, adding nearby front pieces as needed, and guide both twists toward the back.
Cross them once above the ponytail to make an X, then secure their ends into the ponytail with a second covered tie. Place a pink scrunchie over the base. The crossing should sit comfortably against the hair beneath. If the sections barely reach, skip the X and secure them directly at the base instead.
11. Curly high puff with a fabric headband
Choose it when: Your curls or coils already gather comfortably into a high puff.
Use your hands to guide the hair upward and secure it with a suitably sized soft tie, keeping the ends free to form the puff. Place a wide burgundy fabric headband just behind the hairline to guide shorter front curls backward.
Arrange the puff so it sits above and behind the forehead rather than falling toward the eyes. There is no need to flatten the curl pattern or brush the edges into a rigid finish. If reaching that height pulls at the nape, lower the puff; the accessory can provide the Valentine detail wherever the base sits.

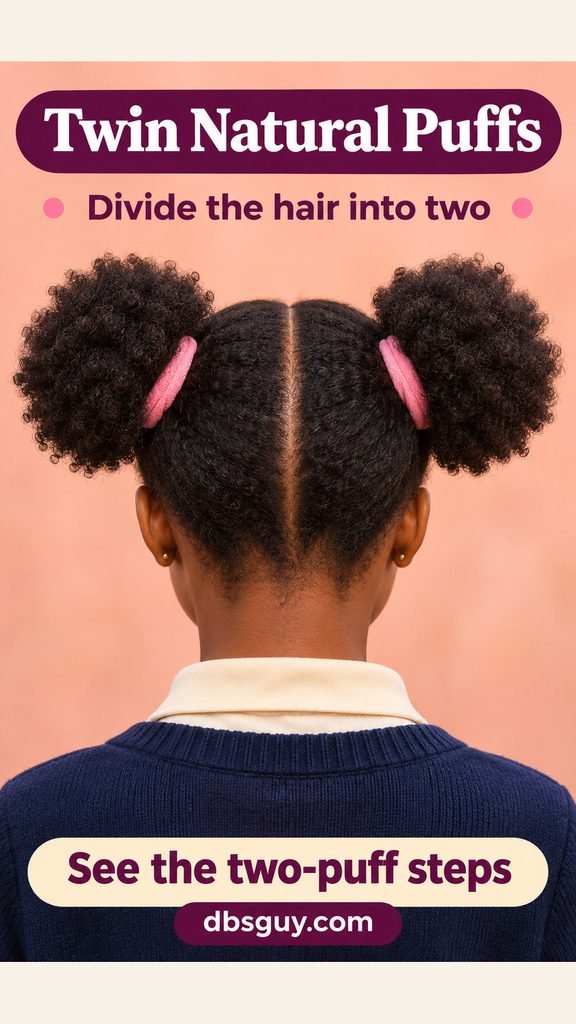
12. Twin natural puffs
If one high puff requires too much stretching, try dividing the hair into two side bases. The pink ties give both puffs a small matching accent.
Part the hair down the middle and work with one half at a time. Gather each side into a rounded puff, including the front pieces, and secure with a soft tie. The image places the puffs above the ears; move them lower if that is where the hair gathers comfortably.
Add pink fabric ties without stretching the roots for a perfectly slick finish. Compare the two bases for comfort before adjusting their appearance. For a school activity requiring a helmet or other headgear, choose a style that fits correctly beneath that equipment and follow the activity rules.
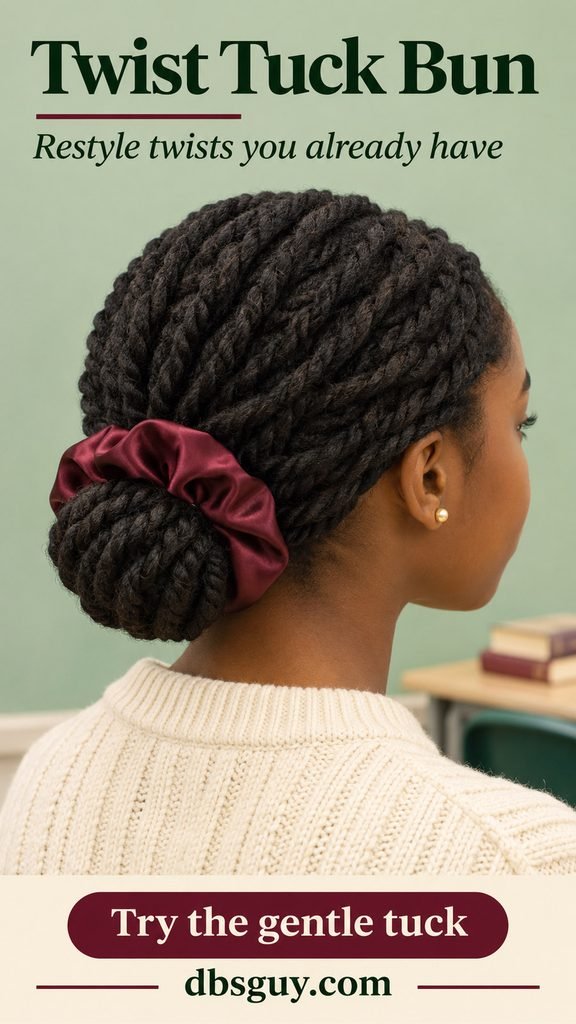
13. Tucked bun for twists you already have
Choose it when: You are wearing medium-length two-strand twists and want to gather them without taking them down.
Guide the twists loosely toward the nape with your hands. Gather them in a wide scrunchie, fold the ends under, and use another gentle wrap of the scrunchie to hold the tucked shape. Arrange any escaping ends beneath the bun without pulling individual twists at their roots.
A burgundy satin scrunchie makes the existing texture the main feature. This is a restyling option, not instructions for installing twists. If your twists are too short or bulky to fold comfortably, leave the ends in a low gathered tail instead.
For other ways to arrange existing twists, browse 27 Twist Hairstyles 2026 – Trendy Twist Ideas for Natural Hair.
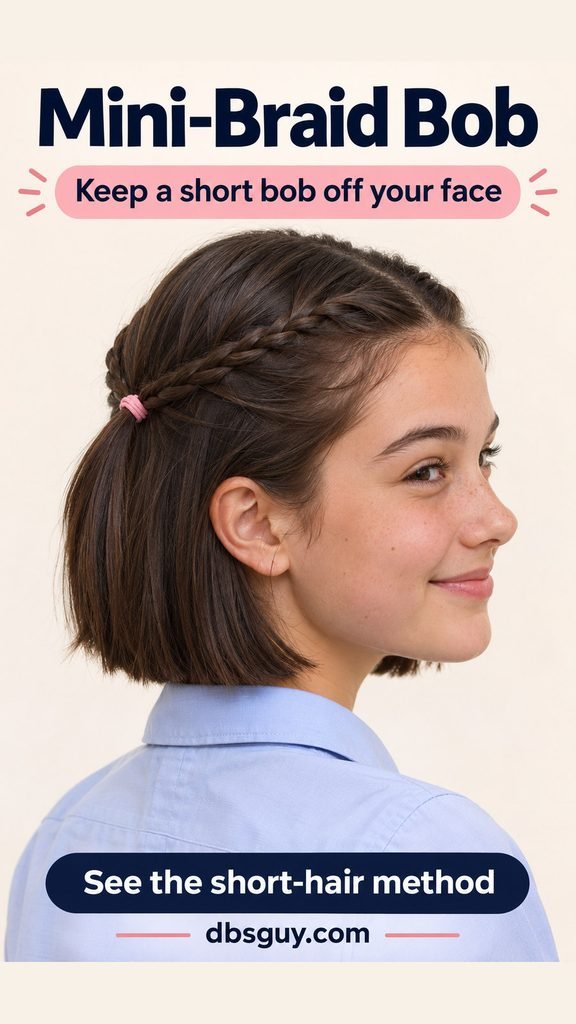
14. Mini-braid bob with a pink tie
A bob does not need to reach a full ponytail for its front sections to be secured. Two slim braids can guide those pieces back while the shorter nape stays down.
Take a small section near each temple and make a slim three-strand braid, guiding it backward as you work. Bring the braids together where their ends comfortably meet at the back and secure with a small pink tie. Let the short nape hair remain down.
If they do not meet, secure each braid separately behind its ear with a suitable small clip. This keeps the front away from your work while accepting the bob’s shorter back. It will not contain the whole hairstyle for an activity that requires every strand tied up.
15. Short curly bob with a soft headband
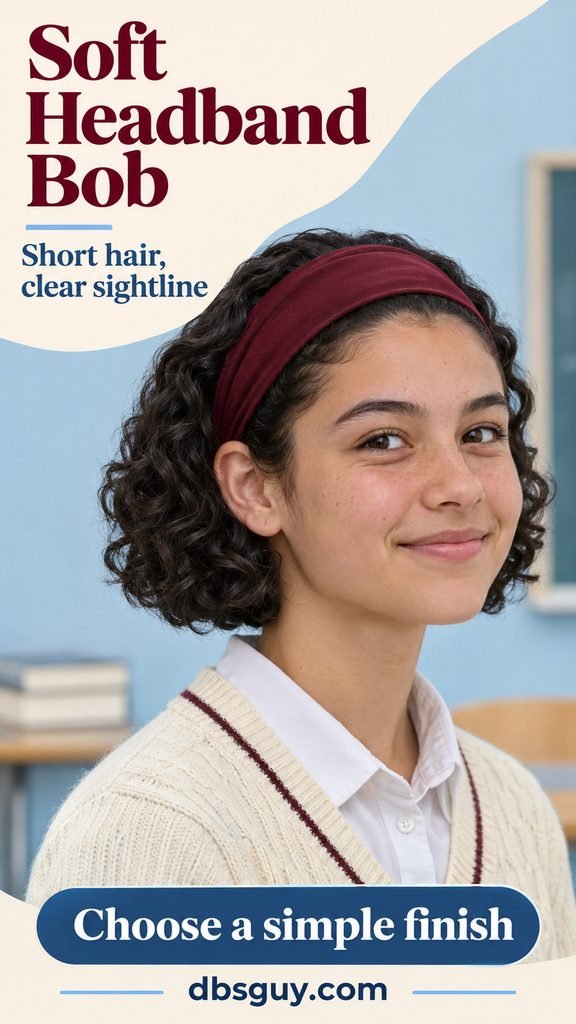
A soft fabric band can hold short front curls back without making tiny ponytails. Burgundy makes the accessory feel seasonal while the bob keeps its natural shape.
Guide the front curls backward and place a soft burgundy fabric headband just behind the hairline. Tuck the side sections behind your ears, then arrange the curls at the back with your fingers. The band should hold the front without pressing painfully at the temples or behind the ears.
Try looking down at a notebook and turning your head. If the band slides, try a different fit rather than forcing it farther back. This look clears the face while leaving the short back loose; choose another option if your class requires the length fully secured.
Also Read: Cute Hairstyles for Short Hair 2026: Easy Bobs, Pixies, Bangs, Braids & Curly Looks.
Before you head to school
Put on the hoodie, coat, or backpack you will actually wear and check that the hairstyle does not catch or get pushed forward. Look down over a notebook, turn your head, and check the front again. Fix the section that slips instead of tightening the whole style.
Use the base tie or pins for support and keep decorations small. Leave dangling ribbon tails and bulky clips out of a style when they interfere with school activities. Pack a spare covered tie if you may need to switch from a ponytail to a braid later.
Questions about Valentine’s Day hair for school
What is the easiest style to do by yourself?
Start with a low ponytail and a small bow if your hair reaches. A soft headband is a simpler option for short hair. The braided heart is better suited to a helper because you need to arrange and check both curves at the back.
Can I make these styles without hot tools?
Yes. None of these looks requires straightening or curling first. Work with your usual texture, and choose a base that gathers comfortably. The pictured finish is a concept, not a requirement to make every strand smooth.
How do I keep bangs out of the way?
Long bangs can go into a front braid or twist. For shorter bangs, try a soft headband or a small clip positioned clear of the eyes. If the bangs cannot reach the back, handle them separately rather than pulling harder on the ponytail.
Which option should I choose for PE?
Begin with your school’s rules for that activity. A braid gathers a long tail, while a compact bun tucks the ends, but headgear and accessory restrictions may change the choice. Remove decorations when required and make sure the style stays comfortable as you move.
Also Read: Valentine Classroom Ideas for a Day Full of Crafts, Games, and Kindness.