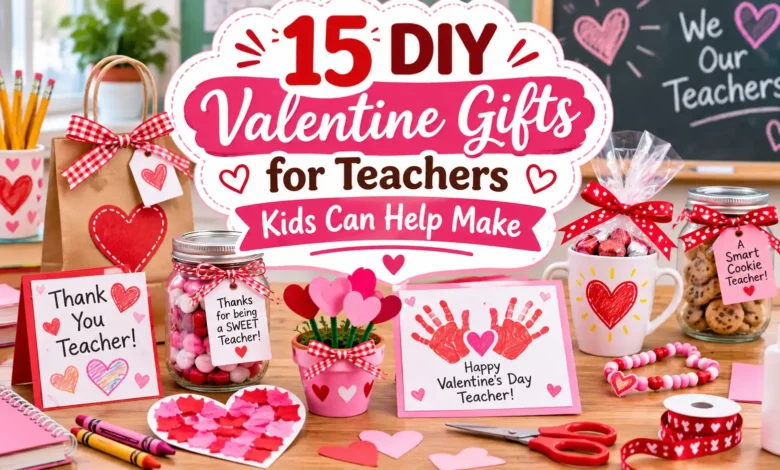
Start with something your child can actually make: a torn-paper thank-you card, a painted bookmark, or a small book about what they have learned. If you would rather give something useful for the classroom, try a pencil cup, a sticky-note cover, or a hand-drawn tote.
These 15 DIY Valentine gifts for teachers give kids a real part in the making. Choose one project that fits their attention span and your supplies. One small gift with a specific thank-you is enough.
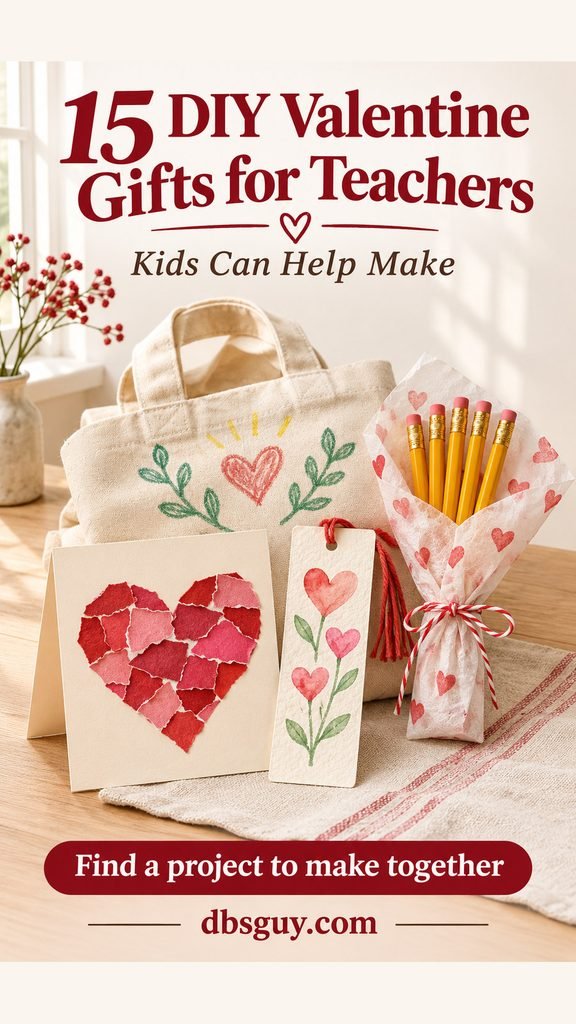
The images are AI-generated craft concepts. They illustrate the designs; the projects have not been physically tested.
Choose a Project Your Child Can Own
For a preschooler, start with tearing paper, coloring, or placing tape while you handle the cutting. For a child who enjoys measuring and folding, try the accordion book or sticky-note folio. The felt sleeve needs more adult preparation and drying time. Follow your child’s skills rather than treating an age as a guarantee of independence.
Check the school’s gift policy before buying materials, and use the teacher’s preferred name and title. The suggestions here are food-free, so you can make a complete gift without adding candy.
Use labeled art supplies intended for children and the surface you are decorating. The CPSC’s Art and Craft Safety Guide recommends close supervision, reading labels, and avoiding solvent-based materials for young children. An adult should handle sharp tools, any required heat setting, and adhesives that are not labeled for the child’s use. Keep clips and other small parts away from children who mouth objects, and wash hands afterward.
1. Make a Torn-Paper Heart Thank-You Card
A mosaic heart gives a child who is still learning to cut a satisfying job: tearing and arranging the pieces. Keep the inside for one thing they genuinely appreciate about their teacher.
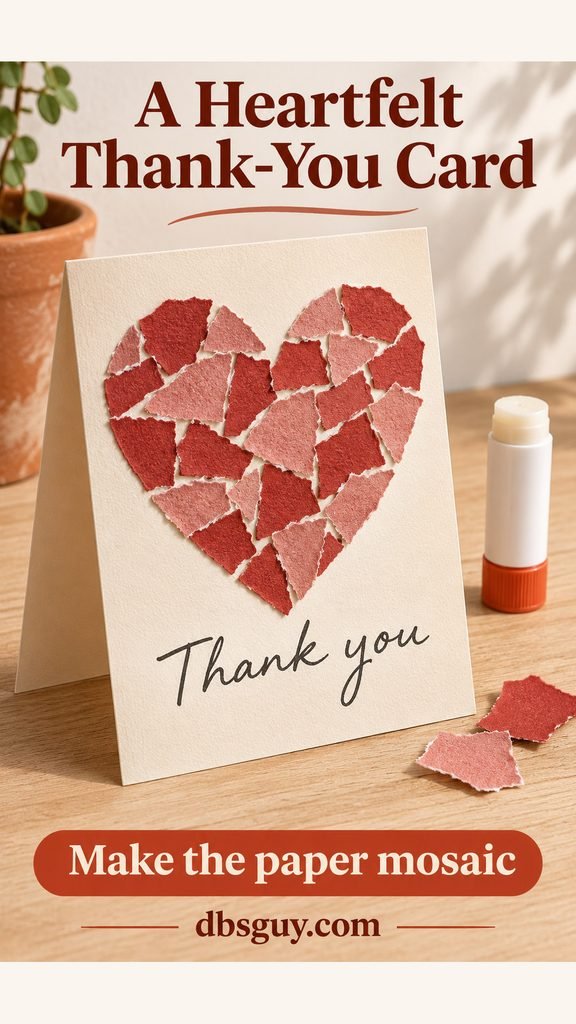
Gather: A blank folded card, red and pink paper scraps, a pencil, a glue stick, and crayons.
- Lightly draw a heart on the front of the card. Tear the colored paper into small pieces; they do not need to match.
- Spread glue inside the outline and press the pieces down, leaving narrow gaps so the mosaic stays visible. Keep the fold clear.
- Let your child finish the inside with a drawing or a sentence such as, “Thank you for helping me read the tricky words.” Write down their words if they cannot write yet.
Adult help: draw the outline if needed and check that the card opens freely. A few uneven pieces make it look like the child made it—which is the point.
2. Paint a Watercolor Bookmark
A flat bookmark is easy to carry to school and useful beyond February. Let the child choose a color the teacher likes, or simply use two colors that blend well.

Gather: Watercolor paper, washable watercolors, a brush, a ruler, scissors, and a colored pencil.
- Have an adult cut a strip about 2 by 7 inches. Tape its edges lightly to scrap paper if it wants to curl while painting.
- Brush on a light wash of color without soaking the paper. Leave it flat until completely dry.
- Add a small heart or leaf drawing and sign the back. Check that no loose color rubs off before putting it between book pages.
Skip bulky decorations that press into a book. The section image shows a ribbon-free version; a slim strip of cardstock also works if you would rather use crayons than paint.
3. Fold a Little Book About What They Taught You
Instead of filling a card with a long adult-written message, give your child three small prompts. A drawing of a classroom moment can say more than a polished paragraph.
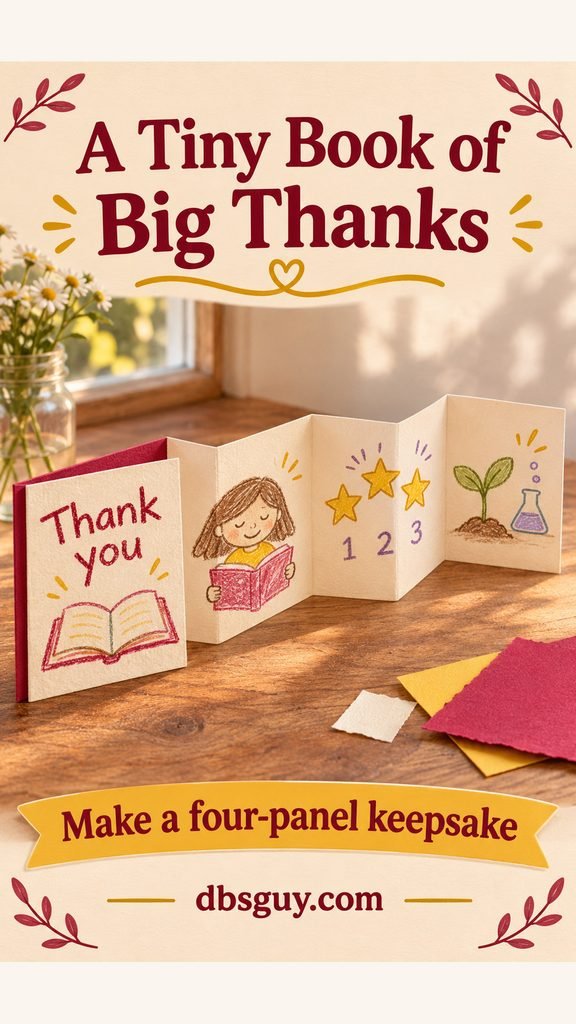
Gather: One 3-by-12-inch strip of cardstock, two 3-inch cover squares if desired, crayons, and a glue stick.
- Mark the strip at 3, 6, and 9 inches. Fold back and forth at the marks to make four connected square panels.
- Use the first panel for “Thank you.” Fill the other three with something learned, a favorite classroom activity, and a moment the teacher helped.
- Glue a cover square to the outside of each end panel if you want sturdier covers. Keep glue out of the creases so the book closes.
Adult help: measure and start the folds. Ask one question at a time, then let the child draw or dictate the answer without turning it into an essay.
4. Build a Three-Flower Paper Heart Bouquet
This bouquet needs no water and can travel flat. Its flowers use broad paper stems, so there is no wire to cover or pointed stick to manage.

Gather: Colored cardstock, green cardstock strips, small paper circles, a glue stick, tape, and a sheet of wrapping paper.
- For each flower, cut three hearts about 2 inches tall. Overlap their pointed ends into a fan, with the rounded tops forming the petals.
- Glue the meeting points to the top of a green cardstock strip about 1 inch wide. Cover the join with a small paper circle and add a leaf. Reinforce the back with tape.
- Repeat for three flowers. Let the joins dry, then gather the lower stems in paper wrapping without bending the flower heads.
An adult can cut the shapes first while younger children choose and arrange the petals. Carry the bouquet on a piece of cardboard in a bag if the trip to school is rough.
5. Give a Pencil Cup a Child-Designed Sleeve
Use a sturdy cup you already have, provided it has a smooth rim and sits securely. The removable sleeve lets the child decorate on a flat surface before it goes around the cup.
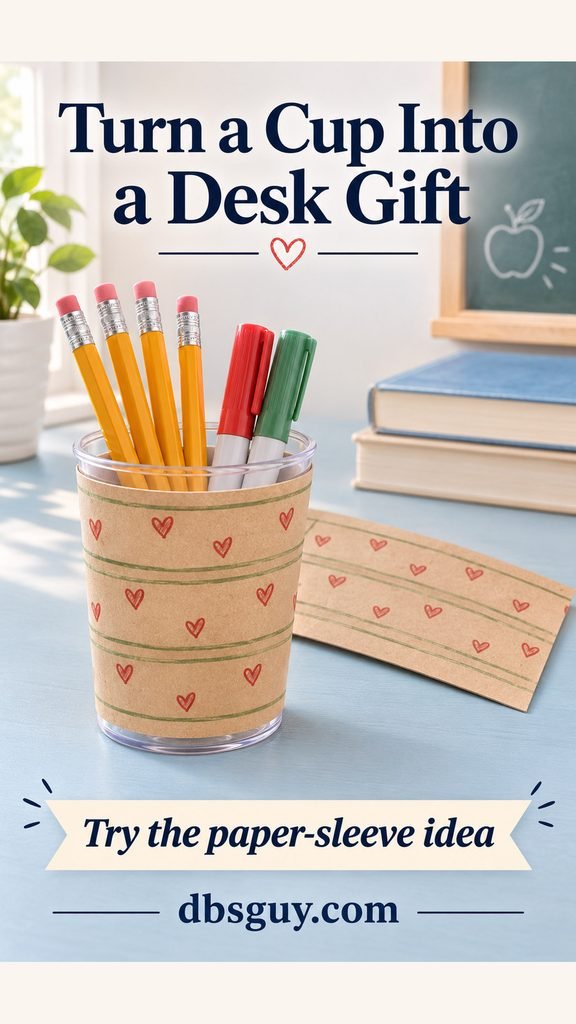
Gather: A clean, dry plastic pencil cup, kraft paper, crayons or markers, scissors, and tape.
- Wrap plain paper around the cup to measure the height and circumference. Leave about ½ inch of overlap and keep the paper below the rim.
- Lay the cut sleeve flat. Let your child draw hearts, stripes, or a small classroom scene.
- Wrap it around the cup and tape the sleeve to itself at the back. Add a few pencils you already have, or give the empty organizer.
Adult help: trim and fit the sleeve. A straight-sided cup is easier to cover than a strongly tapered one; keep the paper dry when cleaning it.
6. Make a Book-Style Cover for Sticky Notes
A little folio turns an ordinary sticky-note pad into a personal desk supply. The important part is the flexible spine: leave enough room for the cover to close over the pad.
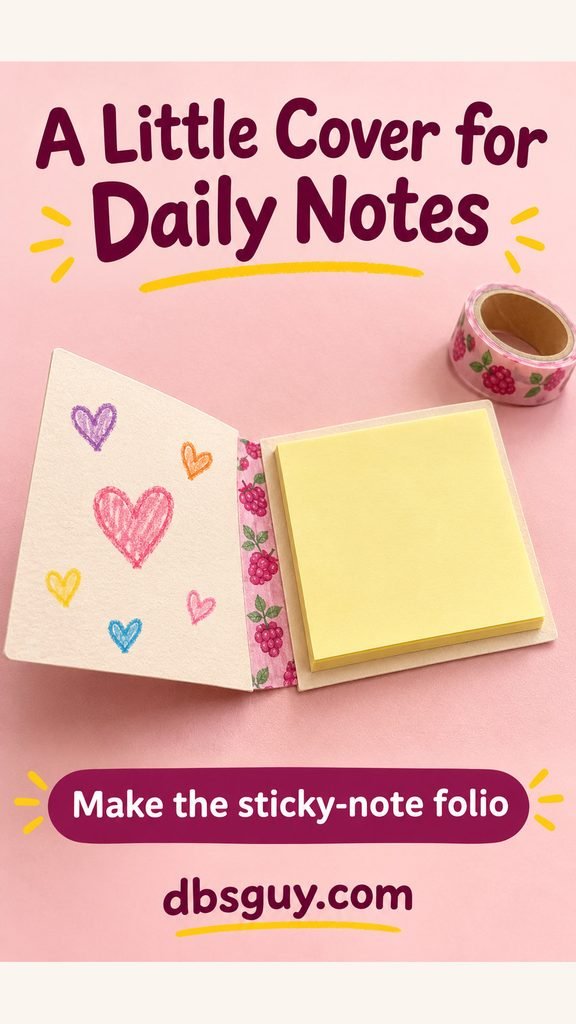
Gather: A 3-inch-square sticky-note pad with a cardboard back, two 3¼-inch cardstock squares, paper tape, and double-sided tape.
- Decorate one square with a few flat drawings. Place the two covers side by side with a gap slightly wider than the pad is thick.
- Bridge the gap with a strip of paper tape on both sides, making a flexible book hinge. Trim any exposed sticky edges.
- Fix the pad’s cardboard back to the inside of the right cover with double-sided tape. Close the folio gently; widen the hinge if the cover pulls on the pad.
Your child can draw the cover and press down the tape. An adult should fit the spine. Tape only the pad’s backing so the notes remain usable.
7. Wrap a Bouquet of Five Pencils
For a child who wants to assemble a gift rather than paint one, make a small bouquet from classroom supplies. The handmade part is the wrapping and the child’s illustrated tag.
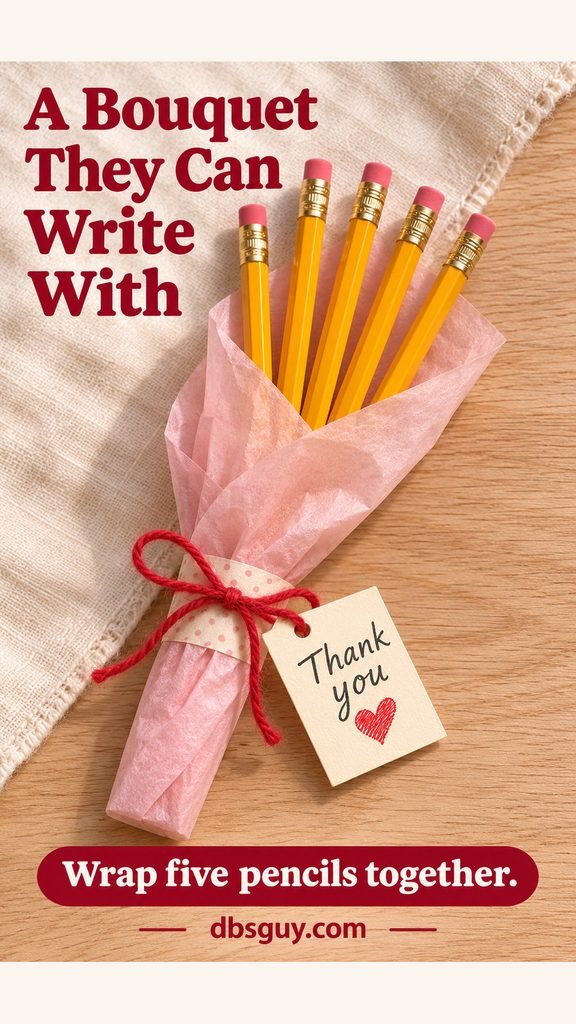
Gather: Five unsharpened pencils, tissue paper, paper tape, yarn, and a small cardstock tag.
- Fan the pencils slightly with their erasers at the top. Hold them together near the lower half with a loose paper band.
- Wrap tissue around the lower halves, leaving all five erasers visible. Tape the paper to itself rather than covering the pencils in adhesive.
- Have your child draw and sign the tag. Add a loose yarn bow around the wrapper.
Match the pencils to supplies the teacher uses if you know their preference. Leave them unsharpened for the trip and keep the wrapping easy to remove.
8. Put Their Drawing on a Cotton Tote
A tote gives a child’s drawing room to stand on its own. Choose one recognizable design—a heart, a book, or a leafy stem—instead of trying to fill every inch.
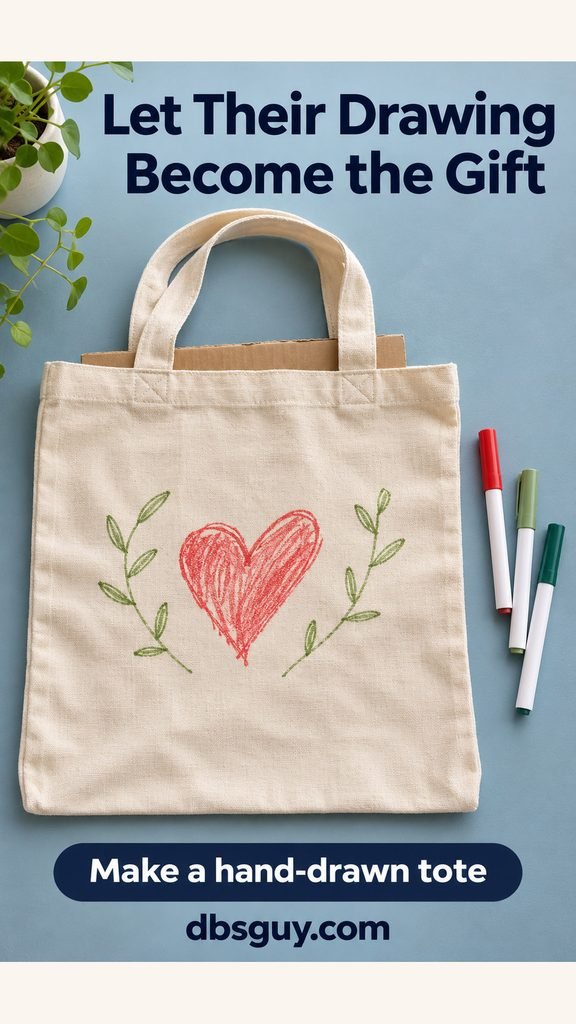
Gather: A plain cotton tote, fabric markers labeled for the child’s age, scrap cardboard, and paper for a practice drawing.
- Read the marker and tote care directions first, including whether the fabric needs washing before decorating.
- Slip cardboard inside the tote to separate the layers. Let your child practice the design on paper, then draw it on the bag with light strokes.
- Follow the marker’s drying and setting directions. Any ironing or other heat setting is an adult job. Include the care instructions with the gift.
Do not promise that every fabric marker will survive the same wash routine. If suitable markers are unavailable, choose the paper folder in idea 15 instead.
9. Assemble a No-Sew Felt Pen Sleeve
This is a good choice for a child who likes arranging fabric shapes. Keep the design simple and allow the adhesive its full labeled curing time before putting pens inside.
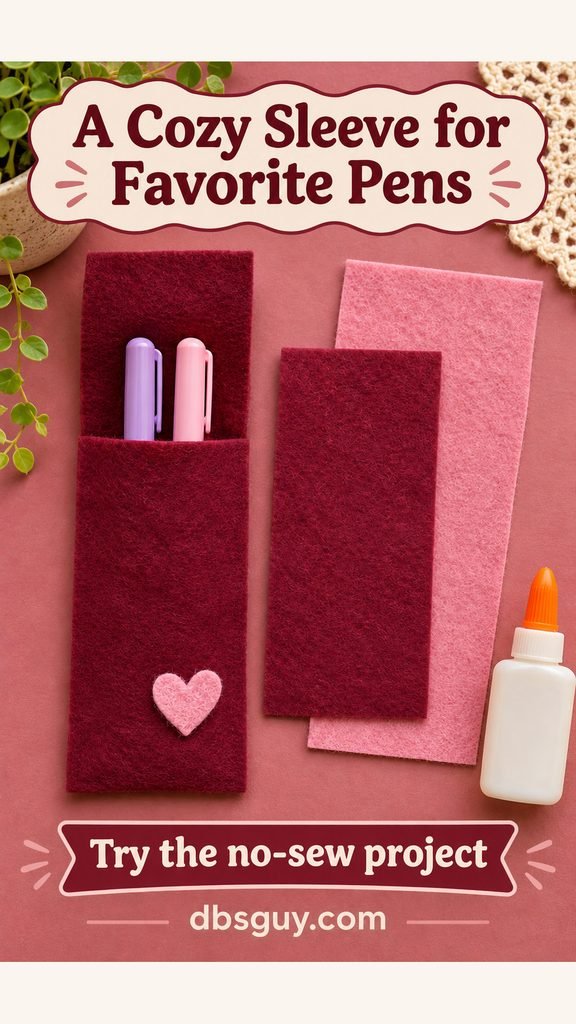
Gather: Felt rectangles about 4 by 8 inches and 4 by 10 inches, a small felt heart, and felt-compatible fabric glue.
- Lay the shorter piece over the longer piece with the bottom edges aligned. An adult should apply a narrow line of glue along the bottom and both sides, about ¼ inch from the edges.
- Press the pieces together, leaving the top of the shorter panel open. The taller back creates a loose flap. Glue the heart low on the front.
- Let the sleeve cure flat according to the glue label. Test the seams gently, then try one or two capped pens. Fold the flap over without adding a small closure.
If the glue is not labeled for your child’s use, their job is choosing colors and placement while you handle bonding. This is a simple holder, not a leakproof pen case.
10. Decorate a Set of Large Binder Clips
A few decorated clips make a small gift for a teacher who sorts papers all day. Use thin paper decorations so the clips still open, close, and hold a stack normally.

Gather: Three large binder clips, paper scraps, colored pencils, double-sided tape, and cardstock for packaging.
- An adult should measure one flat outer face of a clip and cut a paper rectangle that fits entirely within it.
- Let the child draw a different small pattern for each clip. Tape the paper onto the flat face only, staying clear of the jaws and moving handles.
- Have an adult open and close each clip to check it. Clip the finished set to a piece of cardstock for the trip to school.
Keep the metal clips with the adult while a younger child decorates the paper. Skip dangling beads or thick embellishments that interfere with the mechanism.
11. Draw a Small Stationery Set the Teacher Can Use
Unlike a thank-you card addressed to the teacher, these cards are left blank for the teacher’s own notes. That makes the child’s artwork part of a reusable supply.
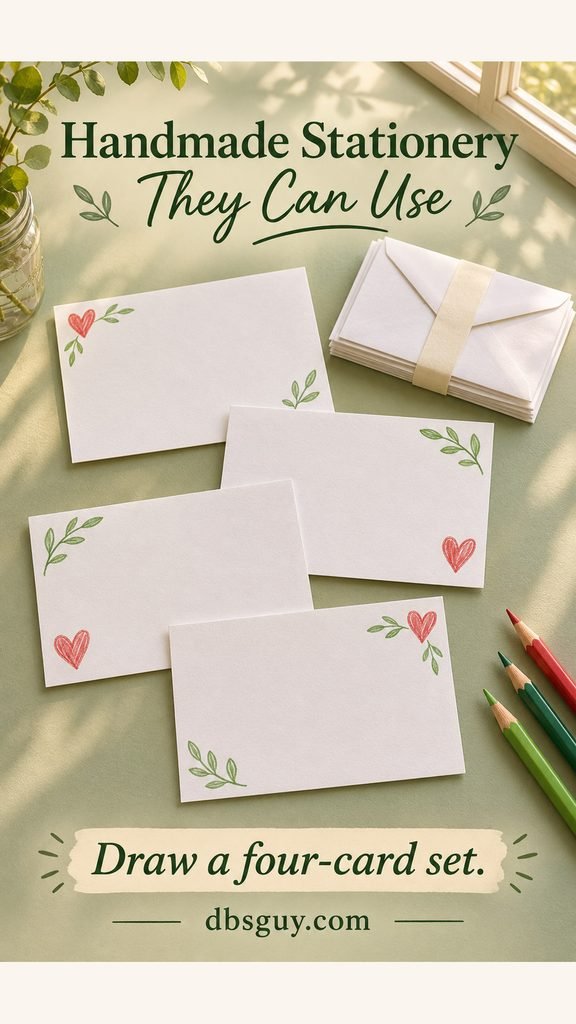
Gather: Four blank note cards, matching envelopes, colored pencils, and a strip of paper for a band.
- Draw a small heart, leaf, or book in one corner of each card. Leave most of the front and the entire inside blank.
- Add a tiny matching design to the back flap of each envelope, keeping the address area clear.
- Stack the dry cards with their envelopes and hold them with a loose paper band. Put the child’s thank-you on the band, where it will not use up a blank card.
Colored pencils make this a dry project with little setup. Let the four designs vary; they do not need to look like a printed matching set.
12. Paint a Small Pot for a Teacher Who Gardens
Choose this one only if you know the teacher enjoys plants. Give the pot empty with a saucer and, if appropriate, an unopened seed packet chosen for their growing space.
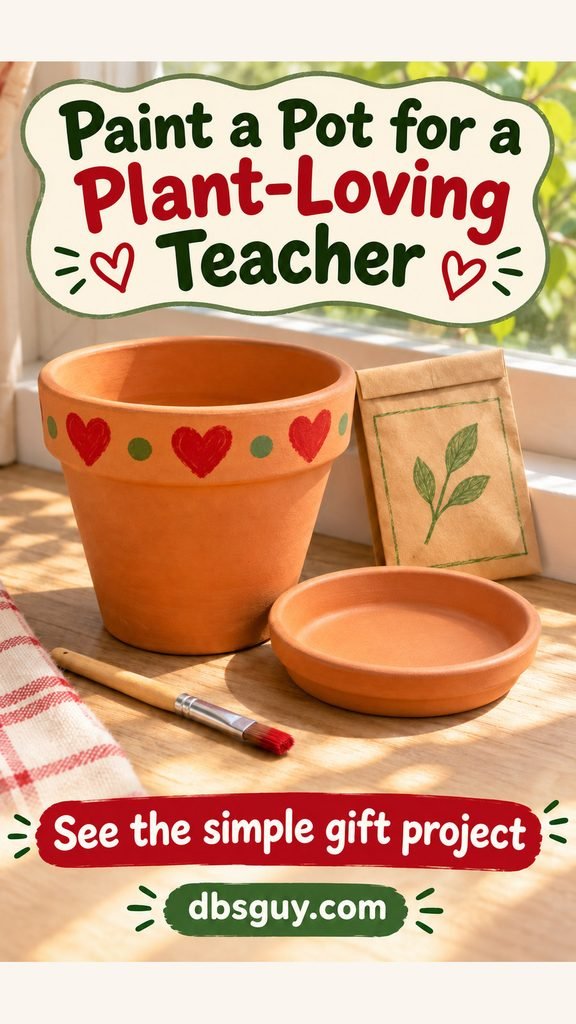
Gather: A small terracotta pot and saucer, child-appropriate paint labeled for terracotta, a brush, and an optional seed packet.
- Prepare the pot according to the paint directions and let it dry. Have your child paint a simple border on the exterior, such as red hearts with green dots.
- Keep the drainage hole open and leave the interior unpainted. Allow the finish to dry and cure for the full time on the label.
- Pack the pot and saucer with paper cushioning. Tuck the seed packet alongside, keeping all of its planting instructions intact.
Treat it as a decorative indoor outer pot unless the paint label supports another use. The recipient can lift out a separate nursery pot for watering. Skip this project if it would create an unwanted plant-care task.
13. Wrap a Cardboard Heart in Yarn
A yarn-wrapped heart is a small hanging keepsake for a teacher who likes student-made decorations. A short, broad heart is easier to wrap than a shape with a long pointed tip.
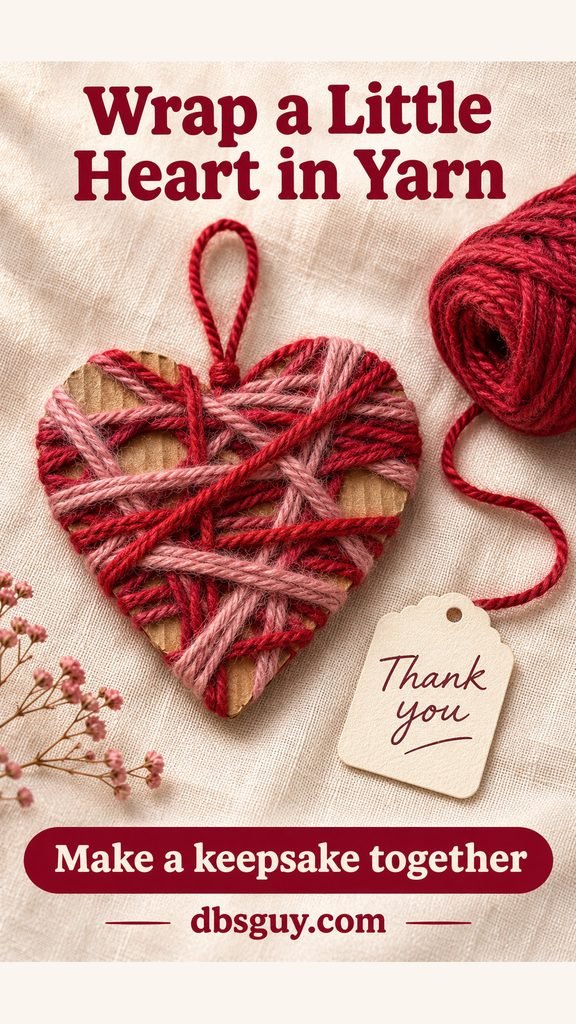
Gather: Sturdy scrap cardboard, yarn, scissors, and paper tape.
- Have an adult cut a heart about 4 inches wide. Tape the yarn end to the back.
- Let the child wrap yarn across the heart in changing directions. An adult can make a few shallow edge notches if the yarn keeps slipping.
- Tuck and tape the final end securely at the back. Add a short hanging loop only if you want one, and attach a signed paper tag.
Leave a little cardboard showing if covering the whole shape becomes frustrating. This is a decoration, so it does not need to withstand pulling or play.
14. Paint a Small Desk Name Sign
A name sign suits a teacher who enjoys personalized desk items. Check the exact spelling and preferred title before the child starts; keep the border quiet enough for the name to stay readable.
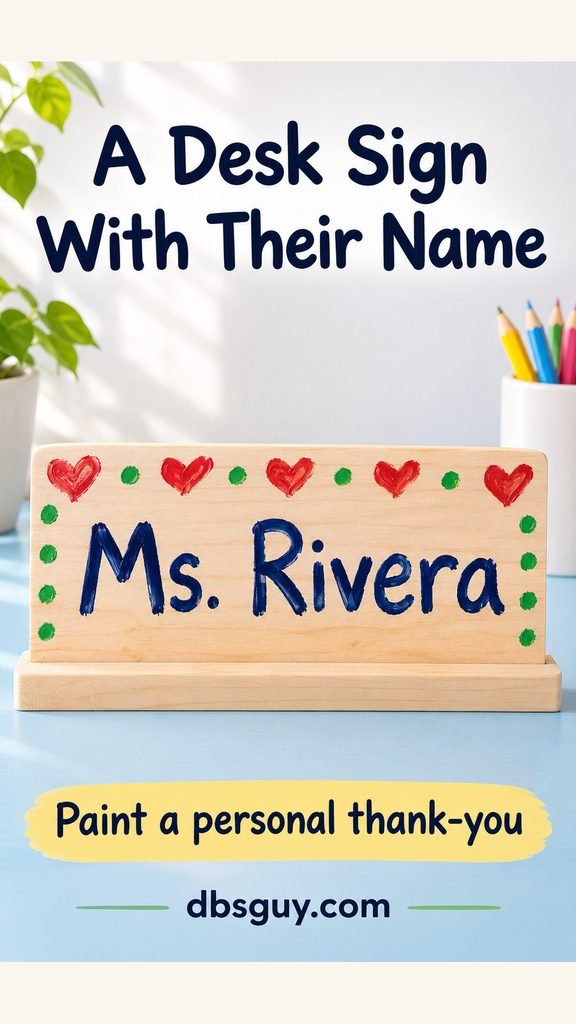
Gather: A smooth unfinished craft-wood plaque with a matching ready-made slotted stand, child-appropriate wood paint, a brush, and a suitable lettering marker.
- Choose a plaque already sized and finished for crafting so you do not need to saw or sand it with the child. Check that it fits its stand.
- Let your child paint a thin heart or dot border, leaving a broad plain center and the slot-fitting edge clear.
- Once dry, help them add the teacher’s name. Follow the paint and marker directions for curing, then place the plaque in its stand.
An adult can handle the lettering while the child creates the border. If you are unsure whether the teacher wants desk decor, choose a bookmark or card instead.
15. Turn a Plain Folder Into an Art-Covered File
A manila folder gives a child plenty of drawing space without needing specialist materials. It is a practical option when you want a completely dry craft to finish in one sitting.
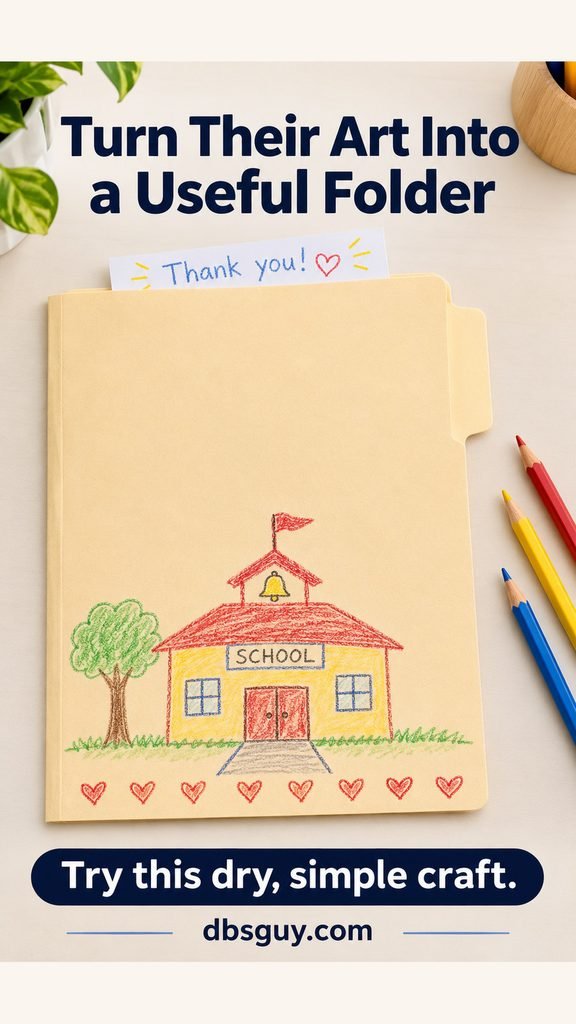
Gather: One letter-size manila file folder, crayons or colored pencils, and a scrap sheet for practice.
- Decide which face will be the front when the folder opens. Keep its tab blank so the teacher can label it.
- Let your child draw a border or a picture in the lower half, such as a schoolhouse, a stack of books, or a line of hearts.
- Keep the fold and inside plain. Write a short thank-you on a separate slip and tuck it inside so the folder can be used for any subject.
Avoid raised decorations that catch on other files. If the drawing runs off the edge, keep it; there is no need to remake a usable folder for a tidier finish.
Finish With a Note That Sounds Like Your Child
Ask, “What does your teacher do that helps you?” Then use the answer. “Thank you for showing me how to start when I get stuck” is specific enough on its own. Let a younger child draw the moment while you write their words underneath.
For more card layouts, see 21 Valentine Card Ideas That Make a Simple Message Feel Personal. Keep the wording appropriate to a teacher: a classroom memory, a thank-you, and the child’s name are plenty.
Pack It So It Arrives in One Piece
Wait for paint and glue to finish drying or curing before wrapping. Slide flat paper gifts into a folder or envelope. Cushion a pot and saucer separately; give paper flowers a cardboard backing. Put the teacher’s name on the outside so a busy morning handoff stays simple.
If your child has several teachers, repeat one manageable project with a different note for each person. There is no need to make all 15, add a purchased gift, or coordinate a class collection.
Questions About Homemade Teacher Valentines
What can a preschooler help make?
The torn-paper card, pencil-cup sleeve, and illustrated folder offer straightforward jobs such as tearing, coloring, and pressing paper into place. Prepare the pieces and offer one task at a time. Choose the project around what the child can handle comfortably.
What is a good last-minute option?
Choose a crayon card, colored-pencil stationery, or the decorated folder if you already have the supplies. They avoid paint-curing time. Do not rush a glued felt sleeve or painted pot just to finish before school.
Does the gift need candy or a gift card?
No. Each project can be given on its own. If you want to add something purchased, first check the school’s policy and any stated teacher preferences. A thoughtful note does not need a minimum spending amount.
Should I correct my child’s handwriting?
Help with the teacher’s name and anything the child asks you to check. For a hard-to-read message, write a small transcription below it or on the back while preserving the original. Let the child decide which drawing to give.